
Why You’ll Love This Orange Creamsicle Cheesecake
Are you craving something that combines the creamy richness of cheesecake with the zesty, refreshing flavor of a summer treat? Look no further! This Orange Creamsicle Cheesecake is the dessert you’ve been dreaming of. Imagine a velvety cheesecake filling infused with fresh orange zest and a tangy citrus glaze that transports you to a warm, sunny day. It’s the perfect balance of sweetness, creaminess, and citrusy freshness that will wow your taste buds.
Whether you’re baking for a special occasion or just treating yourself to a homemade indulgence, this Orange Creamsicle Cheesecake is sure to impress. The blend of tangy orange and creamy cheesecake is reminiscent of the classic creamsicle ice cream, but in a much more sophisticated, decadent form. And don’t worry—it’s easier to make than it sounds!
Throughout this article, I’ll walk you through everything you need to know: from the perfect crust, to the ideal filling, and even troubleshooting tips to ensure your cheesecake comes out perfect every time. By the end, you’ll have a stunning dessert ready to shine at your next dinner party, or perhaps just as a sweet treat for yourself.
So, grab your apron and get ready to bake your way to cheesecake perfection with this delicious Orange Creamsicle Cheesecake. Trust me—your taste buds will thank you! Let’s dive into the details and make this delightful dessert together.
How to Make a Delicious Orange Creamsicle Cheesecake
How to Make a Delicious Orange Creamsicle Cheesecake
Ingredients
Instructions
Notes
- Author: laura
2. What is Orange Creamsicle Cheesecake?
An Orange Creamsicle Cheesecake is a delightful twist on the classic cheesecake, infusing it with the bright, zesty flavor of fresh oranges and the creamy, smooth texture of a traditional cheesecake. It’s a dessert that combines the richness of cream cheese with the refreshing citrus notes of orange, creating a harmonious balance between sweetness and tartness.
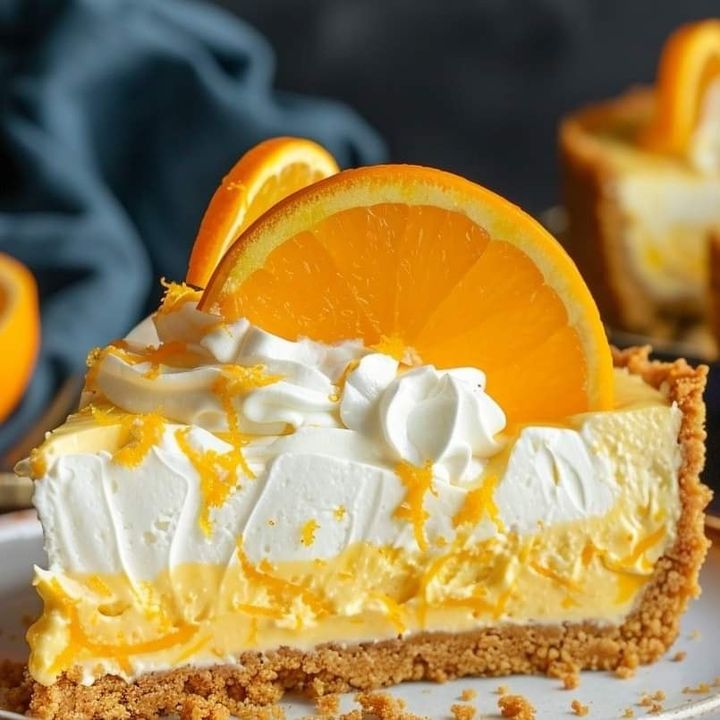
This cheesecake is inspired by the nostalgic creamsicle ice cream, which is typically made of vanilla ice cream with a burst of orange flavor. Imagine that same vibrant citrus tang, but in a creamy cheesecake form! The filling is usually made with cream cheese, sour cream, heavy cream, and eggs, along with the fresh zest and juice of oranges. It’s set on a graham cracker crust and often topped with an orange glaze or fresh orange slices for that extra pop of color and flavor.
Unlike some cheesecakes that are overly dense or rich, the Orange Creamsicle Cheesecake strikes a perfect balance. The citrus flavors cut through the creaminess, making it feel lighter and more refreshing—ideal for summer gatherings, holiday dinners, or any time you want a dessert that feels both indulgent and fresh.
3. Ingredients for the Perfect Orange Creamsicle Cheesecake
To make the best Orange Creamsicle Cheesecake, you’ll need a few key ingredients that come together to create that smooth, creamy, and citrus-packed flavor. Don’t worry; these are easy to find and make this dessert simple to put together. Here’s what you’ll need:
3.1 Ingredients for the Crust
A solid crust is essential to the overall texture and structure of your cheesecake. For this Orange Creamsicle Cheesecake, you’ll want a buttery, crisp graham cracker crust that complements the tangy filling.
- Graham crackers: You’ll need about 1 ½ cups of crushed graham crackers. These provide a slightly sweet, slightly savory base for your cheesecake.
- Butter: Melted butter is essential for binding the crumbs together. Use unsalted butter for the best control over the flavor.
- Sugar: A couple of tablespoons of sugar will enhance the sweetness of the crust.
Simply mix the crumbs, butter, and sugar, then press the mixture into the bottom of a springform pan. Bake it for 10 minutes to set the crust before you add your creamy filling.
3.2 Ingredients for the Cheesecake Filling
Now, for the star of the show—the Orange Creamsicle filling. This is where you’ll get that signature orange flavor combined with the silky creaminess that makes cheesecake so irresistible.
- Cream cheese: Use 3 blocks (8 oz each) of full-fat cream cheese. It’s essential to have it at room temperature for a smooth, lump-free filling.
- Sour cream: Adds a tangy richness that balances the sweetness of the orange.
- Heavy cream: For that smooth, velvety texture.
- Sugar: Granulated sugar sweetens the filling just enough.
- Orange zest and juice: Freshly grated zest and freshly squeezed juice of 2 large oranges are the secret to the bright, citrusy flavor.
- Eggs: To set the filling and give it that classic cheesecake texture.
4. How to Make Orange Creamsicle Cheesecake
Now that we’ve gathered all the necessary ingredients, it’s time to get down to the fun part: making the Orange Creamsicle Cheesecake! This process is a bit involved, but don’t worry—it’s totally worth it. With a little patience and attention to detail, you’ll have a perfectly creamy and citrusy cheesecake that will wow your friends and family.
4.1 Preparing the Crust
First things first: the crust. This simple step lays the foundation for your cheesecake and adds a buttery crunch to balance the smooth filling.
- Preheat your oven to 325°F (163°C). Grease a 9-inch springform pan with a bit of butter to ensure the cheesecake comes out easily.
- Crush the graham crackers: If you have a food processor, this is the easiest way to crush the crackers. If not, place them in a zip-lock bag and crush them with a rolling pin until you have fine crumbs.
- Mix the crumbs, sugar, and melted butter in a bowl until the mixture resembles wet sand. Press the mixture into the bottom of your springform pan, making sure it’s compact and even.
- Bake the crust in the preheated oven for 10 minutes. This will help it set and firm up before you add the cheesecake filling. Once done, remove it from the oven and let it cool while you prepare the filling.
4.2 Making the Orange Creamsicle Filling
Now, let’s move on to the best part—the filling. This Orange Creamsicle Cheesecake filling is creamy, tangy, and bursting with fresh orange flavor. Here’s how to get it just right:
- Beat the cream cheese: In a large mixing bowl, beat the cream cheese with an electric mixer on medium speed until it’s smooth and creamy. You want to avoid any lumps, so make sure your cream cheese is softened to room temperature.
- Add the sugar and sour cream: Gradually add the granulated sugar and sour cream, and continue beating until everything is well combined.
- Incorporate the eggs: Add the eggs one at a time, beating well after each addition. Make sure not to overmix at this point; just mix until combined. Overmixing can lead to cracks in your cheesecake later.
- Add the orange zest and juice: Stir in the freshly grated orange zest and the juice of 2 large oranges. This is what gives the cheesecake its vibrant, citrusy kick! The fresh zest will also add a wonderful fragrance to the filling.
- Add the heavy cream: Finally, pour in the heavy cream and mix until smooth. The heavy cream will give your filling that extra velvety, luxurious texture.
- Pour the filling onto the cooled crust: Once everything is well mixed, pour the cheesecake batter over the prepared graham cracker crust, smoothing the top with a spatula.
4.3 Baking and Cooling the Cheesecake
Here’s where the magic happens. Baking the cheesecake is a delicate process, and getting it just right ensures a smooth, creamy texture with no cracks.
- Prepare a water bath: To avoid cracks and ensure even baking, place the cheesecake pan inside a larger roasting pan. Fill the roasting pan with hot water, about halfway up the sides of the springform pan. This will help the cheesecake bake slowly and evenly.
- Bake the cheesecake: Place the cheesecake in the oven and bake for about 50-60 minutes. The cheesecake is done when the edges are set, but the center is still slightly jiggly. It will firm up as it cools.
- Cool the cheesecake: Turn off the oven, crack the door, and let the cheesecake cool for about an hour. This gradual cooling helps prevent cracking. After an hour, remove it from the water bath and refrigerate the cheesecake for at least 4 hours, preferably overnight.
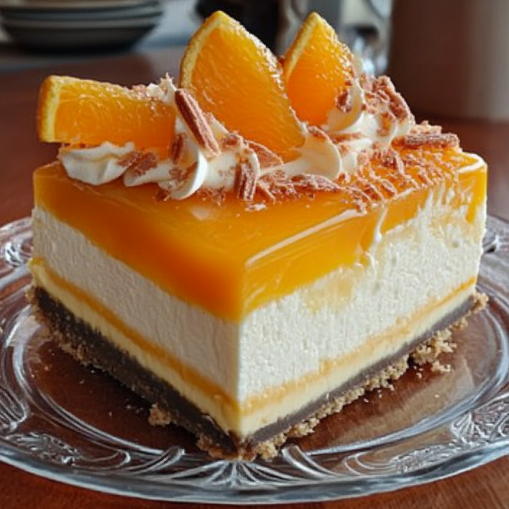
4.4 Adding the Orange Topping or Glaze
Once your cheesecake is completely chilled and firm, it’s time to add a little extra flair! A simple orange glaze or topping can elevate the dessert.
- Orange glaze: In a small saucepan, combine ½ cup of fresh orange juice with 2 tablespoons of sugar. Heat it over medium heat, stirring occasionally until the sugar dissolves. Let it simmer for about 5-7 minutes, or until it thickens slightly.
- Drizzle over the cheesecake: Once your glaze has cooled, pour it over the top of your cheesecake for a glossy finish. If you like, garnish with a few fresh orange slices or additional zest for that extra citrus pop.
5. Tips for a Perfect Orange Creamsicle Cheesecake
Making a perfect Orange Creamsicle Cheesecake might seem like a challenge, but with a few key tips, you can ensure your cheesecake turns out just right every time. Here’s what you need to know:
5.1 Using Room Temperature Ingredients
One of the most important steps in making a smooth, creamy cheesecake is to use room temperature ingredients. Make sure your cream cheese, sour cream, and eggs have been sitting out for at least 30 minutes before you start mixing. This helps them combine more evenly and reduces the risk of lumps in your filling. Cold ingredients don’t mix well, so make sure they’re soft and at room temperature for the best texture.
5.2 Using a Water Bath
A water bath is a game-changer for making cheesecake. This technique ensures that the cheesecake bakes evenly, preventing cracks and giving it a smooth, velvety texture. To create a water bath, wrap your springform pan in aluminum foil to prevent water from leaking in, and place it in a larger pan filled with hot water. The water creates a gentle, moist environment that helps the cheesecake cook slowly and evenly, which is crucial for a flawless dessert.
5.3 Don’t Overmix the Filling
While it’s tempting to beat the filling until it’s perfectly smooth, overmixing can lead to cracks in your cheesecake. Mixing the batter too vigorously incorporates air, which expands during baking and can cause your cheesecake to crack as it cools. When adding the eggs and mixing the filling, beat just until incorporated. You don’t need to overwork the mixture—this helps avoid air bubbles, ensuring a smooth, dense, and creamy texture.
By following these tips, you’ll get that picture-perfect Orange Creamsicle Cheesecake every time. In the next section, let’s troubleshoot some common cheesecake issues and how to fix them, so your dessert comes out flawless!
6. Troubleshooting Common Orange Creamsicle Cheesecake Issues Even with the best recipe, things can sometimes go wrong. But don’t worry—whether it’s cracks, soggy crusts, or a not-so-perfect texture, we’ve got you covered. Here are some common issues you might encounter when making an Orange Creamsicle Cheesecake, along with tips to fix them:
6.1 Cracks in the Cheesecake
Cracks in the cheesecake can be disappointing, but they’re not the end of the world! They’re usually caused by one of two factors: overmixing or rapid temperature changes. To avoid cracks:
- Don’t overmix the batter, especially after adding the eggs. Mix just until combined.
- Use a water bath: This is essential for keeping the baking environment humid, which helps the cheesecake bake evenly and slowly, reducing the chances of cracking.
- Cool slowly: Don’t rush the cooling process! Let the cheesecake cool gradually in the oven with the door cracked open before transferring it to the fridge.
6.2 Soggy Crust
A soggy crust can be a result of too much moisture seeping into the crust or from not baking the crust long enough. To prevent this:
- Bake the crust: Always pre-bake your crust for about 10 minutes to set it before adding the filling. This creates a barrier that keeps it from becoming soggy.
- Use aluminum foil: If using a water bath, wrap the bottom of the springform pan with aluminum foil to prevent water from leaking into the pan and making the crust soggy.
6.3 Runny Cheesecake Filling
If your cheesecake filling turns out too runny or doesn’t set properly, it could be due to underbaking or incorrect ratios in the ingredients.
- Check baking time: Make sure to bake the cheesecake long enough until the edges are set and the center is slightly jiggly. Don’t be afraid if the center still moves a bit—it will set as it cools. You should also use the “toothpick test” (gently insert a toothpick in the center—it should come out clean but with a slight moist residue).
- Use the right amount of eggs: Eggs are crucial for setting the filling. If you leave them out or use too few, the filling will not firm up properly. Make sure you’re using the right amount (2-3 large eggs).
With these tips, you’ll be able to troubleshoot any issues and get your Orange Creamsicle Cheesecake looking as perfect as it tastes. Now, let’s look at the best ways to store and serve your cheesecake in the next section!
7. Storing and Serving Your Orange Creamsicle Cheesecake
Now that you’ve created your beautiful Orange Creamsicle Cheesecake, it’s time to think about how to store and serve it. Whether you’re preparing it ahead of time or serving it right away, following these tips will ensure it stays fresh and delicious.
7.1 Storing the Cheesecake
The beauty of cheesecake is that it keeps well for several days, making it a great make-ahead dessert. Here’s how to store your Orange Creamsicle Cheesecake:
- Refrigerate: Cheesecake needs to be refrigerated for proper storage. After the cheesecake has cooled completely in the fridge, cover it loosely with plastic wrap or aluminum foil. You can also use a cake dome if you have one. This prevents the cheesecake from absorbing any unwanted odors from the fridge and helps it maintain its freshness.
- How long can you store it?: A cheesecake can last up to 5-7 days in the refrigerator. After that, the texture and flavor may begin to degrade. Be sure to finish it within a week for the best experience.
- Freezing: If you want to make the cheesecake in advance, you can freeze it! Once it has chilled and set in the fridge, cover it tightly in plastic wrap, then aluminum foil, and place it in the freezer. It can be stored for up to 1-2 months. To thaw, simply move it to the fridge overnight.
7.2 Serving Your Cheesecake
When it’s time to serve your Orange Creamsicle Cheesecake, presentation is key! Here’s how to make it shine:
- Slice carefully: Use a sharp, serrated knife to slice your cheesecake. For clean cuts, dip the knife in warm water before slicing each piece. Wipe it clean between cuts for a smooth finish.
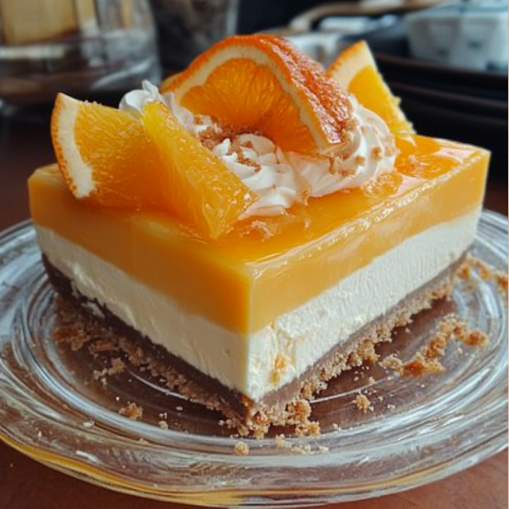
- Garnish: You can elevate your cheesecake with simple garnishes like:
- Orange slices or segments for a fresh, juicy contrast.
- Orange zest for a pop of color and extra citrus fragrance.
- A drizzle of homemade orange glaze (as we mentioned in Part 4) for added sweetness and shine.
- Pair with beverages: This cheesecake pairs wonderfully with a refreshing drink like iced tea, sparkling water, or even a light white wine. The citrus flavor and creamy texture complement these beverages beautifully.
Now that you know how to store and serve your Orange Creamsicle Cheesecake, you’re all set to enjoy it at any time, whether it’s a special occasion or just a sweet treat after a busy week.
8. Frequently Asked Questions About Orange Creamsicle Cheesecake
Making a Orange Creamsicle Cheesecake can feel a little daunting, especially if you’re new to cheesecake baking. But don’t worry—lots of people have the same questions. Let’s go over some of the most common FAQs to help you make the best cheesecake every time.
8.1 Can I use a different type of crust?
Yes, you can absolutely switch up the crust! While graham crackers are the classic choice for cheesecakes, you can experiment with different types. Here are a few options:
- Digestive biscuits: These are slightly more buttery and less sweet than graham crackers, offering a rich base.
- Oreo cookies: For a chocolatey twist, you can substitute the graham crackers with crushed Oreo cookies. The dark chocolate pairs wonderfully with the bright orange flavor.
- Almond flour or gluten-free cookies: If you’re looking for a gluten-free version, almond flour or gluten-free cookies work well as a base.
Feel free to get creative with your crust, but keep in mind that the texture and flavor may change slightly.
8.2 Can I make this cheesecake ahead of time?
Yes, you can! In fact, cheesecake tastes even better after it’s had some time to rest and chill. Making it a day or two in advance is a great way to ensure all the flavors have melded together. In fact, letting it rest in the fridge for at least 4 hours (ideally overnight) is crucial for setting the texture.
Once chilled, store your cheesecake properly in the fridge (covered loosely with plastic wrap or in an airtight container), and it will stay fresh for up to 5-7 days.
8.3 How do I prevent my cheesecake from cracking?
Cracks are a common issue when baking cheesecake, but they can usually be avoided with a few simple techniques:
- Use a water bath: As mentioned earlier, a water bath ensures that the cheesecake bakes evenly and at a steady temperature. This prevents the filling from overheating and cracking.
- Avoid overmixing: Overmixing the batter adds air, which can lead to cracks as the cheesecake cools. Mix just until combined, and avoid over-beating the eggs.
- Cool slowly: Don’t rush the cooling process. Let the cheesecake cool gradually in the oven with the door cracked for about an hour before transferring it to the fridge.
With these tricks, you’ll minimize the chances of cracks and achieve a smooth, creamy finish.
8.4 Can I freeze my Orange Creamsicle Cheesecake?
Absolutely! Freezing your Orange Creamsicle Cheesecake is a great option if you want to make it in advance or store leftovers. To freeze:
- Let the cheesecake cool completely in the fridge.
- Wrap it tightly in plastic wrap, followed by aluminum foil to prevent freezer burn.
- Freeze for up to 1-2 months.
When you’re ready to serve, thaw the cheesecake in the fridge overnight. For the best texture, avoid thawing it in the microwave or at room temperature, as this can affect the consistency of the filling.
By following these answers to common questions, you’ll feel confident in your cheesecake-making skills. In the next section, we’ll summarize everything you need to know to create your perfect Orange Creamsicle Cheesecake. Stay tuned!
Congratulations! You’re now armed with all the knowledge you need to make the perfect Orange Creamsicle Cheesecake. Whether you’re preparing this dessert for a special occasion or just indulging in a sweet treat, this cheesecake will undoubtedly impress everyone who tries it. The combination of creamy cheesecake with a zesty orange twist creates a flavor profile that’s both refreshing and indulgent—a true crowd-pleaser.
9.1 Why You Should Try This Cheesecake
This cheesecake isn’t just your standard dessert. The Orange Creamsicle Cheesecake brings the nostalgic flavors of a classic creamsicle into a rich, indulgent form. The silky smooth filling with hints of citrus zest and orange juice creates a dessert that’s both tangy and sweet, while the buttery graham cracker crust provides a perfect crunch. Plus, it’s surprisingly simple to make—perfect for both novice and experienced bakers alike.
9.2 A Recipe Worth Repeating
Once you’ve made this cheesecake, we’re pretty sure it’ll become one of your go-to recipes. Whether you’re serving it for a holiday dinner, birthday celebration, or just because you deserve something special, this cheesecake has it all. Remember, it’s easy to tweak—feel free to experiment with different crusts, toppings, or flavor variations. The orange flavor can even be swapped for lemon or lime if you want a citrusy twist. So go ahead, give it a try, and enjoy every creamy, zesty bite of this delicious Orange Creamsicle Cheesecake!
It looks like we’ve covered everything from start to finish! You’ve got the entire guide to making a perfect Orange Creamsicle Cheesecake, including all the tips, tricks, FAQs, and a few troubleshooting ideas. There’s nothing more to add for now, but if you have any more specific questions or need help with something else, feel free to ask!
Here’s a quick summary of what you’ve learned:
- Ingredients & Preparation: A simple yet indulgent combination of cream cheese, fresh oranges, and a buttery graham cracker crust.
- Step-by-Step Process: How to bake, cool, and store your cheesecake to ensure it’s smooth, creamy, and crack-free.
- Tips & Troubleshooting: How to prevent common issues like cracks or a soggy crust.
- Serving & Storing: How to store your cheesecake and ideas for serving it at its best.
- FAQs: Answers to your most common cheesecake questions.
Ready to bake? Your Orange Creamsicle Cheesecake awaits!
Good luck with your cheesecake creation, and enjoy every delicious bite! 🍊🍰