
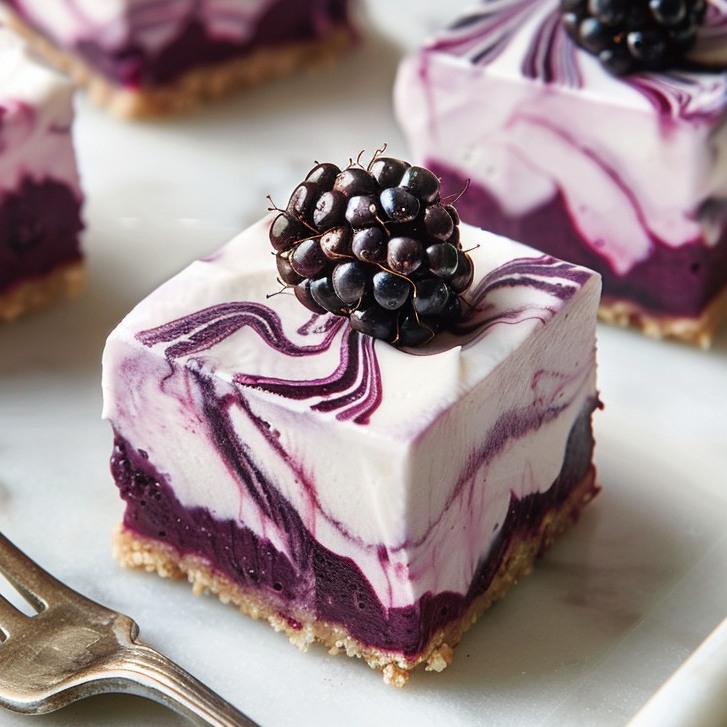
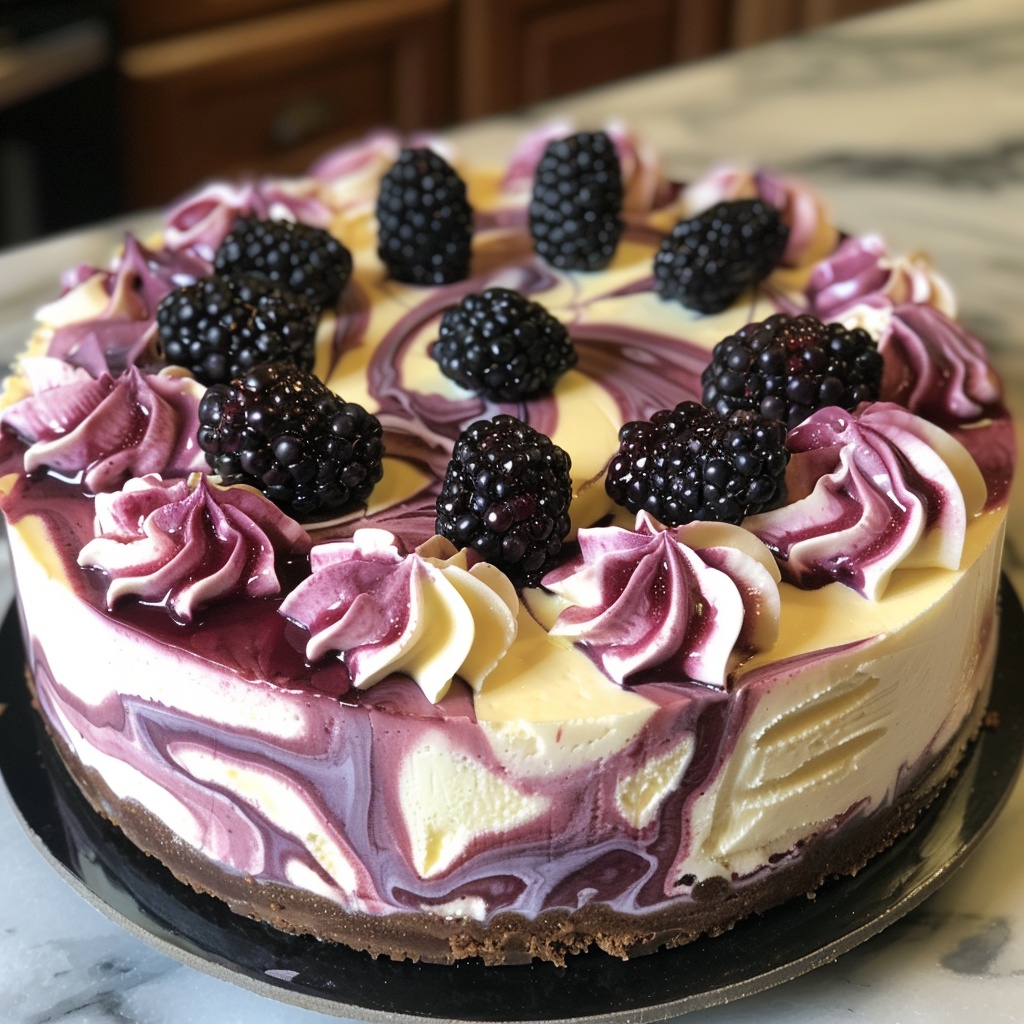
No-Bake Marbled Blackberry Cheesecake
Intro & Hook
Why you’ll love it
Craving a fancy dessert with almost no effort? This No-Bake Marbled Blackberry Cheesecake checks every box. It’s lush, silky, and stunning to serve. Because there’s no oven, you’ll skip cracks, guesswork, and stress. Instead, you’ll whisk, swirl, chill, and slice. The filling is whipped-cream stabilized for a soft, cloud-like bite. The swirl comes from a seedless blackberry sauce that’s bright, tangy, and deeply purple.
Plus, the process is simple. First, you build a graham cracker crust (or digestive, gingersnap, or Oreo—you pick). Then, you blend a smooth filling with cream cheese, powdered sugar, a kiss of lemon, and vanilla. After that, you’ll marble in the berry coulis using an easy dollop-and-drag or concentric-rings technique. Finally, you chill until sliceable. While it rests, the flavor blooms, the color deepens, and the texture turns dream-level creamy. So, you get bakery looks with weeknight effort—yes, really.
No-Bake Marbled Blackberry Cheesecake Delights!
No-Bake Marbled Blackberry Cheesecake Delights!
Ingredients
Instructions
- Author: laura
TL;DR (Quick wins)
-
No oven. Yet it’s rich, silky, and steady on the plate.
-
Seedless blackberry coulis keeps the marble crisp, vivid, and smooth.
-
Choose your stabilizer: whipped cream alone, or add gelatin for extra hold (see gelatin-to-sheet conversion).
-
Use an 8–9-inch springform pan and an acetate collar for sharp sides.
-
Chill long enough for clean slices. Overnight is best.
-
Swap the crust: graham, Oreo, or gingersnap. Go gluten-free if needed.
-
Try freeze-dried blackberry powder for a bold, stable color boost.
-
Garnish with fresh berries, micro-mint, and lemon zest for a photo-ready finish.
Next up: we’ll dive into the recipe overview and flavor focus, then move into ingredients, tools, and step-by-step methods.
Recipe Overview & Flavor Focus
What is a No-Bake “Marbled” Blackberry Cheesecake?
This dessert is a chilled, no-bake cheesecake with a dramatic blackberry marble. Instead of eggs and heat, the filling relies on whipped cream stabilization and sometimes a touch of gelatin or agar-agar. Because there’s no baking, the texture stays silky, light, and sliceable. The “marble” comes from a seedless blackberry coulis swirled through the creamy base. As you drag a skewer or toothpick, deep purple ribbons form elegant patterns. A classic graham cracker crust (or digestive, Oreo, or gingersnap) adds crunch and balance. Therefore, you get bright berry flavor, clean lines, and a glossy finish—without oven timing stress. Moreover, this format is make-ahead friendly, which means the flavors bloom as it chills, and the structure firms up for neat, café-worthy slices.
Seasonality & Fruit Options
Blackberries shine from late spring through summer, when fruit is sweet, juicy, and deeply colored. However, frozen berries work beautifully for coulis, bars, or minis. Thaw them in a shallow dish, then drain extra liquid for a bold, concentrated swirl. For year-round ease, you can also boost color with finely ground freeze-dried blackberry powder. Want a twist? Try a half-and-half swirl with raspberry or blueberry puree for layered hues. For smart prep and storage, learn the best ways to freeze and handle berries with this guide: how to freeze blackberries for sauces. That way, your marble stays vivid, your texture stays creamy, and your flavor stays bright.
Ingredient Breakdown (with Smart Substitutes)
Crust Options
A solid base makes the whole dessert sing. Choose one:
-
Graham cracker crust: classic, toasty, and balanced.
-
Digestive biscuit crust: lightly sweet, slightly wheaty.
-
Oreo crust: deep cocoa vibe and extra drama.
-
Gingersnap crust: warm spice that pops with blackberry coulis.
General formula:
-
2 cups fine crumbs
-
6–8 tablespoons melted butter
-
Pinch of salt
Tips
-
For gluten-free, use certified GF cookies.
-
Pack crumbs firmly, especially at the edges, for neat slices.
-
If your kitchen runs warm, chill the pressed crust 10–15 minutes before filling.
Freshness matters: keep cream cheese and dairy well-refrigerated. Check safe storage guidance here → cream cheese storage times.
Filling Base
This is the creamy heart of your cake. Use full-fat ingredients for best texture.
You’ll need
-
24 oz cream cheese, room temp
-
¾ cup powdered sugar (sifted)
-
1–2 teaspoons vanilla (paste or extract)
-
1 tablespoon lemon juice + ½ teaspoon lemon zest
-
1 cup heavy cream (35%), softly whipped
Why it works
-
Room-temp cream cheese beats smooth, so the filling stays silky.
-
Powdered sugar dissolves fast and keeps it plush.
-
Lemon brightens blackberry notes while balancing sweetness.
-
Softly whipped heavy cream adds body without heaviness.
Substitutes
-
Swap 4–8 oz mascarpone for part of the cream cheese for a luxe finish.
-
Fold in ½–1 cup Greek yogurt (full-fat) for a lighter tang; increase chill time.
-
Use vanilla bean paste for visible flecks and deeper aroma.
Stabilizer Paths
You can keep it set with whipped cream alone. Still, many bakers add a gentle stabilizer for ultra-clean slices.
-
Gelatin (powder): Bloom in cold water, melt gently, then temper into the batter.
-
Gelatin (sheets): Soak to soften, melt, then temper.
-
Agar-agar (vegetarian): Hydrate and simmer briefly; sets slightly firmer than gelatin.
Need exact swaps? See this practical reference → gelatin-to-sheet conversion.
Aim for a soft set. Too much gelling yields a bouncy texture, so measure carefully.
Blackberry Swirl
A crisp marble needs a concentrated, seedless swirl.
Seedless coulis
-
Simmer blackberries, sugar, and lemon.
-
Mash, then reduce until syrupy.
-
Strain out seeds. Cool fully.
Color boosters
-
A teaspoon or two of freeze-dried blackberry powder deepens color without thinning.
-
If using frozen berries, thaw and drain well so excess liquid doesn’t dilute the filling.
Flavor nudges
-
Add a whisper of vanilla or a pinch of salt to round the tang.
-
For balance, taste the coulis; it should be sweet-tart and vivid before marbling.
Tools & Equipment
What you’ll need
-
8–9 inch springform pan: releases clean sides without prying.
-
Acetate collar or parchment strip: keeps edges sharp and photo-ready.
-
Food processor or rolling pin: turns cookies into fine crumbs fast.
-
Mixing bowls (2–3): one for crust, one for filling, one for coulis.
-
Hand mixer or stand mixer: beats cream cheese smooth; whips heavy cream to soft peaks.
-
Fine-mesh sieve: strains seeds for a silky blackberry coulis.
-
Small saucepan: reduces fruit into a concentrated swirl.
-
Offset spatula: spreads crust and filling evenly.
-
Toothpick or skewer: draws the marble patterns.
-
Rubber spatula: folds without deflating.
-
Digital scale (optional): ensures consistent crumb-to-butter ratio.
-
Plastic wrap or lid: covers the pan while chilling.
Quick tips
Chill the empty pan for 5 minutes before packing the crust. Line the bottom with parchment for easy lift-off. And, because neat edges matter, wipe your knife between slices for that clean, café-style finish.
Ingredients for the swirl
-
2 cups (300 g) blackberries, fresh or frozen
-
⅓ cup (65–70 g) sugar
-
1 tbsp lemon juice
-
Pinch of salt
-
Optional: 1–2 tsp freeze-dried blackberry powder for bold color
Step-by-step (thick, glossy, pourable)
-
Combine. Add blackberries, sugar, lemon juice, and salt to a small saucepan.
-
Simmer low. Stir as it bubbles gently. Break berries with a spoon. Keep heat modest to avoid scorching.
-
Reduce. Cook 6–10 minutes until thick, shiny, and syrupy. The spoon should leave a brief trail.
-
Strain. Pass through a fine-mesh sieve. Press firmly to remove pulp; discard seeds.
-
Cool fully. Spread on a plate so it cools fast. Warm coulis thins the filling, so be patient.
-
Boost color (optional). Whisk in a pinch of freeze-dried blackberry powder. It deepens hue without adding liquid.
-
Check texture. Aim for ribbon-like flow that sits on the filling, not a runny sauce. If too thin, return to the pan and reduce 1–2 minutes more. If too thick, whisk in ½–1 tsp water.
Pro tips for fresh vs. frozen
-
Using frozen fruit? Thaw in a shallow dish and drain well. Extra liquid dulls color and weakens the marble.
-
Taste for balance. The coulis should be sweet-tart and concentrated; bright flavor reads as “fresh” even off-season.
-
Store, covered, in the fridge while you prep the filling. Cold, seedless coulis gives sharp lines and a clean, photo-ready swirl.
Whipped-Cream–Stabilized Filling
This creamy base is light, smooth, and steady—without baking.
-
Beat the base. In a large bowl, beat room-temp cream cheese until glossy and lump-free. Scrape the bowl.
-
Sweeten and brighten. Add powdered sugar, vanilla, and a touch of lemon juice plus zest. Mix until velvety.
-
Whip the cream. In a cold bowl, whip heavy cream to soft peaks. It should curl and barely hold. Over-whipping causes a grainy bite.
-
Fold for air. With a rubber spatula, fold the cream into the cheese in three additions. Use wide, slow strokes. Therefore, you keep volume while avoiding streaks.
-
Check texture. The batter should flow in ribbons, not runny and not stiff. If it looks loose, chill 5–10 minutes; the fat firms and the mix thickens slightly.
Why this works
-
Softened cream cheese blends cleanly, so the filling stays silky.
-
Powdered sugar dissolves fast and keeps the mouthfeel plush.
-
Gentle folding preserves air, which makes each slice feel cloud-light yet still sliceable.
Gelatin Route (Extra Hold)
-
Bloom. Sprinkle powdered gelatin over cold water; wait 5 minutes.
-
Melt. Warm the bloomed gel just until clear.
-
Temper. Whisk a few spoonfuls of cheesecake batter into the warm gel. Then stream that back into the bowl while mixing on low.
-
Finish. Fold once more to even it out. Because gelatin firms as it cools, work smoothly and avoid pauses.
Agar-Agar Route (Vegetarian)
-
Hydrate. Whisk agar-agar into cool water; let it sit 2 minutes.
-
Activate. Bring to a brief simmer for 1–2 minutes, whisking.
-
Incorporate. Cool for a minute, then temper into the batter as above. Agar sets a bit firmer than gelatin, so use a light hand.
Pro tips
Keep flavors balanced. If the filling tastes mildly sweet and bright before chilling, it will taste perfect after it sets inside your blackberry coulis marble.
Prep the base
Chill the pressed crust for 10–15 minutes. Then spread ⅔ of the filling into the pan. Smooth the top with an offset spatula. Tap the pan gently on the counter to release air pockets. Keep the remaining ⅓ filling and the blackberry coulis cold. Cold swirl equals sharp lines and bold color.
Method 1: Dollop & drag
Spoon teaspoon-size dots of blackberry coulis over the surface, spacing them like a checkerboard. Add small dollops of the remaining filling between the berry spots. With a toothpick or skewer, draw lazy S-curves from left to right. Then switch directions and glide front to back. Wipe the tip if it gets coated. Stop as soon as you see clean ribbons. Because over-swirl turns marble into mud, less is more.
Method 2: Concentric rings
Spread a very thin veil of the remaining filling across the surface. Pipe or spoon a small circle of coulis in the center. Add larger rings around it, working outward. Starting at the center, pull a skewer out to the edge every inch or so. Then pull the next line from the edge into the center. Alternate in and out to create a starburst with feathered lines. It looks fancy, but it’s quick.
Clean patterns, every time
-
Seedless, well-reduced coulis sits on the filling and doesn’t bleed.
-
Keep your swirl tool shallow. Draw through the top ¼ inch, not deep into the crust.
-
If a line breaks, add a micro-dot of coulis and connect it with one gentle pass.
-
See a bubble? Pop it with the skewer tip, then nudge the line closed.
Finish the top
When the marble looks balanced, stop. Give one tiny tap to settle peaks. Cover the pan so condensation won’t drip on the pattern. You’re ready to chill.
 Assemble & Chill
 Set the pan for a clean finish
Tap the pan once or twice to release tiny bubbles. Smooth any peaks with an offset spatula. Check the edges; the acetate collar should sit flush with the filling. Wipe the rim if needed.
Cover and chill—slow and steady
Cover the pan to block fridge odors and moisture. Then chill on a level shelf. Plan 6–12 hours for a full set. Overnight gives the neatest, café-style slices. Avoid the freezer for setting. Rapid chilling can cause weeping, a dull surface, or uneven texture.
Unmold without drama
Run a thin knife around the edge only if you skipped the collar. Release the springform slowly. Peel away parchment from the base. Let the cheesecake stand 5–10 minutes before slicing; it softens slightly for a clean cut.
Slice like a pro
Use a long, sharp knife. Warm it in hot water, then dry well. Cut straight down. Wipe and rewarm between slices. Because the blackberry coulis is seedless and thick, the marble will stay crisp and glossy. Garnish just before serving so the top stays picture-perfect.
Make it look stunning
Small touches make this no-bake beauty pop. First, chill a platter so slices stay neat. Then lift the cheesecake and center it. For contrast, add a thin ribbon of blackberry coulis on the plate. It frames the marble and looks elegant.
Simple, high-impact garnishes
-
Fresh blackberries piled off-center for a modern look.
-
Micro-mint or tiny mint tips for a fresh, green lift.
-
Fine lemon zest curls to brighten the purple tones.
-
A light snow of powdered sugar sifted just before serving.
-
Optional chocolate curls for texture contrast.
Clean, café-style slices
Use a long, hot knife. Wipe between cuts. Cut straight down—no sawing. Because the coulis is seedless and concentrated, lines stay crisp. Serve chilled but not icy; 5–10 minutes at room temp softens the bite. For minis or bars, keep portions small. The filling is rich, so thinner slices feel luxe without heaviness.
Bars & minis
Want bite-size treats or easy slicing? Make cheesecake bars in a 9×13-inch pan. Line with parchment, leaving long “handles” for lift-out. Press the graham, Oreo, or gingersnap crust in a thin, even layer. Spread the filling, add the blackberry coulis, and marble lightly. Chill 4–6 hours, then cut with a hot knife.
For mini cheesecakes, use a muffin tin with paper liners. Press 1 tablespoon of crumbs per cup. Add filling, then swirl a ½ teaspoon of coulis on top. Because minis set faster, start checking at 3–4 hours.
Flavor twists
-
Blackberry–lemon: Add extra lemon zest to the filling and a squeeze more lemon juice to the coulis. Bright and zippy.
-
Vanilla bean: Use vanilla bean paste for specks and deeper aroma.
-
Mascarpone blend: Swap 4–8 oz of cream cheese with mascarpone for a plush, dessert-bar vibe.
-
Biscoff crust: Spiced, caramelly cookies pair beautifully with blackberry notes.
-
Blueberry or raspberry ribbon: Marble a second berry for two-tone swirls.
Dietary swaps
-
Gluten-free: Choose certified GF cookies. Keep the butter and salt the same; pack the crust well.
-
Vegetarian set: Use agar-agar instead of gelatin. Hydrate, simmer briefly, then temper into the batter. Expect a slightly firmer set.
-
Lighter option: Fold in ½–1 cup full-fat Greek yogurt and reduce powdered sugar slightly. Therefore, chill longer so it firms cleanly.
-
Dairy-free style (test-friendly): Use a thick plant-based cream cheese plus whipped coconut cream. Stabilize with a small amount of agar. Flavor stays berry-forward, though texture will be a bit different.
Texture tuning
If you like a softer bite, skip added stabilizers and lean on the whipped cream fold. For ultra-clean café slices, add a small, measured dose of gelatin or agar. Always keep the coulis thick and seedless so the marble looks sharp and the filling stays creamy.
Conclusion
You’ve got everything you need to pull off a bakery-worthy No-Bake Marbled Blackberry Cheesecake. The path is simple: whisk, swirl, and chill. Because the blackberry coulis is seedless and thick, the marble looks crisp. Since the filling is gently folded, the bite stays cloud-light. And, as it rests, flavor deepens while the set firms for clean, café-style slices.
For best results, remember this tiny checklist:
-
Crust: Pack firmly; chill before filling.
-
Filling: Use room-temp cream cheese; fold the whipped cream softly.
-
Stabilizer: Add measured gelatin or agar-agar only if you want extra-clean cuts.
-
Coulis: Reduce until glossy; cool fully to avoid streaks.
-
Marble: Dollop, drag a few lines, then stop—less is more.
-
Chill: Give it time. Overnight delivers the neatest slices.
Serve with fresh blackberries, a whisper of lemon zest, and a few mint tips. Or, go playful with minis and bars. Finally, store leftovers chilled and slice as you crave them. With smart steps and small touches, this creamy showstopper turns any day into a little celebration.