
Easter Cake Pops: The Perfect Sweet Treat for Your Holiday Celebration
If you’re looking for a fun and festive treat to celebrate the season, Easter cake pops are the perfect choice! These adorable, bite-sized desserts are not only easy to make, but also packed with delightful flavors. Whether you’re hosting an Easter gathering or just looking to bring a little extra sweetness to the holiday, Easter cake pops are a must-try dessert.
Easter Cake Pops Recipe – Easy, Fun & Festive Treats for the Season
- Total Time: 25 minute
Ingredients
Instructions
Notes
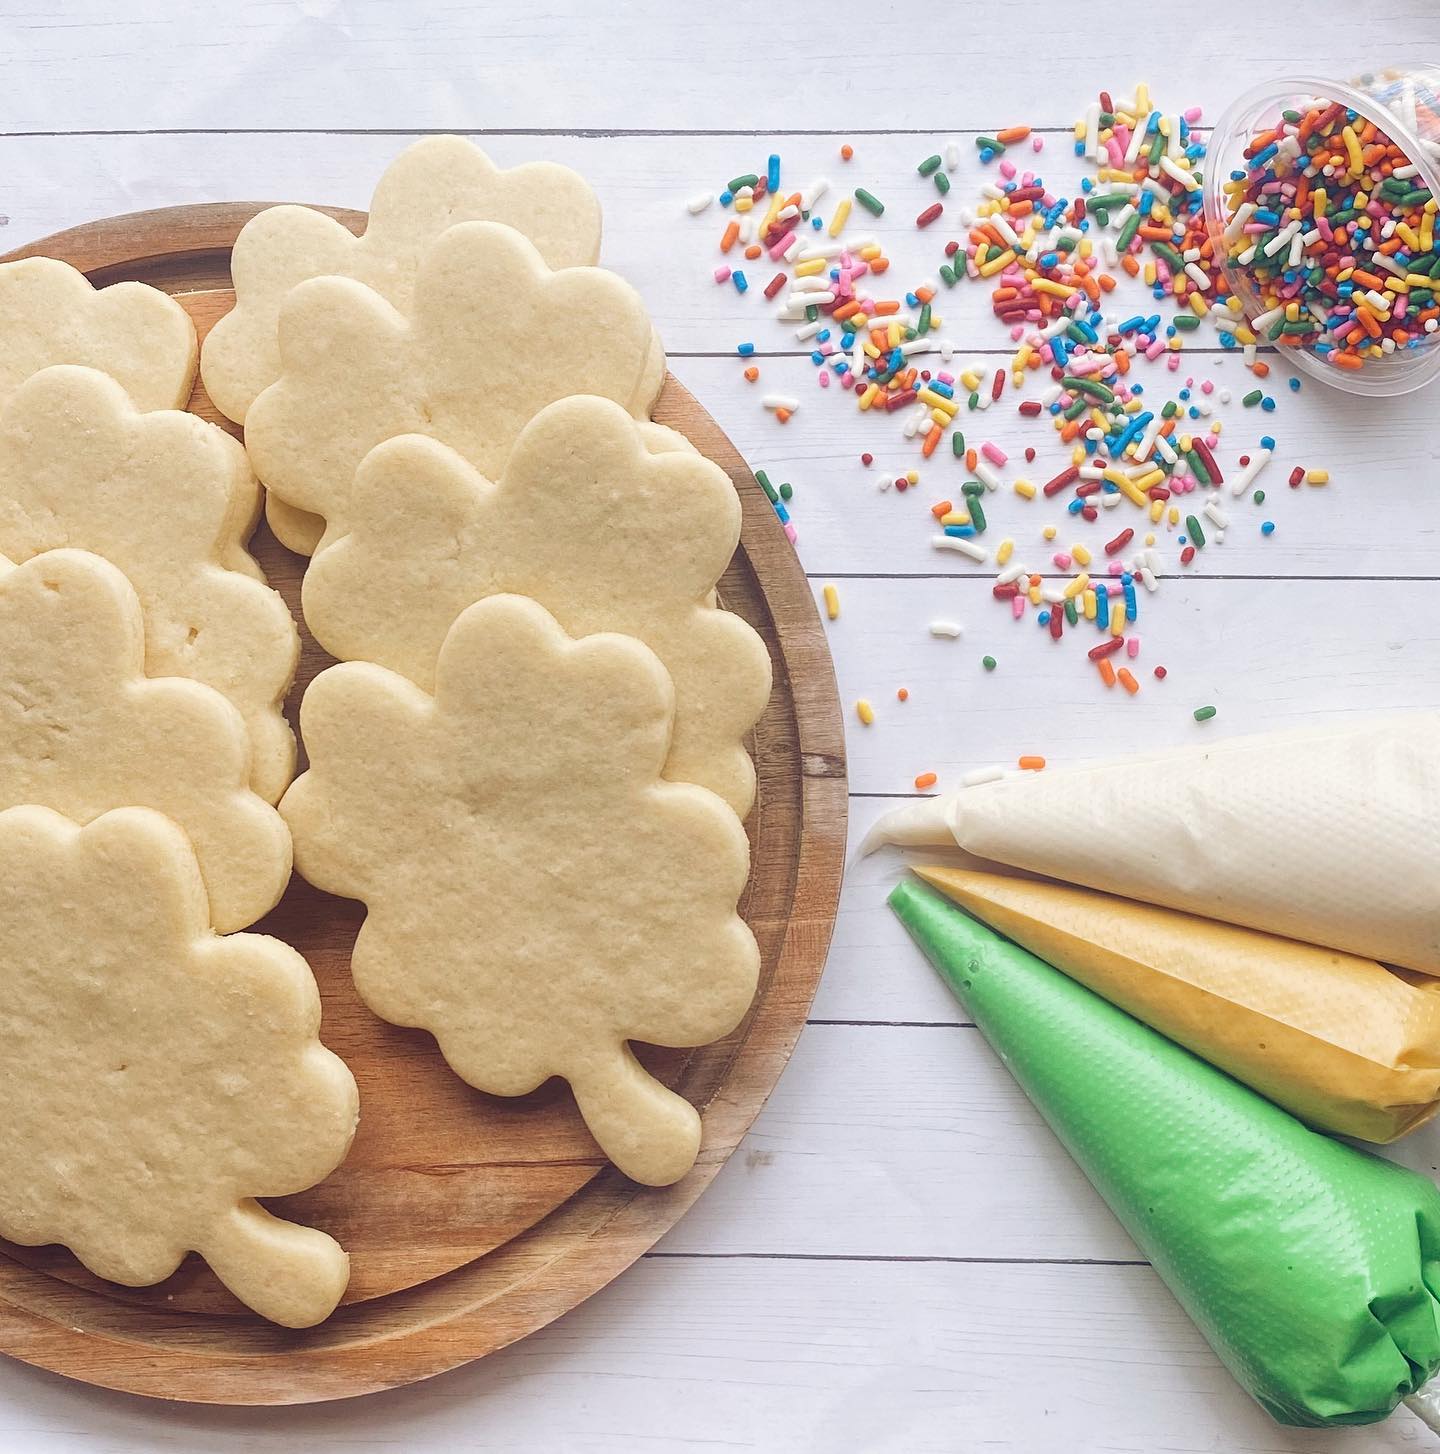
Sprinkle with sprinkles of your choice and allow to cool. Note: I recommend a cake pop holder to make this process easier. Enjoy!
- Author: laura
- Cook Time: 28-33
- Diet: Low Calorie
Part 1: Introduction to Easter Cake Pops
1.1 What Are Easter Cake Pops?
Easter cake pops are bite-sized confections that combine the best parts of cake and frosting into a single, easy-to-eat treat. Imagine a moist, flavorful cake crumb mixed with sweet frosting, all dipped in colorful candy melts or chocolate. They’re then shaped into either balls or oval (egg-like) shapes and decorated with vibrant sprinkles, edible glitter, or fun Easter-themed designs like bunnies and eggs.
These pops are not just a treat for the taste buds, but also a feast for the eyes. Their adorable designs make them perfect for any Easter gathering, adding that extra touch of sweetness to your celebrations.
1.2 Why Are They Popular During Easter?
What makes Easter cake pops so appealing during this festive time? Well, for starters, they’re incredibly versatile. You can customize the colors, flavors, and decorations to match any theme or occasion. But it’s not just about looks. These cake pops are easy to make and even easier to eat. Forget about cutting slices of cake and handing them out – simply pop one of these delightful treats into your mouth, and you’re ready to enjoy.
Another reason cake pops are so beloved at Easter is their portability. Unlike traditional cakes, they don’t require plates or forks, making them ideal for parties, picnics, or Easter egg hunts. Their bite-sized nature means you can indulge without feeling guilty – after all, it’s just a little piece of cake!
But what’s even better? Cake pops are a fun and creative way to get the whole family involved in the kitchen. Kids and adults alike will love shaping the pops, dipping them in colorful coatings, and watching their festive creations come to life.
In the following sections, we’ll break down all the essentials for making perfect Easter cake pops, from the ingredients and tools to tips on decorating and serving. Stay tuned for a step-by-step guide that will have you whipping up this delightful treat in no time!
Part 2: Ingredients and Tools You’ll Need
2.1 Essential Ingredients for Easter Cake Pops
Before you get started with your Easter cake pops, it’s important to gather all the necessary ingredients. The good news? You likely already have most of these items in your pantry or kitchen. Here’s what you’ll need:
-
Cake mix or homemade cake: You can use a store-bought cake mix for simplicity or bake your favorite homemade cake recipe. The flavor is up to you, but vanilla, chocolate, and carrot cake are especially popular choices for Easter.
-
Frosting: For the frosting, you’ll need a basic buttercream or cream cheese frosting. It acts as the “glue” that holds your cake crumbs together. You can make it yourself or use store-bought frosting for convenience.
-
Candy melts or chocolate: This will be used to coat your cake pops. You can find candy melts in a variety of pastel Easter colors, which will help give your pops that festive look. If you prefer chocolate, you can melt either white, milk, or dark chocolate as your coating.
-
Sprinkles and decorations: To give your pops the Easter touch, grab some colorful sprinkles, edible glitter, or Easter-themed decorations like bunny ears, mini candy eggs, or pastel-colored sugar.
-
Lollipop sticks or skewers: These are used to hold your cake pops and make them easy to dip. You can use cake pop sticks or skewers that you cut into smaller lengths.
2.2 Optional Ingredients and Flavor Variations
Feel free to get creative with your Easter cake pops and add some unique flavors or textures. Here are some optional ingredients you might want to experiment with:
-
Flavoring extracts: Add a splash of almond, lemon, or coconut extract to give your cake a unique flavor profile.
-
Fruit puree or jam: You can mix a fruit puree (like strawberry or raspberry) into your frosting for a burst of fresh flavor.
-
Crushed nuts or candy pieces: For added crunch, sprinkle crushed nuts (like almonds or pistachios) or crushed candy into your cake mixture before dipping.
2.3 Essential Tools for Making Cake Pops
Making Easter cake pops doesn’t require a lot of fancy equipment. However, a few tools will make the process easier and more efficient. Here’s a quick list:
-
Mixing bowls: You’ll need at least two bowls—one for the cake crumbs and another for mixing the frosting.
-
Stand mixer or hand mixer: If you’re making homemade cake, a mixer will save you time and effort. You can also use it to blend your frosting.
-
Cookie scoop or tablespoon: A cookie scoop helps portion out your cake mixture into uniform-sized balls, ensuring consistency in your cake pops.
-
Microwave-safe bowl or double boiler: This is for melting your candy melts or chocolate for dipping.
-
Styrofoam block or cake pop stand: Once your cake pops are dipped, you’ll need a place to allow them to set. A styrofoam block or cake pop stand works perfectly for this.
With all your ingredients and tools ready, you’re now prepared to move on to the fun part—making and decorating your Easter cake pops! But first, let’s dive into the step-by-step process in the next section.
Part 3: Step-by-Step Guide to Making Easter Cake Pops
3.1 Bake the Cake
The first step to making Easter cake pops is to bake the cake. If you’re using a cake mix, simply follow the instructions on the box. For a homemade cake, prepare your favorite recipe, whether it’s vanilla, chocolate, or another flavor. Here’s a quick guide:
-
Prepare your cake mix or batter: If using a store-bought cake mix, prepare the batter according to the package instructions. If making it from scratch, mix the ingredients until you have a smooth batter.
-
Bake the cake: Pour the batter into a greased baking pan and bake it at the recommended temperature, usually around 350°F (175°C). Once baked, let the cake cool completely before proceeding to the next step.
-
Pro tip: To make things even easier, you can bake your cake a day ahead of time and store it in the refrigerator overnight.
3.2 Crumble the Cake
Once your cake has cooled completely, it’s time to break it down. Use your hands or a fork to crumble the cake into fine crumbs. The goal is to have a consistent, crumbly texture without any large chunks. Here’s how you can do it:
-
Crumble the cake: Cut the cake into chunks, then gently break it apart with your fingers or a fork until it’s in small, fine crumbs.
-
Avoid over-crumbling: You want the crumbs to be uniform, but not powdery. A texture that’s too fine may make it difficult to form the cake balls.
3.3 Mix in the Frosting
Now that your cake is crumbled, it’s time to add the frosting. The frosting is what binds the crumbs together and gives your cake pops their moist texture. Here’s how to do it:
-
Add frosting: Start by adding a small amount of frosting (about 1/4 cup for every 2 cups of cake crumbs). Mix well until the crumbs are evenly coated and the texture is sticky but not too wet.
-
Test the consistency: Take a small amount of the mixture and roll it into a ball. If it holds its shape and doesn’t crumble apart, you’ve got the right consistency. If it’s too crumbly, add more frosting; if it’s too sticky, add more cake crumbs.
-
Pro tip: Don’t overdo it with the frosting. You want the mixture to hold together, but it shouldn’t be too soggy.
3.4 Shape the Cake Balls
Once the mixture is well combined, it’s time to shape the cake pops. Here’s how:
-
Scoop and roll: Use a cookie scoop or tablespoon to grab a portion of the cake mixture. Roll it between your palms to form a smooth, round ball. Aim for about 1-inch in diameter, but you can make them larger or smaller depending on your preference.
-
Tip for even sizing: If you’re aiming for uniform cake pops, measure each scoop so that all your cake balls are roughly the same size.
3.5 Insert the Lollipop Sticks
The next step is to add the lollipop sticks that will hold your cake pops together. Here’s how to do it:
-
Dip in chocolate: Before inserting the stick, dip the tip of the lollipop stick into the melted candy coating or chocolate. This helps the stick stay in place and prevents it from falling out of the cake ball.
-
Insert the stick: Gently insert the stick into the center of each cake ball. You don’t need to push it all the way through, just enough to hold the ball securely.
-
Chill: Once all the sticks are inserted, place the cake balls on a tray and chill them in the refrigerator for about 30 minutes. This step helps the cake pops firm up, making it easier to dip them in chocolate or candy melts.
 Part 4: Decorating Your Easter Cake Pops
4.1 Prepare the Coating
One of the most fun aspects of making Easter cake pops is the decorating! The coating is what gives them that vibrant Easter look. You can use chocolate, candy melts, or colored icing to create the perfect design for your cake pops. Here’s how you can prepare your coatings:
-
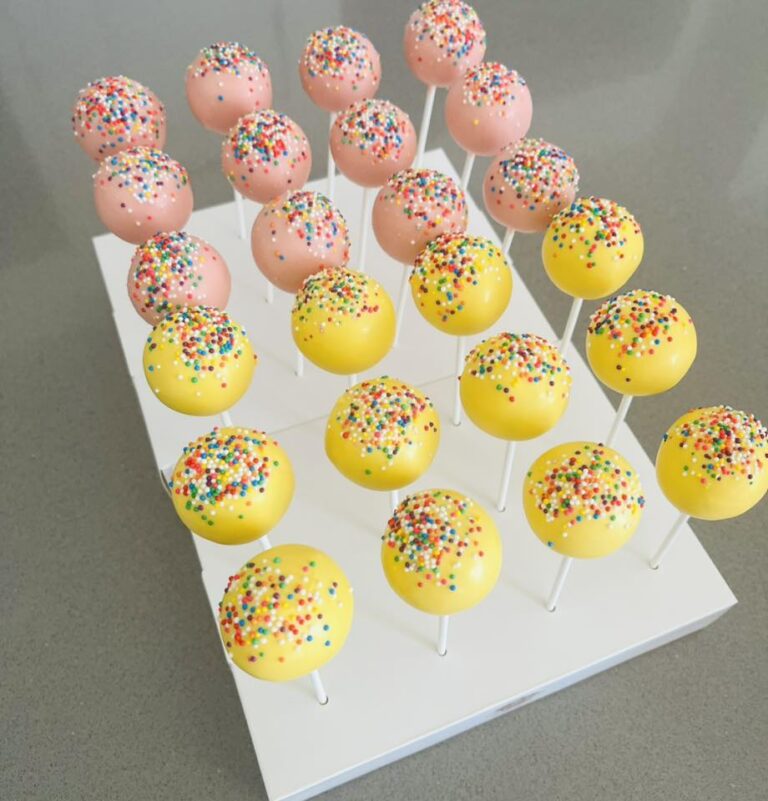
Choose your coating: You can opt for white, milk, or dark chocolate, or you can use candy melts, which come in a variety of colors. For Easter, pastel colors like pink, yellow, green, and blue are ideal.
-
Melt the coating: If you’re using chocolate, melt it slowly in the microwave or over a double boiler, stirring every 15 seconds to prevent it from burning. Candy melts can be melted similarly, but they tend to melt more smoothly and with less risk of seizing.
-
Consistency check: The coating should be thin enough to easily dip the cake pops into but not so runny that it drips off. If the coating is too thick, you can add a small amount of vegetable oil or shortening to thin it out.
4.2 Dip the Cake Pops
Now that your cake pops are chilled and the coating is ready, it’s time to dip. Here’s how to ensure smooth, even coverage:
-
Dip the cake pops: Hold the lollipop stick and dip the cake pop into the coating. Swirl it gently to coat it completely, making sure that the cake ball is fully covered.
-
Shake off excess: After dipping, gently tap the stick on the edge of the bowl to let any excess coating drip off. Be careful not to shake too hard, as this could cause the coating to drip or even crack.
-
Smooth out the coating: If necessary, use a spoon or spatula to smooth the coating and fill in any gaps.
4.3 Decorate with Sprinkles or Candy
Once the coating has set but is still soft, you can decorate your cake pops with festive Easter touches. This is where your creativity can shine! Here’s what you can do:
-
Sprinkles: Add colorful sprinkles for an extra fun touch. Use pastel-colored sprinkles, or go for Easter-themed ones like bunnies or eggs. To make sure they stick, sprinkle them on while the coating is still soft.
-
Easter-themed designs: You can also use small candy pieces or edible glitter to create Easter designs like flowers, bunnies, or eggs.
-
Drizzle with contrasting colors: For a more intricate look, melt some chocolate in a different color (like white chocolate on a pink base) and drizzle it over the dipped cake pops. This adds texture and a pop of color!
4.4 Let the Cake Pops Dry
Once decorated, it’s important to let your Easter cake pops dry fully before serving or storing them. Here’s how to do it:
-
Stand them upright: Place the cake pops in a foam block or styrofoam so they can dry standing up. This ensures the coating doesn’t get smudged and helps keep the lollipop sticks straight.
-
Drying time: Let the cake pops dry for at least 1 hour, or until the coating has hardened completely. You can speed up the process by placing them in the fridge for about 15 minutes after the initial drying period.
4.5 Add Final Touches
Once the cake pops are dry, give them a final touch-up for a polished look:
-
Touch up decorations: If any sprinkles or candy fell off during drying, you can quickly add more to make sure they’re fully decorated.
-
Add ribbons: For a festive finish, tie colorful ribbons around the base of the lollipop stick. This adds a cute touch and makes your Easter cake pops look more giftable!
Part 5: Storing and Packaging Your Easter Cake Pops
5.1 Storing Cake Pops
After putting all that effort into making the perfect Easter cake pops, you’ll want to store them properly to keep them fresh. Here’s how you can make sure your cake pops stay delicious for a longer period:
-
Room temperature storage: If you’re planning to serve your Easter cake pops within a couple of days, you can store them at room temperature. Just make sure they’re in an airtight container, so they don’t dry out. Keep them in a cool, dry place, away from direct sunlight or heat.
-
Refrigerating cake pops: If you’re planning to store them for longer than a couple of days, refrigeration is your best option. Be sure to place the cake pops in an airtight container to prevent them from absorbing any unwanted odors from the fridge. Refrigerated cake pops can stay fresh for up to a week.
-
Freezing cake pops: For long-term storage, cake pops can also be frozen. Wrap each cake pop individually in plastic wrap, and then place them in a zip-lock freezer bag. When you’re ready to enjoy them, allow them to thaw at room temperature for about 15–30 minutes. Freezing won’t affect the flavor, but it may cause the coating to become slightly less shiny.
5.2 Packaging Your Easter Cake Pops
If you’re planning to gift your Easter cake pops or use them for an Easter party, packaging is key! Not only does good packaging ensure freshness, but it also makes your cake pops look even more appealing.
-
Cellophane bags: The most common packaging for cake pops is a simple, clear cellophane bag. These allow people to see the decoration and keep the cake pops fresh at the same time. Simply slip the cake pop into the bag, tie it off with a ribbon, and you’re good to go.
-
Cake pop boxes: If you’re gifting a larger batch of cake pops or giving them as a party favor, you can use specialized cake pop boxes. These are usually small, rectangular boxes with holes to hold each cake pop securely in place. These boxes can be decorated with cute Easter-themed labels or stickers.
-
Plastic cupcake holders: For a more elegant look, you can use clear plastic cupcake holders to display a few cake pops. This method is great for showcasing a small selection of cake pops at parties or events.
-
Easter-themed packaging: To make your cake pops even more festive, consider using Easter-themed packaging like colorful ribbon, Easter grass, or bunny-shaped tags. These small touches will elevate the look of your treats and make them perfect for Easter celebrations.
Part 6: Creative Easter Cake Pop Ideas
6.1 Bunny Cake Pops
One of the most adorable and popular ways to decorate Easter cake pops is by turning them into little bunnies! This idea brings your cake pops to life with a cute, playful design that kids and adults alike will love.
-
Shape the cake pop into a bunny: Instead of the traditional round shape, you can mold your cake pop into an oval shape. This will give it the appearance of a bunny’s head.
-
Add ears: Use mini marshmallows, white chocolate, or fondant to create bunny ears. Place them at the top of your cake pop to complete the bunny look.
-
Decorate the face: Use edible markers, candy eyes, or small chocolate chips for the eyes. For the nose, you can use a small pink candy or a piece of fondant shaped into a triangle.
Bunny cake pops make an excellent addition to any Easter party or as an Easter basket filler. They’re super cute and easy to make!
6.2 Egg-Shaped Cake Pops
Another classic Easter idea is to shape your cake pops like Easter eggs. This design works wonderfully with the pastel-colored coatings you’ll be using for your Easter cake pops.
-
Shape the cake pop into an egg: Instead of a round ball, shape the cake pop into an egg shape. This will give it a distinct, holiday-themed look.
-
Decorate the eggs: Once dipped in the base color, you can decorate these Easter egg cake pops with stripes, polka dots, or even floral designs. Use edible markers, sprinkles, or icing to create fun patterns and designs that will make each cake pop unique.
-
Add finishing touches: For added decoration, sprinkle the cake pops with edible glitter or dust to give them a festive shine.
Egg-shaped cake pops are simple to make but will stand out on any Easter table or as part of a gift package.
6.3 Chick Cake Pops
If you want to create something even more festive, consider turning your cake pops into little chicks. These are perfect for adding a cheerful and colorful element to your Easter celebration.
-
Shape the cake pop into a round ball: Unlike bunnies or eggs, the chick design works best with a round shape.
-
Coat the cake pop: For the chick, use a bright yellow coating like yellow candy melts or yellow icing to mimic the fluffy look of a baby chick.
-
Create the face: Use small orange candies for the beak and candy eyes for the chick’s face. You can also use small edible beads or sugar pearls for the eyes.
-
Add wings and feet: Use fondant or small pieces of candy to create wings and little feet at the bottom of the cake pop.
Chick cake pops are a fun and adorable way to celebrate Easter, and they’re sure to be a hit at any gathering!
6.4 Flower-Shaped Cake Pops
If you’re looking for a more elegant Easter cake pop design, flower-shaped cake pops are the way to go. These cake pops are perfect for a sophisticated Easter brunch or gathering.
-
Shape the cake pop into a flower: Start by shaping the cake pop into a flat oval. This will serve as the base of your flower.
-
Create petals: Use fondant or colored chocolate to create petal shapes around the center of the cake pop. You can create multiple layers of petals to add dimension.
-
Decorate the center: For the center of the flower, use a small round candy or edible pearl. You can also decorate the center with a contrasting color of icing to make it stand out.
These flower-shaped cake pops add an extra level of creativity and beauty to your Easter celebrations, perfect for an elegant touch.
6.5 Basket Cake Pops
Basket-themed cake pops are another creative Easter idea that brings in the symbolism of Easter baskets.
-
Shape the cake pop like a small basket: Start by shaping the cake pop into a small round or oval shape. Then, mold the top of the cake pop into a handle shape.
-
Coat with brown or pastel icing: To make the basket look more realistic, you can coat the cake pop with a light brown or pastel-colored coating.
-
Add Easter “eggs”: After coating, you can place small candy eggs around the cake pop to create the illusion of an Easter basket.
Basket cake pops are a creative and adorable way to incorporate the Easter basket theme into your desserts.
Part 7: Tips and Tricks for Perfect Easter Cake Pops
7.1 Use High-Quality Ingredients
One of the most important aspects of making the perfect Easter cake pops is to use high-quality ingredients. From your cake base to the coating and decorations, premium ingredients will ensure that your cake pops taste amazing and look even better.
-
Choose fresh cake mix or homemade cake: While store-bought cake mixes are convenient, homemade cake often yields better flavor and texture. If you’re making a homemade cake, make sure to use fresh, high-quality flour, sugar, and butter.
-
Use quality candy melts: Since candy melts are the main coating for cake pops, it’s worth investing in high-quality candy melts or chocolate. Good chocolate ensures a smooth, glossy coating that will make your cake pops look professional.
-
Go for real butter in frosting: If you’re making a frosting to bind your cake and give it a smoother texture, opt for real butter over margarine for a rich, creamy finish.
Using top-notch ingredients will pay off in both the taste and appearance of your Easter cake pops.
7.2 Perfecting the Cake Pop Shape
Creating the perfect cake pop shape is essential for a professional look. Whether you’re making simple round cake pops or intricate designs like bunnies or flowers, proper shaping will ensure uniformity and an elegant appearance.
-
Don’t overwork the cake mixture: After crumbling the cake and mixing it with frosting, make sure you don’t overwork the mixture. Overmixing can make the dough too dense, making it harder to shape.
-
Use a cookie scoop: A cookie scoop helps create uniform portions of cake, ensuring that your cake pops are all the same size.
-
Shape with care: Gently roll the cake mixture into balls or any other desired shape. For detailed designs like bunnies or chicks, take your time to mold each piece carefully.
If you get the shape right, your Easter cake pops will have that perfect, smooth, and polished finish.
7.3 Dipping and Coating Like a Pro
Dipping the cake pop into the coating can be tricky, especially if you want it to look flawless. However, with the right technique, your Easter cake pops will have a smooth, even coating that will make them look mouth-watering.
-
Thin your candy melts: If your candy melts are too thick, they’ll create lumps and uneven coats. To get a smooth dip, melt your candy melts, then thin them with a little vegetable oil or shortening until they reach a smooth, pourable consistency.
-
Use a deep mug or tall glass: Instead of a shallow bowl, use a deep mug or glass to dip the cake pops. This allows you to dip the cake pops straight into the coating without making a mess.
-
Dip gently and swirl: Hold the cake pop by the stick and dip it gently into the candy coating. Swirl it around to make sure it’s completely covered. Then, gently tap the stick on the edge of the mug to remove any excess coating.
Using these techniques will give your cake pops a smooth and shiny finish.
7.4 Let the Cake Pops Set Properly
Letting your cake pops set properly is an important step in the process. It ensures that the coating hardens and the cake stays intact on the stick.
-
Allow to cool on parchment paper: After dipping your cake pops in the coating, place them upright on a sheet of parchment paper. This prevents the cake pops from touching each other and ensures they harden without sticking.
-
Let the coating dry completely: Be patient and allow your cake pops to dry completely before you start decorating. This prevents smudging the coating and helps your decorations adhere better.
Properly setting your cake pops ensures they have that polished, professional look.
7.5 Storing and Transporting Cake Pops
When it comes to Easter cake pops, proper storage and transportation are key to keeping them fresh and looking good.
-
Store in an airtight container: Once your cake pops are fully set, store them in an airtight container at room temperature. This prevents them from drying out and keeps them fresh for up to a week.
-
Avoid refrigeration: Refrigerating cake pops can cause the coating to crack, so it’s best to keep them at room temperature. If you’re storing them for a longer period, freezing them is an option. Just make sure to thaw them at room temperature to prevent moisture from forming.
-
Transport carefully: When transporting cake pops, use a sturdy box with holes to hold the sticks in place. This will keep them from getting squished or falling over.
With proper care, your Easter cake pops will stay fresh and look beautiful, even after being stored for a while or transported to a party.
Conclusion: Bringing It All Together for Perfect Easter Cake Pops
Celebrating Easter with Cake Pops
There you have it—your ultimate guide to creating beautiful, festive, and delicious Easter cake pops. From choosing the right ingredients to adding the perfect decorations, these cake pops are sure to delight both visually and in taste. The Easter season is the perfect time to get creative in the kitchen, and cake pops offer a fun and interactive way to celebrate with your loved ones.
Whether you stick with traditional designs like bunnies and eggs or try something new and innovative, the process is always exciting and rewarding. Plus, you’ll have a delightful treat to share with friends and family during your holiday gatherings. Remember, it’s not just about how they look, but also about the joy of creating something from scratch that will bring smiles to your guests.
The Key to Success with Cake Pops
With the tips, techniques, and tricks we’ve shared, you’re equipped to create Easter cake pops that are not only cute but also delicious. From perfect shaping to flawless dipping and coating, you’ll be able to make cake pops that are both professional in appearance and mouthwatering in flavor.
The Perfect Easter Treat
Easter cake pops are versatile and fun treats that can fit any theme or occasion. They’re easy to personalize with different coatings, colors, and decorations, making them a go-to dessert for the season. So, the next time you’re looking for a sweet way to celebrate Easter, look no further than these adorable, bite-sized delights.