
If you’ve ever craved a dessert that’s as easy to make as it is delicious, then Choco-Berry Dream No-Bake Cheesecake is just what you need. This mouthwatering treat combines the richness of chocolate with the freshness of berries, all wrapped up in a creamy, no-bake cheesecake base. Whether you’re looking to impress guests at a summer gathering or simply treat yourself, this dessert is a perfect balance of indulgence and simplicity. And the best part? You don’t even need to turn on your oven!
In this article, we’re going to walk you through everything you need to know about making this dreamy dessert—from what it is, why it’s so special, and how to make it, to the best ways to serve and customize it. Plus, we’ve included some helpful tips and FAQs to ensure you have all the info you need to create the perfect Choco-Berry Dream No-Bake Cheesecake every time. Let’s dive in!
1. What is Choco-Berry Dream No-Bake Cheesecake?
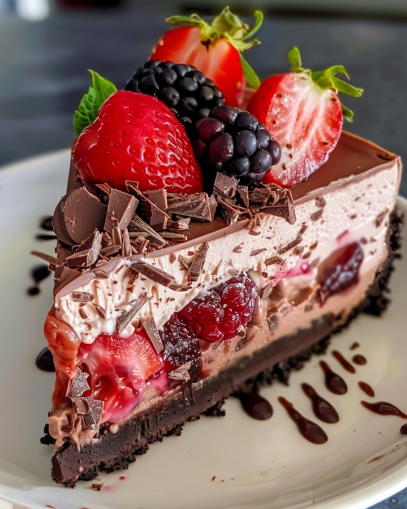
So, let’s start by breaking down what makes this cheesecake so dreamy. A Choco-Berry Dream No-Bake Cheesecake is a dessert that layers rich chocolate and fresh, juicy berries into a no-bake cheesecake filling, all sitting atop a crunchy graham cracker or cookie crust. It’s an indulgent yet light treat that requires no baking, which means it’s perfect for a hassle-free dessert that’s quick to prepare but looks impressive.
In simpler terms? Think of it as a fusion between a classic cheesecake and a chocolate-berry tart, but with a no-bake twist that saves you time and energy. You get all the creamy goodness of cheesecake, combined with the lusciousness of chocolate and the refreshing sweetness of berries.
What makes this cheesecake even more appealing is that it’s easily customizable, allowing you to adjust flavors and textures based on your personal preferences. Whether you prefer darker chocolate or sweeter milk chocolate, or whether you like a fruitier berry layer or a more chocolate-dominant filling, this dessert can be adapted to suit any taste.
Why It’s Called “Choco-Berry Dream”
The name says it all! The cheesecake features the perfect balance of rich, velvety chocolate and the sweet-tart flavors of fresh berries. The combination is so creamy and decadent, it truly feels like a “dream” in every bite. This dessert is a real showstopper that looks as stunning as it tastes, making it a go-to for special occasions and casual gatherings alike.
2. Why Choose No-Bake Cheesecake?
When it comes to making desserts, there’s something undeniably satisfying about a no-bake cheesecake. But why exactly should you opt for a no-bake version, especially when it comes to a dessert as luxurious as Choco-Berry Dream No-Bake Cheesecake?
2.1. Time-Saving Delight
First and foremost, one of the biggest advantages of no-bake cheesecakes is the time they save. Unlike traditional cheesecakes that require hours of preparation and a stint in the oven, a no-bake cheesecake is quick and simple. With just a few key ingredients and no need to preheat your oven, you’re able to whip up a decadent dessert in a fraction of the time.
For busy weekdays or when you’re in a rush to prepare something special for guests, no-bake cheesecakes like the Choco-Berry Dream are a lifesaver. You just mix the ingredients, pour the cheesecake filling into your crust, and refrigerate. That’s it! No complicated steps and no waiting for your oven to heat up.
2.2. Perfect Texture
Another fantastic reason to choose a no-bake cheesecake is its texture. Unlike baked cheesecakes, which can sometimes have a denser or firmer texture, no-bake cheesecakes are lighter, fluffier, and more mousse-like. This creates the perfect contrast between the creamy filling and the crunchy base, making each bite more irresistible.
In a Choco-Berry Dream No-Bake Cheesecake, the combination of airy cheesecake filling with the smooth richness of chocolate and the burst of fresh berries results in a texture that is simply heavenly.
2.3. Easily Customizable
With no-bake cheesecakes, the world is your oyster when it comes to customization. You can experiment with different crusts, fillings, toppings, and flavorings. Whether you prefer a chocolate cookie crust, a graham cracker base, or even a gluten-free option, no-bake cheesecakes allow you to tweak the recipe to suit any dietary preference.
For our Choco-Berry Dream cheesecake, the rich chocolate layer and fresh berry topping are already a winning combination. However, you can always switch out the berries for other fruits like peaches or even add a drizzle of caramel for extra indulgence.
2.4. No-Bake, No Stress
Sometimes, the thought of baking a cheesecake and hoping it comes out perfectly can be a little overwhelming. With a no-bake recipe, there’s less stress involved. You don’t have to worry about cracking, overcooking, or undercooking. All you need to focus on is creating that dreamy, creamy filling.
3. Ingredients You’ll Need for Choco-Berry Dream No-Bake Cheesecake
Before diving into the delightful process of making a Choco-Berry Dream No-Bake Cheesecake, it’s crucial to gather the right ingredients. The beauty of this recipe lies in its simplicity. So, here’s a list of everything you’ll need for both the crust and the cheesecake filling, along with the fresh fruit toppings.
3.1. For the Crust
The crust forms the base of this decadent cheesecake, providing a crispy contrast to the creamy filling. Here’s what you’ll need:
- Chocolate Graham Crackers (or any chocolate cookies): These will be crushed to make a flavorful and crunchy base.
- Butter: Adds richness and helps bind the crumbs together to form a solid base.
- Sugar (optional): If you want a slightly sweeter crust, feel free to add a tablespoon or two of sugar. It’s totally optional!
3.2. For the Cheesecake Filling
The filling is the heart of this dessert and what makes it oh-so-creamy:
- Cream Cheese (softened): The main component of the cheesecake filling, giving it that creamy texture and rich flavor.
- Heavy Cream: This adds the fluffiness and helps to create a smooth, whipped texture.
- Sweetened Condensed Milk: For a rich, sweet flavor that also helps set the filling without the need for baking.
- Vanilla Extract: Just a teaspoon for a hint of vanilla flavor that complements the chocolate and berries beautifully.
- Powdered Sugar: Adds sweetness without making the texture gritty, ensuring a smooth finish.
3.3. For the Toppings
The Choco-Berry Dream No-Bake Cheesecake gets its name from the stunning berry topping that adds freshness and a pop of color. For this, you’ll need:
- Fresh Berries: Raspberries, blueberries, or strawberries (or a combination) are perfect for this cheesecake. Choose berries that are in season for the freshest flavor.
- Chocolate Sauce or Ganache: A smooth drizzle of chocolate sauce or ganache to add an extra layer of decadence on top.
- Optional Garnishes: A sprinkle of chopped nuts, a few mint leaves, or a dusting of cocoa powder for added flavor and visual appeal.
4. How to Prepare the Crust for Choco-Berry Dream No-Bake Cheesecake
Now that you’ve gathered all the ingredients, it’s time to begin assembling your Choco-Berry Dream No-Bake Cheesecake. The first step is creating the crust. This is a simple process that will give you a solid, flavorful base for your cheesecake, setting the stage for the creamy filling and fruity topping to shine.
4.1. Crushing the Chocolate Graham Crackers (or Cookies)
Start by breaking up your chocolate graham crackers or chocolate cookies. You can do this by placing them in a Ziploc bag and gently crushing them with a rolling pin, or use a food processor if you prefer a finer crumb. Aim for small, uniform crumbs – not too powdery, but definitely smaller than whole crackers.
Tip: If you like a chunkier texture in your crust, leave some larger pieces for a bit of crunch!
4.2. Melting the Butter
Next, melt the butter. You can do this in a microwave-safe bowl for about 20-30 seconds or in a small saucepan over low heat. Once melted, set it aside to cool slightly.
4.3. Mixing the Crust
In a large mixing bowl, combine the crushed crackers and the melted butter. Stir well until the crumbs are fully coated with the butter, which will help the crust hold together when pressed. If you want a sweeter crust, you can also mix in a tablespoon of sugar at this point (totally optional).
4.4. Pressing the Crust into the Pan
Once your crust mixture is ready, it’s time to press it into your springform pan or pie dish. Use the back of a spoon or the bottom of a glass to press the crumbs firmly into the bottom of the pan. Make sure the crust is even and compact to avoid any loose sections once the cheesecake is set.
Tip: To make the crust extra sturdy, consider pressing it slightly up the sides of the pan as well. This will add a beautiful, professional touch to your finished cheesecake!
4.5. Chilling the Crust
Now, pop the crust into the refrigerator for about 10-15 minutes to firm up before you move on to the filling. The cool temperature will help the butter set and create a solid base for the creamy filling.
5. Making the Creamy Cheesecake Filling
Now that your crust is ready and chilling in the fridge, it’s time to make the Choco-Berry Dream No-Bake Cheesecake filling. This is where the magic happens—creating that rich, velvety cheesecake base that will balance perfectly with the chocolate crust and fresh berries. Here’s how to do it:
5.1. Mixing the Cream Cheese and Sugar
Start by softening your cream cheese. If it’s too cold, it can be difficult to blend smoothly, so let it sit out for about 30 minutes before you begin. Once softened, place the cream cheese in a large mixing bowl.
Next, add the sugar to the cream cheese. Use a hand mixer or stand mixer to beat the two ingredients together until the mixture is smooth and creamy. Be sure to scrape down the sides of the bowl occasionally to ensure everything is incorporated evenly.
Tip: If you prefer a sweeter filling, feel free to adjust the amount of sugar to taste. Some people love a more decadent, sweet cheesecake, while others might prefer a lighter touch.
5.2. Incorporating the Vanilla Extract
Add the vanilla extract to the cream cheese mixture. This will add depth and a touch of warmth to the flavor, enhancing the richness of the cheesecake. Mix it in until fully incorporated.
5.3. Whipping the Heavy Cream
In a separate bowl, whip the heavy cream until stiff peaks form. This means the cream should be thick enough that it holds its shape when you lift the beaters. It’s important to whip the cream well to give your cheesecake filling that luxurious, fluffy texture.
Tip: Make sure the heavy cream is cold before whipping, as this will help it whip up faster and more effectively. If you want to ensure it’s whipped to perfection, refrigerate your mixing bowl and beaters beforehand!
5.4. Combining the Two Mixtures
Once the heavy cream is whipped, gently fold it into the cream cheese mixture. Use a spatula to incorporate the two together, being careful not to deflate the whipped cream. The goal is to create a smooth, light, and fluffy filling that will hold its shape without being too dense.
Tip: For an extra creamy filling, you can add a small amount of sour cream or Greek yogurt to the mixture. This adds a tangy balance that complements the sweetness of the other ingredients.
5.5. Final Mixing and Tasting
Once everything is combined, give the filling a taste. If you think it needs more sweetness, add a touch more sugar or vanilla. When you’re happy with the flavor and consistency, the filling is ready to go!
6. Assembling the Choco-Berry Dream No-Bake Cheesecake
The hard part is over! Now that we have a delicious chocolate crust and a smooth, creamy cheesecake filling, it’s time to assemble our Choco-Berry Dream No-Bake Cheesecake. This is where the magic truly happens, as you layer everything to create a beautiful, mouthwatering dessert.
6.1. Layering the Cheesecake Filling on the Crust
Start by gently spreading the cheesecake filling over the chilled chocolate crust. Use a spatula or the back of a spoon to evenly smooth it out. Make sure the filling is spread all the way to the edges to create a nice, uniform layer.
As you spread the filling, be sure not to disturb the crust. It’s already firm, so you want to make sure the cheesecake layer rests nicely on top without any mixing. If you’ve done it correctly, you should have a beautiful, even layer of creamy cheesecake.
6.2. Tapping and Smoothing the Top
After you’ve added the cheesecake layer, tap the pan gently on the counter to remove any air bubbles and ensure the filling settles evenly. Then, smooth the top with your spatula or spoon. A well-smooth top adds a professional touch to your cheesecake.
Pro Tip: You can also make a decorative swirl pattern on top of the filling if you’d like to give it some extra flair. Just use the back of a spoon or a skewer to create a swirl design. It looks stunning and adds a nice texture contrast.
6.3. Chill in the Fridge
Once your cheesecake is beautifully layered, it’s time to chill. This is a no-bake dessert, so the cheesecake needs time to set in the fridge. Place the cheesecake in the fridge for at least 4 hours, but ideally overnight, so that it firms up and holds its shape when sliced.
Be patient—it’s worth the wait!
7. Topping the Choco-Berry Dream No-Bake Cheesecake
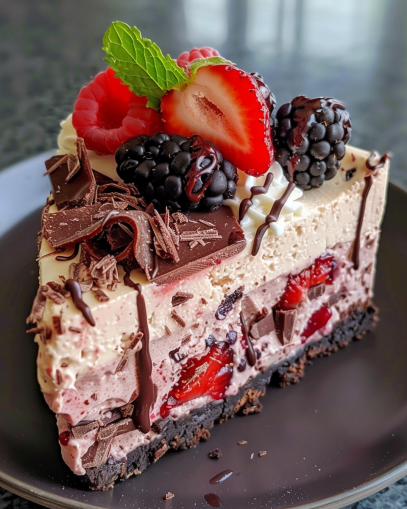
The final step in making your Choco-Berry Dream No-Bake Cheesecake is all about the topping. A cheesecake without a beautiful topping is like a painting without color! This is your chance to get creative and add a burst of freshness and sweetness. Let’s dive into the world of berries and make this cheesecake truly shine.
7.1. Selecting the Best Berries
The beauty of this cheesecake lies in its versatility when it comes to berries. You can use a mix of fresh strawberries, blueberries, raspberries, and blackberries, or just pick your favorites. Fresh berries are key to adding both flavor and a pop of color to your cheesecake.
- Strawberries bring a juicy sweetness.
- Blueberries add a slightly tart, refreshing taste.
- Raspberries lend a soft, tangy kick.
- Blackberries provide a deep, rich flavor that complements the chocolatey base perfectly.
Use a combination of these berries to create a visually appealing, multi-colored topping. If you want to take it a step further, you can even marinate the berries in a little honey or lemon juice to add an extra layer of flavor!
7.2. Arranging the Berries on Top
Once you’ve selected your berries, it’s time to arrange them on the cheesecake. Start by placing the largest berries (like strawberries) around the edge of the cheesecake, creating a border. Then, fill in the center with smaller berries, like blueberries and raspberries, to create a layered, artistic effect.
Feel free to get creative with the design. You can make a circular pattern or scatter the berries randomly for a more casual look. Either way, the result will be a gorgeous topping that elevates your cheesecake.
7.3. Drizzling with Caramel Sauce (Optional)
For an extra touch of indulgence, drizzle some caramel sauce over the top of the cheesecake and berries. The caramel adds a rich, buttery flavor that perfectly complements the chocolate crust and fresh berries. Plus, it looks beautiful when it cascades over the sides of the cheesecake.
If you prefer a less sweet option, you can skip this step, but the caramel really takes this dessert to the next level.
7.4. Final Chill Before Serving
Once the cheesecake is topped, place it back in the fridge for at least 30 minutes to allow the topping to set. This ensures that when you slice the cheesecake, the berries stay perfectly in place and the caramel hardens slightly, adding to the luxurious feel.
8. Frequently Asked Questions (FAQ)
To wrap up our Choco-Berry Dream No-Bake Cheesecake journey, let’s dive into some frequently asked questions. These are common queries that will help clarify some of the finer details of making this scrumptious dessert. Whether you’re a first-time baker or a seasoned pro, you’ll find answers here to make your cheesecake experience even sweeter!
8.1. Can I make this cheesecake ahead of time?
Absolutely! In fact, this cheesecake is perfect for making ahead. In fact, it’s better if you give it a few hours (or even overnight) in the fridge. The longer it sets, the firmer it becomes, and the flavors meld together beautifully. Just be sure to add the berry topping right before serving to keep it fresh.
8.2. Can I use frozen berries for the topping?
While fresh berries are the best choice for the topping, you can use frozen berries if fresh ones aren’t available. If you go this route, make sure to thaw the berries and drain any excess juice before topping your cheesecake. Too much liquid can make the cheesecake soggy.
8.3. What can I substitute for the chocolate crust?
If you prefer a different base, you can swap the chocolate crust for a traditional graham cracker crust, or even a nut-based crust. For a fun twist, try using Oreos or biscoff cookies for a spiced, crunchy bottom. Whatever you choose, make sure it complements the creamy filling and berry topping!
8.4. How long will the cheesecake keep in the fridge?
Once made, your Choco-Berry Dream No-Bake Cheesecake can be stored in the fridge for up to 3-4 days. Just be sure to cover it tightly with plastic wrap or store it in an airtight container to keep it fresh. If you have leftovers (lucky you!), this cheesecake still tastes delicious the next day.
8.5. Can I make this cheesecake without the cream cheese?
If you’re looking for a lighter version, you can substitute the cream cheese with Greek yogurt or a plant-based cream cheese alternative. Keep in mind that the texture and flavor will change slightly, but it will still be a creamy and delicious dessert.
8.6. Can I use a store-bought caramel sauce?
Absolutely! If you’re short on time or don’t feel like making homemade caramel, store-bought caramel sauce works just as well. Just make sure it’s a high-quality sauce to complement the rich flavor of the cheesecake.
These FAQs should help clear up any lingering questions you might have. If you’re ready to get started with your Choco-Berry Dream No-Bake Cheesecake, you now have all the tips and tricks needed to create a show-stopping dessert. Happy baking, and enjoy every bite!