
 Part 1: Introduction
1.1 Overview of Butterfinger Chocolate Bundt Cake
If you’ve ever dreamed of a cake that’s as rich and satisfying as it is easy to make, then you’re in for a treat with this Easy Butterfinger Chocolate Bundt Cake. This dessert combines the classic Butterfinger candy bars with a moist, fudgy chocolate cake, creating a delightful flavor explosion that’ll have everyone asking for seconds. What makes it even better is that it’s simple to whip up! A chocolate Bundt cake has never tasted this good or been this easy.
Bundt cakes are incredibly popular because of their unique shape and the fact that they’re perfect for showcasing various flavors. But what sets this Butterfinger version apart? It’s the gooey, crunchy Butterfinger bits mixed right into the batter. These little bursts of peanut-buttery goodness elevate an already delicious chocolate cake to a whole new level. Trust us, this one will become your go-to recipe for special occasions and everyday indulgence alike.
1.2 Importance of Easy-to-Make Desserts
One of the biggest challenges in baking is finding a recipe that doesn’t require fancy skills or a ton of time. That’s where this easy Butterfinger chocolate Bundt cake comes in! It’s made with simple ingredients you likely already have in your pantry, and the method is straightforward—no complicated steps or special techniques. This makes it the ideal cake for beginners and experts alike. Plus, when you’re craving something sweet but don’t want to spend hours in the kitchen, this cake delivers!
The best part? This dessert’s versatility. You can serve it at family gatherings, birthday parties, or even just as a treat to enjoy with your morning coffee. And if you’re someone who loves getting creative in the kitchen, you’ll find plenty of room to customize the cake to your taste.
1.3 Purpose of the Article
So, why are we here? In this article, we’ll guide you through every part of making the easy Butterfinger chocolate Bundt cake from scratch. We’ll cover essential ingredients, provide a step-by-step breakdown of the baking process, and give you tips for decorating your cake to impress. Additionally, we’ll include a FAQs section to answer common questions and troubleshoot any issues you might face while baking.
If you’re ready to indulge in the chocolatey goodness of this Butterfinger Bundt cake, keep reading! Let’s dive into the next section and talk about the ingredients you’ll need to make this dessert a reality
Part 2: Understanding the Ingredients
2.1 Key Components of the Cake
When it comes to baking, having the right ingredients is everything. For this easy Butterfinger chocolate Bundt cake, we’ll be using a combination of pantry staples and a couple of special ingredients to create a dessert that’s rich, moist, and perfectly balanced.
- Cake Mix: The base of this cake is a classic chocolate cake mix. Using a cake mix makes this recipe quick and foolproof. While some may prefer starting from scratch, cake mixes are convenient and still deliver a decadent result. Look for a moist chocolate cake mix to ensure the texture is perfect. If you prefer, you can also opt for a dark chocolate mix for an even richer flavor.
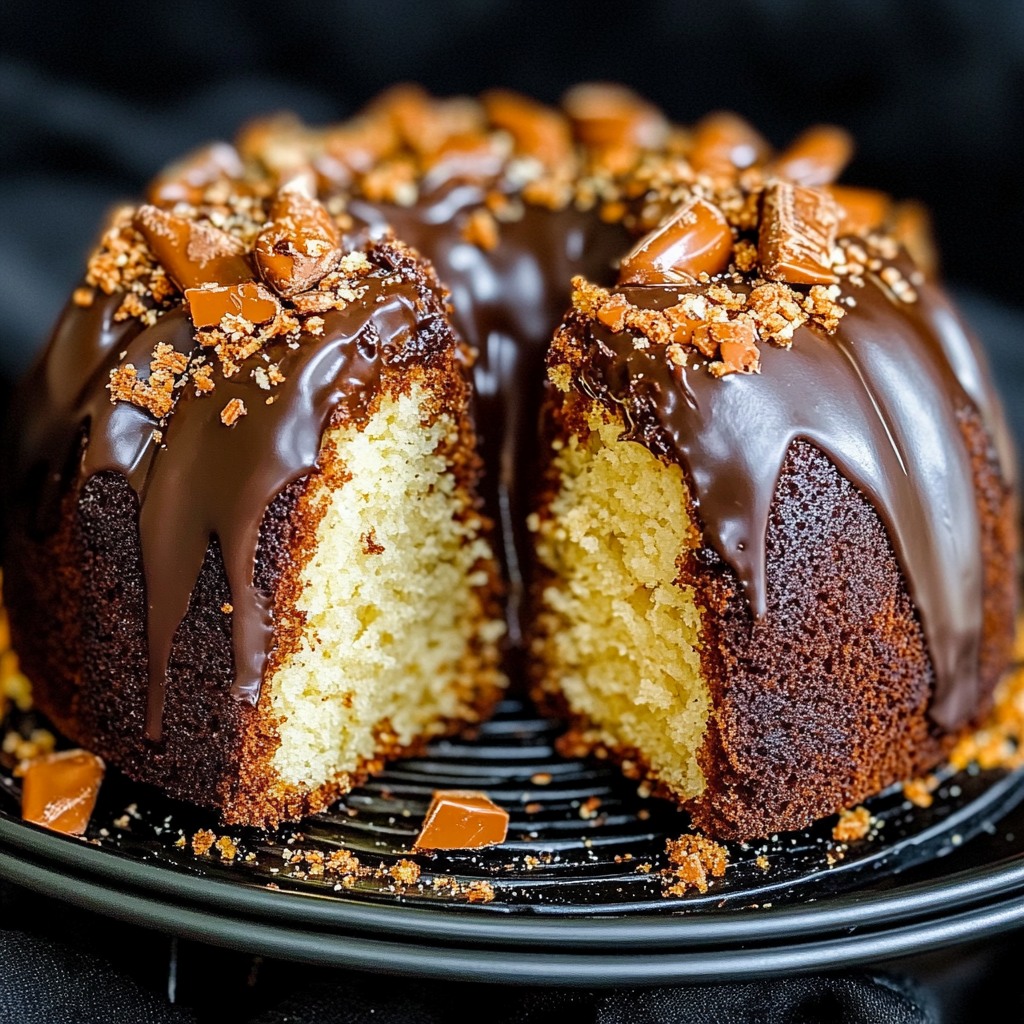
- Butterfinger Candy Bars: The star of the show! These crushed Butterfinger bars provide that perfect crunch and peanut-buttery goodness that adds a unique twist to this chocolate cake. The Butterfinger pieces are folded into the batter, ensuring every bite is a delightful mix of chocolate and peanut butter.
- Additional Ingredients: To complete the batter, you’ll need eggs, oil, and water. These are common ingredients in cake mix-based recipes, helping to create the smooth texture we all love in a Bundt cake. Some recipes call for milk instead of water to give a richer flavor, but we’ll stick with water to keep it simple.
2.2 Selecting Quality Ingredients
While cake mixes are convenient, it’s essential to choose high-quality ingredients for the best flavor. When selecting your chocolate cake mix, look for a trusted brand with good reviews or one that’s known for its moistness and flavor. Similarly, the Butterfinger candy bars should be fresh. If you’re using older bars, they may lose their crunch, which is key to the texture of this cake.
You can even experiment with different types of chocolate. If you’re a true chocolate lover, go ahead and use a premium dark chocolate cake mix or add extra chocolate chips to the batter for an even more indulgent experience.
2.3 Substitutions and Variations
There’s always room for customization in baking, and this easy Butterfinger chocolate Bundt cake is no exception! If you’re looking to adjust the recipe to your dietary needs, consider these options:
- Dairy-Free: Substitute the eggs and milk with dairy-free alternatives. Use a dairy-free chocolate cake mix and your favorite non-dairy milk to make this cake suitable for those with lactose intolerance.
- Gluten-Free: For a gluten-free version, look for a gluten-free chocolate cake mix and double-check that the Butterfinger bars you use are gluten-free. Some brands might contain gluten, so it’s important to check the label.
- Other Candy Bars: Don’t feel restricted to just Butterfinger! You can easily swap it out for other candy bars like Reese’s for a peanut-butter-chocolate fusion or even M&M’s for a colorful twist.
Using quality ingredients and customizing the recipe to your taste will ensure your cake turns out just how you like it.
 Part 3: Mixing the Ingredients and Preparing the Cake
3.1 Prepping Your Equipment
Before we dive into mixing, it’s essential to get your tools ready. The right equipment makes the entire baking process easier and more efficient.
- Bundt Pan: The Bundt pan is the star of the show here. Make sure to choose a high-quality non-stick Bundt pan to prevent any sticky situations when it comes time to remove your cake. If you don’t have a non-stick pan, you can grease your pan with butter and lightly dust it with flour, or use a baking spray that’s specifically designed for non-stick surfaces.
- Mixing Bowls: You’ll need a large mixing bowl to combine your cake mix, eggs, oil, and water. Having a whisk or electric mixer on hand will help you get the batter smooth and lump-free.
- Measuring Cups and Spoons: Precision is key in baking, so make sure you have measuring cups and spoons for the water, oil, and other ingredients.
3.2 Combining the Ingredients
Once you’ve gathered all your tools, it’s time to mix everything together. Follow these steps for a smooth and easy process:
- Prepare the Cake Mix: Start by adding the chocolate cake mix into your large mixing bowl. Follow the directions on the package for the oil, eggs, and water (or milk) measurements. Typically, you’ll add about 1 cup of water, ½ cup of oil, and 3 eggs to the mix.
- Mix Until Smooth: Using a whisk or an electric mixer, combine the ingredients until smooth. Make sure there are no lumps in the batter—this will ensure an even texture throughout the cake. You don’t need to overmix, just combine until everything is well-blended.
- Add the Butterfinger Pieces: Once your batter is ready, it’s time to incorporate the Butterfinger candy pieces. Gently fold in about 1 cup of crushed Butterfinger bars. These pieces should be evenly distributed throughout the batter, so every slice of cake has a satisfying crunch.
Pro tip: To crush the Butterfingers, place them in a resealable plastic bag and use a rolling pin to gently crush them into smaller pieces. This prevents a mess and ensures a nice even texture in the cake.
- Optional Add-ins: This is your chance to add any extra ingredients you want to experiment with, like chocolate chips or a dash of vanilla extract for extra flavor.
3.3 Pouring the Batter into the Pan
Once your batter is ready and well-mixed, it’s time to pour it into the prepared Bundt pan. Take care not to overfill the pan—leave about an inch of space at the top to allow the cake to rise as it bakes.
- Level the Batter: Use a spatula or spoon to evenly distribute the batter in the pan. Gently tap the pan on the counter a few times to release any air bubbles. This will help create an even texture and prevent unsightly holes in the cake after baking.
- Smooth the Top: Use the back of the spatula to smooth the top of the batter to ensure the cake bakes evenly. This step is crucial for a beautifully shaped Bundt cake.
3.4 Baking the Cake
Now, it’s time to pop the cake into the oven. Preheat your oven to 350°F (175°C), and place your Bundt pan in the center of the oven to ensure even baking.
- Bake Time: The baking time will vary slightly depending on your oven and the size of your Bundt pan. Generally, bake the cake for 30 to 40 minutes. Start checking for doneness around 30 minutes by inserting a toothpick into the center of the cake. If it comes out clean, the cake is done. If it’s still wet, bake for a few more minutes and check again.
- Cool the Cake: Once the cake is done baking, remove it from the oven and let it cool in the pan for about 10-15 minutes. After that, gently run a knife around the edges to loosen the cake from the pan, then flip the pan over onto a cooling rack. Allow the cake to cool completely before frosting or servinge.
Part 4: Frosting and Decorating Your Cake
4.1 Choosing the Right Frosting for Your Cake
Now that your Butterfinger chocolate Bundt cake is baked and cooled, it’s time for the fun part—frosting and decorating! The right frosting not only adds a creamy texture but also enhances the cake’s overall flavor. For this dessert, we’ll be using a rich chocolate frosting that complements the cake’s texture and the crunchy Butterfinger pieces.
You can choose between a few frosting options, but the best one for this cake is a cream cheese frosting or chocolate ganache. Both are simple to prepare and add an indulgent layer to the cake.
- Chocolate Frosting: A classic choice for any chocolate cake, chocolate frosting is rich and creamy. It provides a smooth contrast to the crunchy Butterfinger bits and a decadent finish to every bite.
- Cream Cheese Frosting: If you love a tangy balance to the sweetness of chocolate, cream cheese frosting is the perfect match. It’s a bit lighter than chocolate frosting and offers a delightful contrast to the cake’s rich flavor.
4.2 How to Make Chocolate Frosting
Here’s a simple recipe for a creamy chocolate frosting that will perfectly complement your Butterfinger chocolate Bundt cake.
Ingredients:
- 1 cup of unsalted butter, softened
- 3-4 cups powdered sugar
- ½ cup unsweetened cocoa powder
- 1 teaspoon vanilla extract
- ¼ cup milk (more if needed)
Instructions:
- Whip the Butter: In a mixing bowl, beat the softened butter until smooth and fluffy, about 2-3 minutes. This creates the creamy base for your frosting.
- Add Cocoa and Sugar: Gradually add the powdered sugar and cocoa powder, beating well between each addition. Start on a low speed to avoid a sugar cloud, then increase the speed as it comes together.
- Add Milk and Vanilla: Once the frosting is starting to thicken, add the vanilla extract and ¼ cup of milk. Beat until the frosting is smooth and spreadable. If the frosting is too thick, add more milk, a tablespoon at a time, until you reach the desired consistency.
- Taste and Adjust: Give your frosting a quick taste test. If it needs more sweetness, add an extra spoonful of powdered sugar. If you prefer a richer taste, add a bit more cocoa powder.
4.3 Decorating Your Cake
With the frosting ready, it’s time to get creative with decorating! There are several ways to finish off your Butterfinger chocolate Bundt cake, depending on your style.
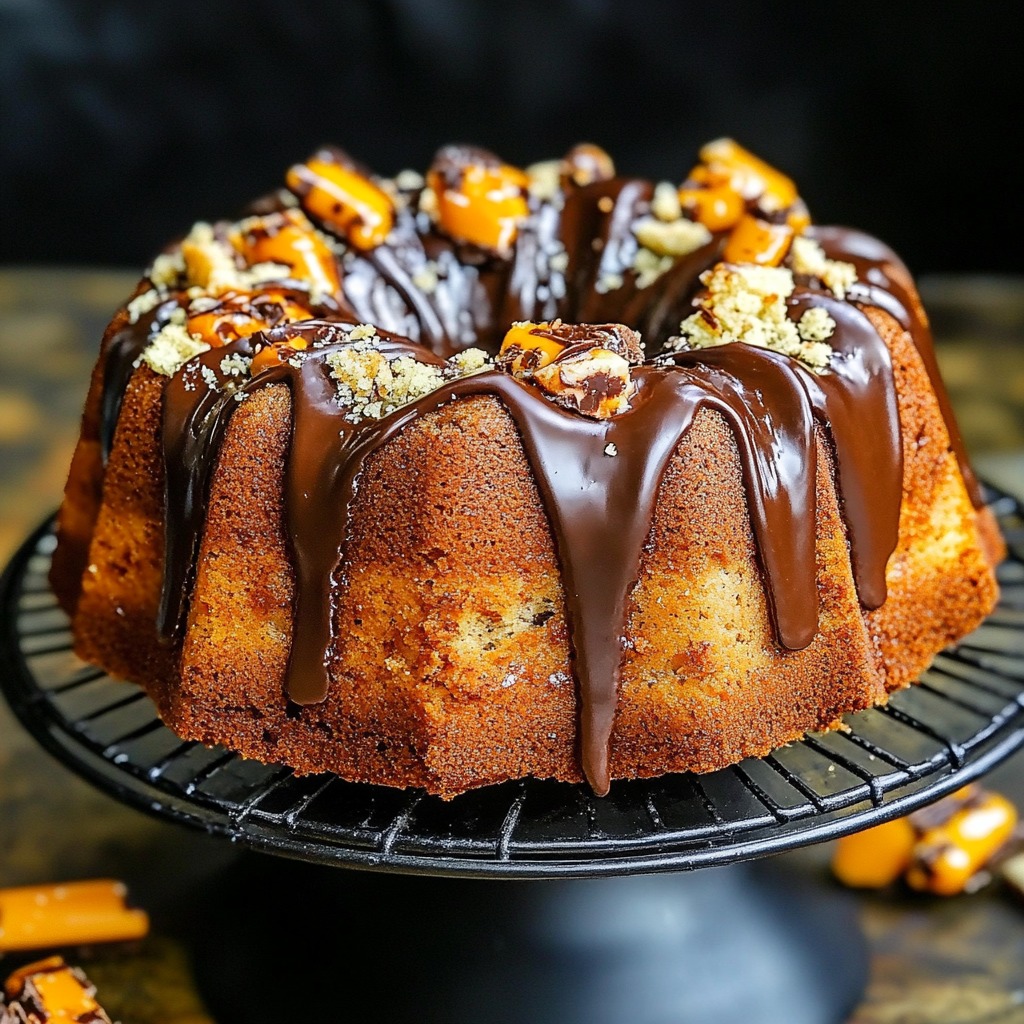
- Drizzling the Frosting: For a rustic look, pour the frosting over the top of the Bundt cake and allow it to drip down the sides. This works especially well if you have a thicker frosting. You can even make it drip a little further down the cake for a dramatic effect.
- Butterfinger Crumbles: To make the cake even more decadent, top the frosting with crushed Butterfinger pieces. You can either sprinkle them on top for a more casual presentation or press them gently into the frosting for a more elegant finish. The Butterfinger crunch adds a delightful contrast to the smooth frosting and rich cake.
- Garnish with Additional Chocolate: If you’re a chocolate lover, consider adding extra chocolate shavings or drizzle some melted chocolate over the top. This adds another layer of indulgence to an already decadent cake.
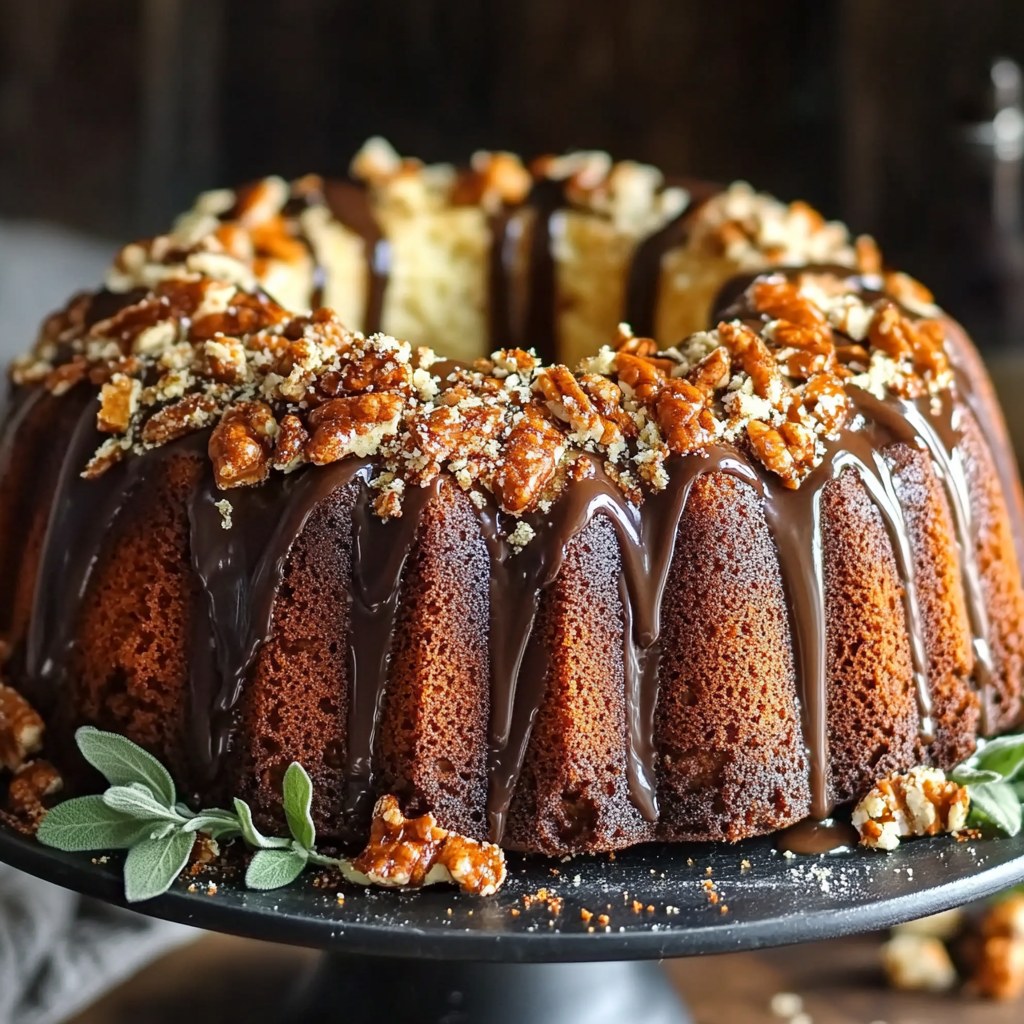
- Add Whipped Cream or Candied Nuts: If you want to give your cake a little extra flair, garnish it with a dollop of whipped cream or top it with candied nuts like pecans or almonds. These will add texture and a sweet finish to every slice.
4.4 Tips for Perfect Decoration
- Use Piping Bags: If you want more control over how the frosting is applied, consider using a piping bag fitted with a star or round tip. This will allow you to create beautiful patterns on top of the cake.
- Let the Frosting Set: If you’re planning on adding a decorative touch, such as crushed Butterfinger pieces, let the frosting set a little before adding toppings. This prevents the crumbs from sinking into the frosting.
 Part 5: Serving and Enjoying Your Butterfinger Chocolate Bundt Cake
5.1 How to Slice and Serve the Cake
The moment you’ve been waiting for is finally here—the Butterfinger chocolate Bundt cake is ready to be sliced and served! Whether you’re hosting a party, treating your family, or just indulging in a sweet treat, serving this cake is a simple but rewarding experience.
- Slicing the Cake: Bundt cakes are typically denser than regular cakes, so when slicing, make sure to use a sharp serrated knife to get clean, even slices. The cake should cut easily, but don’t press too hard or you might squash the frosting.
- Serving Portions: If you want to serve generous portions, cut the cake into large slices. Alternatively, for smaller servings (or if you’re serving guests), cut each slice in half or serve it with a scoop of vanilla ice cream. The rich chocolatey flavor and crunchy Butterfinger bits make this cake satisfying on its own, but pairing it with ice cream takes it to the next level.
5.2 Creative Ways to Serve Your Cake
While the Butterfinger chocolate Bundt cake is delicious on its own, there are a few creative ways to elevate its presentation and make it even more enjoyable:
- Serve with Ice Cream: This cake pairs wonderfully with vanilla ice cream, but you could also try chocolate, caramel, or even a fun peanut butter swirl ice cream. The coolness of the ice cream contrasts perfectly with the warmth and richness of the cake.
- Top with Fresh Berries: To cut through the sweetness, fresh fruit like strawberries, blueberries, or raspberries add a refreshing burst of flavor. You could either serve the berries alongside the cake or top each slice with a few berries for a pop of color and texture.
- Whipped Cream and Nuts: For an extra indulgent touch, top each slice with a dollop of freshly whipped cream or chocolate whipped cream. Candied nuts, such as pecans or almonds, add a nice crunch and balance out the rich cake and frosting.
- Make Cake Pops: If you have leftover cake, or if you simply want a fun twist, consider turning the Bundt cake into cake pops. Crumble the cake, mix it with a little frosting, shape it into balls, and dip them into melted chocolate. This is a great option for parties or snackable treats.
5.3 Best Occasions to Serve Your Cake
- Birthday Parties: This Butterfinger chocolate Bundt cake makes for a fun and impressive birthday treat. With its rich flavor and eye-catching appearance, it’s sure to be a hit at any birthday celebration.
- Holiday Gatherings: Serve this cake during holidays like Christmas, Thanksgiving, or Easter to wow your guests. The chocolatey and Buttery crunch flavors are perfect for special occasions.
- Casual Gatherings: Even if you’re just having friends over for a casual get-together, this cake is perfect for any occasion. Pair it with a hot cup of coffee or iced tea for a delightful dessert.
5.4 Storing Leftovers
After the cake has been enjoyed, you might have some leftovers. Don’t worry! Proper storage will help keep your cake fresh for the next few days.
- Room Temperature: If you plan to finish the cake within a couple of days, store it in an airtight container at room temperature. It will stay fresh for up to 3 days.
- Refrigeration: If you want to keep the cake for a longer period, you can refrigerate it. Just make sure it’s covered tightly to prevent it from drying out. The cake can last up to a week in the fridge.
- Freezing: To store the cake for a longer time, freeze individual slices. Wrap them in plastic wrap and foil, and place them in a freezer-safe bag. When you’re ready to enjoy a slice, simply thaw it at room temperature or warm it up in the microwave for a few seconds.
Part 6: FAQs About Butterfinger Chocolate Bundt Cake
6.1 Can I Make the Butterfinger Chocolate Bundt Cake Ahead of Time?
Absolutely! This cake is perfect for making ahead of time, which is especially helpful if you’re planning a special event or a party. In fact, the flavors can even improve after a day or two, as the cake becomes even moister.
- How to Store: To make it ahead, bake the cake and let it cool completely. Then, wrap it tightly in plastic wrap and store it at room temperature for up to 2 days. If you’re storing it longer, refrigerate it and frost just before serving. This will help keep the frosting looking fresh.
- Freezing: You can also freeze the unfrosted Bundt cake for up to 3 months. Once you’re ready to serve, simply thaw it at room temperature, and then add the frosting and toppings.
6.2 How Can I Make This Cake More Moist?
If you’re looking to make your Butterfinger chocolate Bundt cake even more moist, here are a few tips:
- Use Sour Cream or Buttermilk: Adding sour cream or buttermilk to your batter will create a moist, tender crumb. The acidity in these ingredients helps break down the structure of the cake, making it soft and fluffy.
- Don’t Overmix the Batter: Overmixing can lead to a dense cake, so mix the batter just until combined. This will ensure your cake has a light and airy texture.
- Add a Little Extra Butter or Oil: If you’re looking for extra richness, you can add an additional tablespoon of butter or oil. This helps keep the cake moist, especially if you’re storing it for a longer period.
6.3 Can I Make a Gluten-Free Version of This Cake?
Yes! Making a gluten-free version of the Butterfinger chocolate Bundt cake is simple. All you need to do is swap the regular flour for a gluten-free flour blend. Be sure to check the label of your gluten-free flour to ensure it’s a 1:1 substitute for all-purpose flour.
- Tip: If you’re concerned about the texture, you can add a teaspoon of xanthan gum to help with the structure of the cake. Additionally, be cautious when choosing your Butterfinger since some candies may contain gluten, so check the packaging before using them.
6.4 Can I Use Other Candies Instead of Butterfinger?
While the Butterfinger pieces add a unique crunch and flavor to this cake, you can certainly swap them out for another candy if you prefer. Some great alternatives include:
- Reese’s Peanut Butter Cups: If you love peanut butter and chocolate together, chopped-up Reese’s cups work beautifully in this cake.
- Snickers Bars: Snickers offers a similar crunchy texture with the added sweetness of caramel and nuts, making it an excellent substitute for Butterfinger.
- M&Ms: For a more colorful and less crunchy option, you can use M&Ms, especially if you want to make the cake more festive.
Just make sure to adjust the candy’s ratio in the batter to match the Butterfinger amount, so the flavor and texture stay balanced.
6.5 How Do I Know When the Cake is Done?
Knowing when your cake is done is essential to achieving the perfect texture. Here’s how you can test it:
- Toothpick Test: Insert a toothpick or cake tester into the center of the cake. If it comes out clean or with just a few moist crumbs, the cake is done. If it comes out with wet batter, give it a few more minutes in the oven.
- Spring Back: Gently press the top of the cake with your finger. If it springs back, it’s fully cooked. If it leaves an indent, it needs a bit more time.
6.6 How Can I Fix a Dry Bundt Cake?
If your Butterfinger chocolate Bundt cake turns out dry, don’t worry—there are a few ways to rescue it:
- Add a Syrup Soak: You can soak the cake with a simple syrup made from equal parts sugar and water, heated until the sugar dissolves. Brush the syrup over the cake for added moisture.
- Serve with Whipped Cream or Ice Cream: If the cake is slightly dry, serve it with a dollop of whipped cream or a scoop of ice cream. The creamy texture will balance out the dryness and add extra flavor.
Part 7: Final Tips and Additional Resources
7.1 Final Tips for Perfecting Your Butterfinger Chocolate Bundt Cake
Now that you’re well on your way to creating the perfect Butterfinger chocolate Bundt cake, here are a few final tips to ensure your cake is a success every time:
- Properly Grease and Flour Your Bundt Pan: One of the most crucial steps to prevent your cake from sticking to the pan is to make sure it’s properly greased and floured. Use a generous amount of butter or non-stick spray, and dust with flour or cocoa powder (if you prefer). This will help your cake come out smoothly and retain its beautiful Bundt shape.
- Don’t Overfill the Pan: It’s easy to get excited and pour too much batter into the pan, but be mindful not to overfill it. Leave some space (about 1 inch) at the top of the pan to allow the cake to rise and bake evenly. Overfilling could lead to uneven cooking or batter spilling over.
- Let the Cake Cool Before Frosting: Patience is key here. Allow your cake to cool completely before applying frosting or glaze. If you frost a warm cake, the frosting might melt and become runny. Cooling the cake ensures the frosting stays in place and maintains its beautiful texture.
- Customize Your Frosting: While this recipe calls for a chocolate frosting, don’t hesitate to experiment with other types of frosting or glazes. Peanut butter frosting, cream cheese frosting, or even a white chocolate ganache can be perfect alternatives to complement the chocolatey and Butterfinger flavors.
- Enjoy the Process: Baking is all about having fun and enjoying the journey. Don’t stress over perfection; embrace any little imperfections as they only add to the charm of homemade treats!
7.2 Resources for Further Inspiration and Tips
For more expert tips, tutorials, and recipes that will help you become a Bundt cake pro, check out these useful resources:
- Allrecipes – How to Bake the Perfect Bundt Cake
Link: Allrecipes – Bundt Cake Tips
Recommended Anchor Text: “How to bake the perfect Bundt cake” - Food Network – Cake Decorating 101
Link: Food Network – Cake Decorating Tips
Recommended Anchor Text: “Cake decorating 101” - King Arthur Baking – Tips for Better Cakes
Link: King Arthur Baking – Better Cake Tips
Recommended Anchor Text: “Better cake tips from King Arthur Baking”
7.3 Conclusion
Your Butterfinger chocolate Bundt cake is bound to become a crowd favorite with its irresistible chocolatey richness and crunchy peanut butter twist. Whether you’re baking it for a special occasion or just because you deserve a sweet treat, this cake is the perfect balance of indulgent and comforting.
By following this comprehensive guide, you’ve got all the tools you need to make a flawless cake each time. Don’t forget to experiment with different variations, like swapping out the Butterfinger for other candies, or adding extra toppings to make the cake truly your own.
Now, it’s time to get baking, slice up that delicious cake, and enjoy every last bite!
Print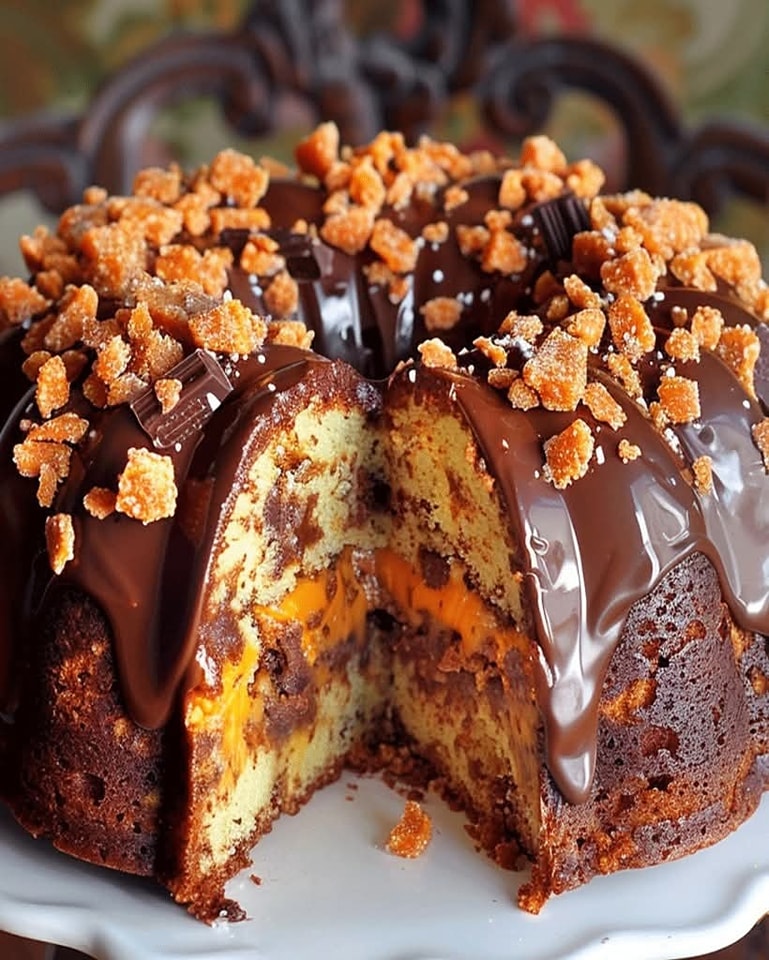
Ingredients
- Author: laura