
Introduction
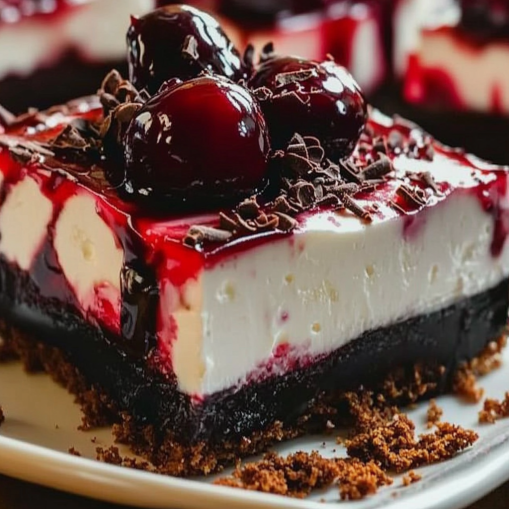
Black Forest Cheesecake Delight Bars—doesn’t that sound divine? These dessert bars combine the lusciousness of chocolate, the creaminess of cheesecake, and the tang of cherries, all layered into a treat that’s perfect for parties, family gatherings, or a quiet indulgence. With simple ingredients, straightforward steps, and a bit of creativity, you’ll be whipping up a dessert that everyone will rave about. Let’s dive into the magic of creating these irresistible bars!
Part 1: Ingredients and Equipment Needed

Essential Ingredients
To create the perfect Black Forest Cheesecake Delight Bars, you’ll need the following ingredients:
- For the crust:
- 2 cups crushed chocolate cookies (Oreo or graham crackers work wonders).
- ½ cup melted butter.
- For the cheesecake layer:
- 16 oz cream cheese, softened.
- ¾ cup granulated sugar.
- 2 large eggs.
- ¼ cup unsweetened cocoa powder.
- 4 oz melted dark chocolate (optional for richer flavor).
- For the toppings:
- 1 can (21 oz) cherry pie filling.
- 1 cup heavy whipping cream (for garnish).
- 2 tbsp powdered sugar.
- Chocolate shavings or curls for decoration.
Optional Ingredients
- Kirsch (cherry liqueur) for a true Black Forest flavor.
- Homemade cherry filling for an extra special touch.
Equipment
- 9×13-inch baking pan.
- Parchment paper for easy removal.
- Electric mixer or food processor for mixing.
- Spatula and offset knife for smooth layers.
Pro Tip
Make sure all ingredients are at room temperature before starting. This ensures a creamy, lump-free cheesecake layer.
Part 2: Making the Crust
Step 1: Prepare the Pan
- Line a 9×13-inch baking pan with parchment paper, leaving an overhang for easy lifting later.
- Lightly grease the parchment paper to prevent sticking.
Step 2: Create the Crust Mixture
- In a large bowl, combine the crushed chocolate cookies and melted butter.
- Mix thoroughly until the texture resembles wet sand.
Step 3: Form the Base
- Pour the crust mixture into the prepared pan.
- Press it firmly into an even layer using the back of a spoon or a flat-bottomed measuring cup.
- Refrigerate the crust for at least 15 minutes while preparing the cheesecake filling.
Pro Tip
If you’re a fan of richer flavors, substitute some of the butter with melted dark chocolate for added depth.
Part 3: Making the Cheesecake Layer
Step 1: Gather the Ingredients
For this layer, you’ll need:
- Cream cheese (softened)
- Granulated sugar
- Vanilla extract
- Eggs (room temperature)
Step 2: Blend the Cream Cheese Mixture
- In a large mixing bowl, beat the cream cheese and sugar together until smooth and creamy.
- Add the vanilla extract and mix until combined.
Step 3: Incorporate the Eggs
- Add the eggs one at a time, beating on low speed after each addition.
- Ensure each egg is fully blended before adding the next to prevent overmixing, which can cause cracks during baking.
Step 4: Pour Over the Crust
- Once mixed, pour the cheesecake batter over the chilled crust.
- Smooth it out with a spatula to create an even layer.
Pro Tip
For a silkier texture, make sure all the ingredients are at room temperature before mixing.
Next, we’ll add the rich cherry topping and begin layering the delightful flavors of the Black Forest theme. Get ready to elevate these bars with a burst of fruity goodness!
Part 4: Creating the Cherry Topping
Step 1: Choose Your Cherries
- Opt for either canned cherry pie filling or fresh cherries.
- If using fresh cherries, pit them and cook them with sugar and cornstarch to create a homemade cherry compote.
Step 2: Prepare the Cherry Mixture
- For canned filling, ensure it’s smooth and free from excess syrup clumps.
- For fresh compote:
- Combine cherries with a bit of sugar, water, and lemon juice.
- Simmer on medium heat until the mixture thickens and becomes glossy.
Step 3: Layer It Over the Cheesecake
- Once the cheesecake has baked and cooled slightly, spoon the cherry topping evenly over the cheesecake layer.
- Spread gently with a spatula to avoid disrupting the cheesecake underneath.
Pro Tip for Added Flavor
Stir in a teaspoon of almond extract or kirsch (a cherry liqueur) into the topping for a deeper, authentic Black Forest flavor.
Part 5: Adding the Chocolate Drizzle and Garnish
Step 1: Melt the Chocolate
- Choose high-quality dark or semi-sweet chocolate for the drizzle.
- Melt the chocolate using a double boiler or in the microwave (in 20-second intervals to prevent scorching).
- For a glossy finish, stir in a teaspoon of vegetable oil or butter.
Step 2: Drizzle Over the Cherry Layer
- Using a spoon or a piping bag, drizzle the melted chocolate over the cherry topping in thin, even streams.
- Aim for a crisscross pattern to add visual appeal.
Step 3: Add Chocolate Garnishes
- Use a vegetable peeler to create chocolate curls from a chilled chocolate bar.
- Sprinkle the curls generously over the top of the cheesecake.
Optional Garnishes
- Top with whipped cream rosettes around the edges for a bakery-style finish.
- Add whole cherries on top of the whipped cream for an extra pop of color and texture.
Part 6: Slicing and Serving the Bars
Step 1: Proper Chilling Time
- After adding the garnishes, place the cheesecake in the refrigerator for at least 4-6 hours. This allows the layers to set firmly, ensuring clean slices.
- For best results, chill overnight to enhance the flavors.
Step 2: Prepare for Slicing
- Use a sharp, thin knife for cutting.
- Dip the knife into hot water, then wipe it dry before each slice to avoid dragging layers.
- Measure the bars evenly to ensure consistent portions, typically aiming for 12-16 bars depending on the size of the pan.
Step 3: Plate with Style
- Use a spatula to gently lift each bar out of the pan.
- Serve with a dollop of whipped cream or extra cherry sauce on the side for a touch of elegance.
Optional Serving Tips
- Pair the bars with a cup of coffee or dessert wine to elevate the experience.
- For gatherings, arrange the bars on a decorative platter for an eye-catching display.
Part 7: Storing and Preserving Freshness
Refrigeration Tips
- Place leftover Black Forest Cheesecake Delight Bars in an airtight container to maintain their texture and flavor.
- Store in the refrigerator for up to 5-7 days. Make sure the bars don’t absorb odors from other food by using a tightly sealed container or plastic wrap.
Freezing Instructions
- Want to save some for later? These bars freeze beautifully!
- Step 1: Wrap individual bars in plastic wrap or parchment paper to prevent freezer burn.
- Step 2: Place the wrapped bars in a freezer-safe container or resealable bag.
- Step 3: Freeze for up to 2 months.
Thawing Recommendations
- To enjoy frozen bars, transfer them to the refrigerator for 4-6 hours before serving.
- Avoid thawing at room temperature to prevent condensation from ruining the cheesecake layers.
With proper storage, these bars retain their decadent taste, making them perfect for future cravings or last-minute desserts. Whether you refrigerate or freeze, savor each bite of this irresistible dessert!
FAQs About Black Forest Cheesecake Delight Bars
1. What is a Black Forest Cheesecake Delight Bar?
A Black Forest Cheesecake Delight Bar combines the rich flavors of a classic cheesecake with the indulgent taste of Black Forest cake. It typically features a buttery graham cracker crust, a creamy cheesecake layer, sweetened cherries, and whipped cream, all topped with chocolate shavings or ganache. It’s a delightful no-bake dessert that’s perfect for any occasion.
2. Can I make Black Forest Cheesecake Delight Bars ahead of time?
Yes, you can prepare these bars ahead of time! In fact, they often taste even better after sitting in the fridge for a few hours or overnight. Just store them in an airtight container in the refrigerator to maintain their freshness and texture.
3. Can I use frozen cherries instead of fresh?
Frozen cherries work perfectly for Black Forest Cheesecake Delight Bars. Just make sure to thaw them and drain any excess liquid before using them in your recipe. This will prevent the bars from becoming soggy and ensure they maintain their creamy consistency.
4. How can I make my Black Forest Cheesecake Delight Bars more decadent?
To elevate your Black Forest Cheesecake Delight Bars, try adding a layer of chocolate ganache on top of the cheesecake filling or even drizzling it over the cherries. You can also sprinkle crushed chocolate cookies or nuts over the top for added texture and flavor.
5. Can I substitute the graham cracker crust?
Absolutely! While a graham cracker crust is traditional, you can substitute it with crushed Oreos, chocolate wafer cookies, or even a nut-based crust if you’re looking for a gluten-free option. Each alternative will give the bars a slightly different flavor profile but will still complement the cheesecake filling beautifully.
6. Can I freeze Black Forest Cheesecake Delight Bars?
Yes, these bars freeze wonderfully. Once they’ve set in the fridge, you can cover them tightly and store them in the freezer for up to 2-3 months. To thaw, simply place them in the fridge overnight before serving.
7. What should I serve with Black Forest Cheesecake Delight Bars?
These bars are indulgent enough on their own, but you can serve them with a dollop of whipped cream, extra chocolate shavings, or a drizzle of cherry syrup for added flair. A cup of coffee or a glass of dessert wine can also complement the rich flavors of the cheesecake.
8. How do I prevent my cheesecake layer from cracking?
To prevent cracking, make sure your cheesecake filling is smooth and lump-free before pouring it over the crust. Avoid overmixing the batter, as this can incorporate too much air, leading to cracks during cooling. Additionally, let the bars cool slowly in the refrigerator rather than in a warm environment.
Conclusion
Black Forest Cheesecake Delight Bars are the perfect blend of indulgence, sweetness, and creamy goodness. Whether you’re hosting a special occasion, looking for a new dessert to try, or simply want to satisfy your sweet tooth, these bars offer a delicious twist on the classic Black Forest Cake. With a buttery graham cracker crust, a rich cheesecake filling, and the signature topping of cherries and chocolate, they are a delightful treat that everyone will love.
Not only is this dessert easy to make, but it’s also highly customizable, allowing you to add your personal touch with different crusts, toppings, or even by making it gluten-free. Plus, it’s a no-bake dessert, so it’s perfect for any time of year—whether it’s a hot summer day or during the holidays.
So why not treat yourself and your loved ones to a slice (or two) of these scrumptious Black Forest Cheesecake Delight Bars? They’re sure to be a hit!