
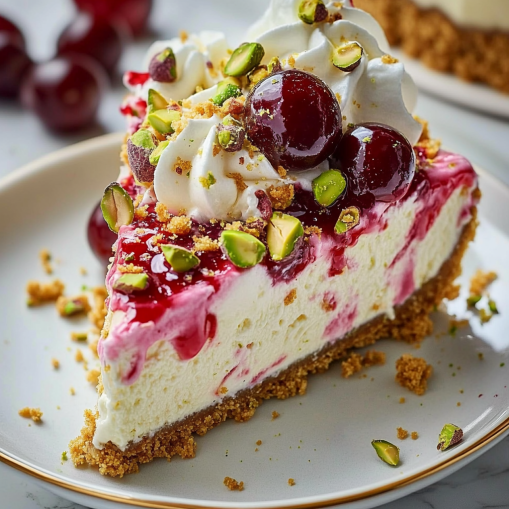
Lemon-Lime Cherry Pistachio Cheesecake Recipe
This cheesecake combines the refreshing zing of lemon and lime with the sweetness of cherry and the nutty richness of pistachios, resulting in a one-of-a-kind dessert that’s as beautiful as it is delicious. Throughout this recipe, I’ll guide you through the ingredients, the preparation process, some tips to ensure a flawless outcome, and creative ways to make this cheesecake your own. Let’s dive in!
Part 1: Ingredients and Preparation
Ingredients You’ll Need
When crafting this lemon-lime cherry pistachio cheesecake, the right blend of fresh and flavorful ingredients is essential. Here’s what you’ll need for each part of the cheesecake.
Crust Ingredients
To make a firm and nutty base, use crushed pistachios and graham crackers combined with melted butter. This crust is unique, adding a delightful crunch to every bite.
Filling Ingredients
The filling combines classic cheesecake elements with a citrus twist. You’ll need cream cheese, sugar, fresh lemon and lime zest, a bit of cherry puree, and a hint of vanilla. Together, these ingredients give the cheesecake its creamy texture and tangy flavor.
Topping Ingredients
For an eye-catching finish, a cherry topping adds a pop of color and a juicy sweetness. Fresh or frozen cherries work well here, and a few extra pistachios on top provide a lovely texture contrast.
How to Prepare Lemon-Lime Cherry Pistachio Cheesecake
This recipe section is designed to create a cheesecake with layers of flavor, texture, and color, making it both visually appealing and utterly delicious. In the next part, we’ll dive into the detailed steps to prepare the crust and filling, so each layer comes out just right.
Part 2: Making the Crust
Step 1: Preparing the Pistachio-Graham Crust
For this cheesecake crust, we’re combining crushed pistachios and graham crackers for a nutty, buttery base. Here’s how to get it just right:
- Grind the Pistachios and Crackers: Pulse the pistachios and graham crackers in a food processor until you get a fine, crumbly mixture. Tip: Ensure there are no large chunks for an even-textured crust.
- Add Butter: Slowly pour melted butter into the mixture. This will help the crust bind together and add a rich flavor. Stir until the crumbs are evenly coated.
- Press into Pan: Firmly press the mixture into the bottom of a springform pan to create an even layer. Use the bottom of a glass or measuring cup to smooth it out, ensuring a compact base.
- Chill the Crust: Place the crust in the fridge for at least 15 minutes. This step helps it set and prevents crumbling when you add the cheesecake filling.
With this crust, you’ll have a solid, flavorful base ready to complement the tangy filling we’ll prepare next.
Part 3: Preparing the Filling
Step 1: Creaming the Base Ingredients
- Blend Cream Cheese and Sugar: In a large mixing bowl, combine softened cream cheese and sugar. Use a mixer on medium speed to beat until smooth and creamy. This step ensures a velvety texture for your cheesecake.
- Add Lemon and Lime Zest: Incorporate the zest of a lemon and a lime for a refreshing citrus punch. This zest will infuse the cheesecake with bright flavors without adding extra liquid.
- Add Eggs One at a Time: Crack in the eggs one by one, mixing after each addition. This method helps to avoid overmixing and creates a light, airy texture.
- Mix in Vanilla and Cherry Puree: Add vanilla extract for depth and cherry puree for a hint of sweetness and color contrast.
Step 2: Pouring the Filling Over the Crust
- Pour and Smooth: Once your filling is fully blended, pour it over the chilled crust. Smooth the top with a spatula for an even surface.
- Bake and Set: Place the cheesecake in the oven and bake at a low temperature to prevent cracking. The filling should be firm around the edges but slightly jiggly in the center when done.
Part 4: Creating the Cherry Topping
Step 1: Preparing the Cherry Mixture
- Heat the Cherries: In a small saucepan, add fresh or frozen cherries along with a bit of sugar and a squeeze of lemon juice. Heat over medium until the cherries start to break down, releasing their juices and creating a thick sauce. Pro tip: Add a pinch of salt to balance the sweetness.
- Thicken with Cornstarch: Dissolve a small amount of cornstarch in water, then stir it into the cherry mixture. This will thicken the sauce to a perfect consistency for topping the cheesecake.
- Simmer and Cool: Let the cherry topping simmer until it’s thick enough to coat the back of a spoon, then remove it from heat and allow it to cool. Cooling helps the sauce set and ensures it won’t slide off the cheesecake.
Step 2: Spreading the Topping
- Evenly Spread Over Cheesecake: Once the cheesecake is fully cooled and the cherry topping has set, spoon the cherry mixture over the top, spreading it evenly. The vibrant cherry red against the creamy cheesecake creates a beautiful contrast.
- Sprinkle Chopped Pistachios: For added texture and a pop of color, sprinkle chopped pistachios over the cherry topping.
Part 5: Making the Lemon-Lime Whipped Cream
To complement the richness of the cheesecake and the sweetness of the cherry topping, a light, citrus-infused whipped cream adds an airy finishing touch.
Step 1: Whipping the Cream
- Combine Ingredients: In a chilled mixing bowl, combine cold heavy cream with a touch of powdered sugar, lemon zest, and lime zest. This zesty addition will enhance the citrus flavors already in the cheesecake, giving it a bright, refreshing note.
- Whip to Soft Peaks: Use a mixer on medium-high speed to whip the cream mixture until soft peaks form. Be cautious not to overwhip, as it can become too thick. The texture should be light and airy, perfect for spooning or piping.
Step 2: Decorating the Cheesecake
- Pipe or Spoon on Top: Gently spoon or pipe the lemon-lime whipped cream around the edges or in dollops on top of the cherry layer. This creamy layer adds a lovely contrast and a bit of flair to the finished dessert.
- Garnish with Additional Zest and Pistachios: For a final decorative touch, sprinkle a little more lemon and lime zest over the whipped cream and garnish with a few whole or chopped pistachios. This garnish highlights the cheesecake’s key flavors and gives it a beautiful presentation.
Now, your Lemon-Lime Cherry Pistachio Cheesecake is ready to impress! With layers of flavor and a visually striking presentation, this cheesecake is sure to become a favorite.
Part 6: Tips for Serving and Storing Your Cheesecake
Serving Suggestions
- Chill Before Serving: Once your cheesecake is assembled with all layers, refrigerate it for at least 4 hours or ideally overnight. This chilling time allows the flavors to meld and the cheesecake to set to the perfect texture.
- Slice with a Warm Knife: For clean, professional slices, dip a knife in warm water and wipe it dry before each cut. This technique prevents the filling from sticking to the blade, giving you a smooth slice every time.
- Garnish Just Before Serving: If you want to add a little extra lemon or lime zest, fresh cherries, or a sprinkle of pistachios as garnish, do so right before serving. This adds a fresh, vibrant look and a bit of extra flavor.
Storing Leftovers
- Refrigeration: Keep leftover cheesecake in an airtight container in the refrigerator for up to 5 days. This helps maintain the texture and prevents it from absorbing any other odors from the fridge.
- Freezing: For longer storage, freeze individual slices wrapped in plastic wrap and foil, then place them in a freezer-safe container. This cheesecake can be frozen for up to 2 months. To serve, thaw in the refrigerator overnight.
With these tips, you’ll ensure that each slice of your Lemon-Lime Cherry Pistachio Cheesecake is as fresh and flavorful as the first. Enjoy!
Part 7: Frequently Asked Questions (FAQs)
This section covers some common questions that readers might have about making and serving the Lemon-Lime Cherry Pistachio Cheesecake.
1. Can I Make This Cheesecake in Advance?
Yes! This cheesecake is ideal for making ahead. Prepare the crust and filling the day before, then add the cherry topping and whipped cream just before serving. This gives the cheesecake time to fully set and allows the flavors to meld beautifully.
2. How Do I Keep My Cheesecake from Cracking?
Cracks often form due to overmixing, overbaking, or sudden temperature changes. To prevent this, mix on low speed, bake with a water bath, and cool the cheesecake gradually by leaving it in the oven with the door slightly open for 30 minutes after baking. This gentle process reduces the chances of cracking.
3. Can I Use Other Nuts Instead of Pistachios?
Absolutely. While pistachios add a unique flavor and color, other nuts like almonds, pecans, or walnuts can work as well. Just ensure they’re finely chopped for an even distribution and complementary texture.
4. Is It Possible to Make a Dairy-Free Version?
Yes! Swap the cream cheese with a plant-based cream cheese alternative and use coconut or almond milk in place of heavy cream. Note that the texture may vary slightly, but the overall flavor should remain delicious.
5. Can I Substitute Fresh Cherries with Canned or Frozen?
Yes, both canned and frozen cherries can be used. If using canned, be sure to drain and rinse to remove excess syrup. For frozen cherries, let them thaw and drain before using to avoid excess liquid in your topping.
With these FAQs, you’ll be ready to handle any questions that come up while preparing or serving your Lemon-Lime Cherry Pistachio Cheesecake. Enjoy the flavors and make it your own!
This concludes the article. You’ve now been walked through creating a Lemon-Lime Cherry Pistachio Cheesecake, from the preparation of the crust to serving tips and FAQs.
If you’re looking to try out this delicious dessert, remember to check out any additional resources you may need for more insights, and feel free to make adjustments to personalize it to your taste. Enjoy the process and the tasty result!