
The Deliciousness of Strawberry Earthquake Cake
When you think of cakes, you probably imagine something sweet, light, and fluffy. But what if I told you there’s a cake that’s not only delicious but also visually intriguing and bursting with flavor? Enter the Strawberry Earthquake Cake, a dessert that delivers the best of both worlds: gooey cream cheese filling and a striking appearance with cracks that make it as fun to look at as it is to eat.
In this guide, you’ll learn everything there is to know about creating this incredibly indulgent cake—from the ingredients and step-by-step instructions to tips for making it just right. Whether you’re baking for a special occasion or simply craving a dessert that stands out, the Strawberry Earthquake Cake is sure to leave everyone asking for more. Let’s dive in and explore why this cake is taking the dessert world by storm!
Now, let’s get started with the first section of our guide.
What is Strawberry Earthquake Cake?

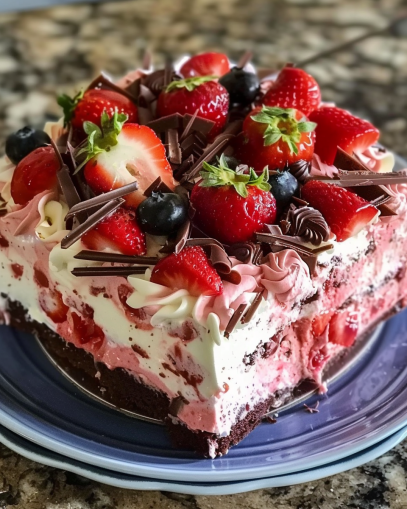
So, what exactly is a Strawberry Earthquake Cake? Well, it’s not just a cake; it’s a fun dessert with an irresistible twist. The name comes from its appearance—the cake cracks as it bakes, giving it a “shaky” look that’s visually stunning and, dare we say, a bit mysterious. But those cracks aren’t just for show. They come from the rich, gooey cream cheese filling that melts into the cake while it bakes, creating an irresistible combination of textures: moist cake with a tangy, creamy surprise in every bite.
What makes this cake truly unique is the flavor combo. Strawberry cake mix is the base, giving the dessert a sweet, fruity flavor that’s complemented by the creamy filling. As the cake bakes, the cream cheese filling seeps through, forming beautiful cracks across the surface (hence the “earthquake” effect). Trust me, this dessert is a crowd-pleaser that will not only taste amazing but also look stunning on any dessert table.
That’s a little introduction to the world of Strawberry Earthquake Cake. Now that you know what it is, let’s explore the key ingredients that make this dessert so irresistible!
Key Ingredients for Strawberry Earthquake Cake
Before you get your baking gloves on, it’s important to know what makes up the Strawberry Earthquake Cake. Luckily, it’s not a complicated list of ingredients. In fact, most of them are probably already in your kitchen! Here’s what you’ll need to make this cake a delicious reality.
Main Ingredients for the Cake:
- Strawberry Cake Mix
The foundation of this cake is the strawberry cake mix. It’s the shortcut to getting that perfect texture and vibrant strawberry flavor. You could make a cake from scratch, of course, but the box mix ensures the cake comes out moist and fluffy every time. Plus, it gives you that classic strawberry taste that pairs perfectly with the creamy filling. If you’re in a pinch, this is a total lifesaver. - Vegetable Oil & Eggs
These two ingredients are what make your cake soft and moist. The oil helps keep the cake from being dry, while the eggs provide structure and richness. Together, they give you that melt-in-your-mouth softness that makes you want to grab another slice. - Vanilla Extract & Water
A teaspoon of vanilla extract brings depth to the cake’s flavor, while water thins out the batter to the right consistency. The vanilla enhances the strawberry flavor, rounding it out and making it a bit more complex. - Optional Add-ins (Chocolate Chips, Nuts, Coconut)
While not essential, these add-ins can take your Strawberry Earthquake Cake to the next level. Want a bit of crunch? Toss in some chopped nuts like walnuts or pecans. Love a bit of sweetness and texture? Shredded coconut is a great addition. If you’re a chocolate lover, chocolate chips will melt beautifully into the cake as it bakes, giving you pockets of gooey chocolate goodness.
Cream Cheese Filling Ingredients:
- Cream Cheese
This is the secret to the cake’s creamy and indulgent filling. You want to use full-fat cream cheese for the richest flavor and best texture. The cream cheese creates that gooey, melty filling that seeps into the cake, creating those signature cracks. - Butter & Powdered Sugar
The butter adds richness and helps smooth out the cream cheese filling. Powdered sugar ensures that the filling is sweet and easy to spread. Combined, these two create the perfect balance of sweetness and creaminess. - Vanilla Extract
Just like in the cake batter, vanilla extract is a must in the filling. It adds a subtle flavor that complements the tanginess of the cream cheese and sweetness of the sugar.
These ingredients are what bring the Strawberry Earthquake Cake to life. Now that you know what goes into it, let’s dive into the step-by-step process of baking this decadent treat!
Step-by-Step Instructions for Making Strawberry Earthquake Cake
Now that we’ve covered the ingredients, it’s time to roll up our sleeves and get baking! Don’t worry, making this Strawberry Earthquake Cake is pretty simple—especially with these clear, easy-to-follow instructions. Just follow the steps, and you’ll have a cake that’s sure to impress!
1. Preparing the Oven and Baking Pan
First things first, preheat your oven to 350°F (175°C). This ensures that the cake bakes evenly and comes out perfectly. While the oven is heating up, prepare your 9×13-inch baking pan. Grease it lightly with butter or cooking spray, then dust it with a bit of flour to ensure the cake doesn’t stick. Alternatively, you can line the pan with parchment paper for easy removal after baking.
2. Making the Cake Batter
Now for the fun part—mixing the cake batter! In a large mixing bowl, combine your strawberry cake mix, vegetable oil, eggs, water, and vanilla extract. Use a hand mixer or whisk to blend the ingredients until smooth. Be careful not to overmix, as this can make the cake dense instead of light and fluffy. Once everything is incorporated and you have a smooth batter, pour it into the prepared pan. Spread it out evenly, making sure the batter covers the bottom of the pan.
3. Creating the Cream Cheese Filling
Next, let’s make the cream cheese filling that gives this cake its signature gooey texture. In a medium bowl, beat the cream cheese and butter together until smooth using an electric mixer. Add in the powdered sugar and vanilla extract, and mix until the filling is creamy and well-combined. It should have a thick but smooth consistency.
Spoon dollops of this cream cheese filling over the cake batter, spacing them out evenly. Don’t worry about spreading the filling—just plop it in random places. As the cake bakes, the filling will spread out naturally, creating those beautiful cracks across the surface.
4. Assembling the Cake
Once you’ve placed the cream cheese filling in the batter, pour the remaining cake batter over the top of the filling. Again, don’t worry about spreading it or making it perfect. The magic happens when the cake bakes, and the cream cheese filling will create those delicious cracks on top. For an added touch, you can sprinkle chopped nuts, shredded coconut, or chocolate chips on top for a little extra texture and flavor. This step is optional but highly recommended for that extra layer of goodness.
5. Baking the Cake
Place the pan in your preheated oven and bake for 40-45 minutes. You’ll notice the cake will start to puff up, and cracks will begin to form as it bakes—this is the “earthquake” effect! To test for doneness, insert a toothpick into the center of the cake. If it comes out clean or with a few moist crumbs (but not wet batter), your cake is ready. Be careful not to overbake, as this can cause the cake to dry out.
6. Serving the Cake
Once the cake is done, remove it from the oven and allow it to cool for about 10-15 minutes. Letting it cool slightly will help the flavors settle and make it easier to slice. When ready, cut it into squares, and if desired, drizzle with strawberry jam or sprinkle a bit of powdered sugar on top for a touch of sweetness and visual appeal.
That’s it! Your Strawberry Earthquake Cake is ready to be devoured. The cake will have a beautiful crackled top with gooey cream cheese filling, making each slice a perfect balance of soft, sweet, and tangy flavors.
Why Is It Called an “Earthquake Cake”?
So, you might be wondering—why earthquake? It’s not because it’s a cake designed to survive the shaking of a natural disaster, but because of the unique, crackled appearance it gets while baking. The cracks that form on top of the cake are what give it the name “Earthquake Cake.”
As the cream cheese filling bakes into the strawberry cake mix, it starts to sink and spread, creating fissures that look like the aftermath of an earthquake. These cracks are the cake’s signature feature, making it look as if the top of the cake was… well, shaken up a bit.
But those cracks aren’t just for looks—they also create the most mouth-watering contrast between the dense, tangy cream cheese filling and the soft, fluffy cake. When you take a bite, you get a combination of textures: the creamy filling melts in your mouth, while the moist cake adds a satisfying bite. The cracked top might be one of the most visually interesting parts of this cake, and it’s definitely what makes it stand out on any dessert table.
So, while the name might sound dramatic, it’s totally fitting for a cake that’s as delicious as it is visually stunning.
In the next part, I’ll share some handy tips to help you make the perfect Strawberry Earthquake Cake—so your cake is guaranteed to be a showstopper! Stay tuned!
Tips for the Perfect Strawberry Earthquake Cake
Making a Strawberry Earthquake Cake sounds pretty straightforward, but there are a few insider tips that will take your baking game to the next level. Let’s ensure you make a cake that’s not only gorgeous but also perfectly moist, creamy, and bursting with flavor. Here are some essential tips:
1. Use Fresh Ingredients
This might seem like a no-brainer, but using fresh ingredients really makes a difference, especially when it comes to the cream cheese filling. Room temperature cream cheese and butter will blend better and result in a smoother, more creamy filling. If the cream cheese is too cold, you’ll end up with lumps that are hard to mix out. Similarly, fresh eggs ensure the cake bakes evenly and doesn’t become too dense. So, make sure to take your ingredients out ahead of time to bring them to room temperature before you start baking.
2. Don’t Overmix the Batter
It’s tempting to mix the batter until it’s perfectly smooth, but overmixing can cause the cake to be dense and heavy. For a light and airy cake, mix only until the ingredients are just combined. Lumps in the batter are perfectly fine! The cake will still turn out moist and fluffy.
3. Perfecting the Cream Cheese Filling
One of the main attractions of this cake is the creamy filling that oozes into the cake, creating the iconic cracks. To ensure your filling is smooth and doesn’t spill out of the cake while baking, make sure your cream cheese filling isn’t too runny. Beat the cream cheese and butter until soft and creamy before adding the powdered sugar. Spoon the filling in dollops over the batter instead of spreading it out, as it will naturally spread during baking. Don’t worry if it’s uneven—it all works out in the end!
4. Bake with Care
It’s easy to get distracted while baking, but the key to a perfect Strawberry Earthquake Cake lies in careful baking. Keep an eye on your cake as it bakes, especially during the last 10 minutes. The cracks should start to form as it bakes, but you don’t want the cake to be overdone. Test the cake for doneness by inserting a toothpick in the center—it should come out with a few moist crumbs but not wet batter. If it comes out clean, the cake’s likely overbaked, so pull it out ASAP!
5. Let the Cake Cool Properly
It can be tempting to dig into that beautiful, cracked cake right out of the oven, but patience is key. Let the cake cool for about 10-15 minutes before slicing it. This gives the cream cheese filling time to settle and thicken slightly, making it easier to cut clean slices. If you try to cut the cake while it’s still too hot, you risk making a mess of that perfect crackling top.
6. Serving Suggestions
Once your cake has cooled and you’ve cut it into pieces, you can take it over the top with some extra touches! For extra sweetness and flavor, try drizzling a little strawberry jam or preserves over the top. You can also sprinkle powdered sugar to give it that perfect finishing touch. Want to make it even more indulgent? Add a scoop of vanilla ice cream or a dollop of whipped cream to each slice. Trust me, it’ll take the cake from delicious to decadent.
These tips will help you make a perfectly moist, creamy, and flavorful Strawberry Earthquake Cake every time. Now that you’ve mastered the basics, let’s dive into some fun variations you can try!
Next, I’ll walk you through a few creative variations on the classic Strawberry Earthquake Cake that’ll keep your taste buds guessing! Stay tuned for more tasty ideas!
Variations of Strawberry Earthquake Cake
The Strawberry Earthquake Cake is already delicious on its own, but that doesn’t mean you can’t have a little fun with it! There are several ways to put your own spin on this classic dessert, whether you’re looking to switch up the flavor or accommodate dietary restrictions. Here are some creative variations to try!
1. Lemon Strawberry Earthquake Cake
If you love a bit of zest in your desserts, why not try a lemon twist on this already fruity cake? Simply add lemon zest to the cake batter along with a little fresh lemon juice for that perfect citrusy balance. The tartness of the lemon will pair wonderfully with the sweet strawberry cake mix and creamy filling. For extra flavor, you can even swirl in some lemon curd into the cream cheese filling before baking—creating an even more dynamic flavor profile!
2. Chocolate Strawberry Earthquake Cake
For all the chocolate lovers out there, this variation is a must-try. Add cocoa powder (about ¼ cup) to your strawberry cake mix to create a chocolate-strawberry combo that’s simply irresistible. The deep, rich flavor of chocolate enhances the strawberry while still allowing the cream cheese filling to shine through. You can also toss in chocolate chips to the batter for some added gooeyness. Trust me, this combo is a chocolate-and-strawberry lover’s dream.
3. Vegan Strawberry Earthquake Cake
If you’re vegan or just want to make a plant-based version, you can easily swap out the animal products in the cake and cream cheese filling. For the cake, replace the eggs with flax eggs or unsweetened applesauce. You can also swap the butter for vegan butter and use vegan cream cheese in the filling. The key is to find the right vegan substitutes to keep the texture moist and creamy. Even with these swaps, your cake will still have that beautiful crackled top and indulgent filling.
4. Gluten-Free Strawberry Earthquake Cake
If you’re avoiding gluten, this recipe can be easily adapted. Simply use a gluten-free cake mix (there are plenty of great ones available) and make sure your cream cheese and butter are gluten-free (most are, but it’s always worth checking). You can also add a little almond flour or gluten-free all-purpose flour to help improve the texture if needed. The result will be a moist, fluffy cake with all the same delicious cracks and creamy filling—without the gluten!
These variations prove that the Strawberry Earthquake Cake is a versatile dessert that can be customized to fit all tastes and dietary preferences. Whether you stick to the classic recipe or experiment with new flavors, you’re guaranteed a show-stopping dessert that’s as fun to make as it is to eat.
In the next part, I’ll walk you through some common mistakes people make when baking this cake and how to avoid them. Stay tuned!
Common Mistakes to Avoid When Making Strawberry Earthquake Cake
Even though the Strawberry Earthquake Cake is relatively easy to make, there are a few common pitfalls that can turn your dessert from spectacular to… well, less than stellar. Don’t worry though! I’ve got you covered. Here are some mistakes to avoid and tips to make sure your cake turns out perfectly every time.
1. Overmixing the Batter
One of the most common mistakes when baking any cake is overmixing the batter. It’s tempting to keep stirring to get a smooth consistency, but overmixing can lead to a dense cake rather than a light and fluffy one. To avoid this, mix the ingredients just until combined. A few lumps are totally okay!
2. Using Cold Cream Cheese
Your cream cheese filling is the heart of this cake, and using cold cream cheese is a surefire way to ruin it. When the cream cheese is too cold, it will be hard to mix, leaving you with a lumpy, uneven filling. For a smooth and creamy texture, always soften your cream cheese and butter to room temperature before making the filling. This ensures it mixes in perfectly with the powdered sugar for that perfect, gooey filling.
3. Not Checking the Cake’s Doneness
It’s easy to set a timer and walk away, but don’t just assume your cake is done because it’s been in the oven for 45 minutes. Ovens vary, and the Strawberry Earthquake Cake can be tricky when it comes to knowing the exact moment to pull it out. Be sure to test with a toothpick or fork to check if it’s done. If the toothpick comes out with wet batter, it’s not ready yet. If there are just a few moist crumbs, you’ve hit the sweet spot!
4. Not Letting the Cake Cool Enough
Patience is key! If you try to slice the Strawberry Earthquake Cake too soon, the cream cheese filling may spill out and make a mess. Let it cool for at least 10-15 minutes after baking before cutting. This will give the filling time to set and make the cake easier to slice.
5. Using the Wrong Size Pan
This cake recipe calls for a 9×13-inch pan. Using a smaller pan can cause the cake to overflow, while a larger pan will make the cake too thin, potentially drying it out. Stick to the recommended pan size to get the perfect balance of moist cake and creamy filling.
By avoiding these common mistakes, you’ll be well on your way to baking the perfect Strawberry Earthquake Cake that’s sure to impress everyone at the table.
In the next section, I’ll answer some frequently asked questions about this cake. This will help clear up any remaining doubts you may have. Stay tuned!
Frequently Asked Questions (FAQs) About Strawberry Earthquake Cake
As you dive into the world of baking your very own Strawberry Earthquake Cake, there are likely a few lingering questions on your mind. Don’t worry—I’ve got answers to the most frequently asked questions about this delicious dessert. Let’s clear up some of the confusion and give you the confidence to bake your perfect cake!
1. Can I Use Fresh Strawberries Instead of Cake Mix?
While the classic recipe calls for strawberry cake mix for convenience and flavor consistency, you can use fresh strawberries if you prefer a more natural approach. To do this, you’d need to puree the strawberries and use them in place of the water in the cake batter. However, the texture might differ slightly, and you may need to adjust the baking time. Keep in mind that cake mix ensures the best results in terms of texture and moistness.
2. Can I Make This Cake in Advance?
Absolutely! You can make your Strawberry Earthquake Cake a day or two ahead of time, which is perfect for parties or gatherings. Simply store it in an airtight container at room temperature for up to 2 days, or refrigerate it for up to a week. The flavors will actually improve as they sit. Just make sure to bring it to room temperature before serving for the best taste and texture.
3. How Do I Store Leftover Strawberry Earthquake Cake?
If you’re lucky enough to have leftovers (which is rare!), you can store your cake in an airtight container to keep it fresh. Room temperature storage is fine for 1-2 days. After that, it’s best to refrigerate it, especially because of the cream cheese filling. It will stay fresh in the fridge for up to a week. Just make sure to let it come to room temperature before serving again for the best texture.
4. Can I Freeze Strawberry Earthquake Cake?
Yes, you can freeze this cake, but there are a few things to keep in mind. To freeze, wrap the cake tightly in plastic wrap and then in aluminum foil to prevent freezer burn. It will stay good in the freezer for up to 3 months. When ready to serve, allow the cake to thaw overnight in the fridge, then bring it to room temperature before cutting and serving. This will ensure the best flavor and texture.
5. Why Are the Cracks in the Cake So Important?
The cracks in the Strawberry Earthquake Cake are what make it so visually appealing and delicious! These cracks form when the cream cheese filling spreads out during baking. Not only do they create that signature “earthquake” look, but they also allow the tangy cream cheese filling to mix with the strawberry cake, creating an irresistible balance of textures and flavors in every bite.
6. Can I Make Strawberry Earthquake Cake Without the Cream Cheese Filling?
If you’re not a fan of cream cheese or want a lighter version, you could replace the cream cheese filling with a whipped cream or a simple vanilla pudding filling. However, keep in mind that the creamy, tangy filling is a key component of the cake’s signature flavor and texture. So, while you can try alternatives, the traditional cream cheese filling is what makes this cake so indulgent!
By now, you should have a good grasp of how to make the perfect Strawberry Earthquake Cake and avoid any common pitfalls. But if you ever have any more questions, don’t hesitate to reach out or experiment with new ingredients to make this cake your own!
In the next section, I’ll wrap everything up and leave you with some final tips and serving suggestions to make your Strawberry Earthquake Cake experience even more unforgettable. Stay tuned!
Final Tips and Serving Suggestions for Strawberry Earthquake Cake
Now that you’re fully equipped to make the perfect Strawberry Earthquake Cake, let’s wrap things up with a few final tips and serving suggestions to ensure this cake is a showstopper every time you make it!
1. Serve with a Sweet Drizzle or Toppings
While the Strawberry Earthquake Cake is delicious all on its own, there are some extra touches you can add to elevate the experience. Here are a few ideas:
- Strawberry sauce or jam: For an extra burst of strawberry flavor, drizzle some strawberry sauce over each slice. You can even use strawberry preserves or fresh strawberries for a garnish.
- Whipped cream: A dollop of fresh whipped cream adds a light, airy touch to balance out the richness of the cream cheese filling. Alternatively, you can use vanilla ice cream for an indulgent treat!
- Chocolate drizzle: For a little extra decadence, try drizzling some melted chocolate on top of each slice or around the edges of the cake.
2. Pair with a Drink
Pair your Strawberry Earthquake Cake with the perfect beverage for a truly satisfying dessert experience. Here are some great drink options that complement the sweet and tangy flavors of the cake:
- Coffee or Espresso: The rich bitterness of coffee or a shot of espresso pairs beautifully with the sweetness of the cake and balances the richness of the cream cheese filling.
- Iced Tea: For a lighter, refreshing drink, iced tea (either sweetened or unsweetened) provides a nice contrast to the dessert’s richness.
- Sparkling Water: If you’re looking for a palate cleanser, sparkling water with a slice of lemon or lime can be a great option to keep the taste buds fresh between bites.
3. Perfect for Any Occasion
Whether you’re baking for a birthday party, a holiday gathering, or a casual afternoon tea, the Strawberry Earthquake Cake is perfect for any occasion. It’s simple enough to make when you’re craving something sweet but impressive enough to serve at a more formal event.
If you’re looking to make it even more festive, try adding a colorful sprinkle or some edible glitter on top. This will give the cake a bit of sparkle and extra fun appeal—perfect for celebrations like Valentine’s Day or Mother’s Day.
4. Don’t Forget the Leftovers
After all the compliments and rave reviews, you’ll likely have a bit of cake left over. Make sure to store it properly so you can enjoy it later. Remember, the cake keeps well in the fridge for up to a week and can even be frozen for longer storage. If you’re freezing it, be sure to wrap it tightly in plastic wrap and foil to preserve its moisture and texture.
Final Thoughts
There you have it—the ultimate guide to baking and serving the perfect Strawberry Earthquake Cake. Whether you stick with the classic recipe or try one of the fun variations, you’re sure to create a dessert that’s as delightful to eat as it is to look at. So, gather your ingredients, get baking, and enjoy every delicious bite of this stunning and indulgent treat!
I hope this guide has helped you feel confident in your ability to create a truly show-stopping Strawberry Earthquake Cake. Happy baking!
Conclusion and Recap of the Strawberry Earthquake Cake
In this comprehensive guide, we’ve explored everything you need to know to make the perfect Strawberry Earthquake Cake—from ingredients and step-by-step instructions to tips, variations, and troubleshooting common mistakes. Whether you’re a seasoned baker or a newbie, this cake is simple yet impressive, and it’s bound to be a hit at any gathering.