
In this article, we’ll dive into everything you need to know about Orange Creamsicle Cake—from its ingredients and step-by-step instructions to decorating tips and variations. So, let’s get started with the first section: What Makes Orange Creamsicle Cake Special?
1. What Makes Orange Creamsicle Cake Special?

If you’ve ever had an orange creamsicle—that delightful ice cream bar with orange on the outside and vanilla cream on the inside—you already know how special this combination is. But when you take that flavor and turn it into a cake, you get something truly extraordinary.
The Flavor Combination:
What makes the Orange Creamsicle Cake stand out is the perfect pairing of orange zest and vanilla cream. The tanginess of fresh orange juice and zest complements the sweet, smooth richness of the vanilla frosting. Together, these flavors transport you to a summer day with every bite—like the classic creamsicle popsicle but in cake form.
Texture and Consistency:
The texture is another thing that sets this cake apart. The cake itself is light, airy, and moist, making it a joy to eat. When paired with the creamy frosting, it creates the perfect melt-in-your-mouth experience. Every slice is a balance of soft cake, smooth frosting, and a refreshing orange burst.
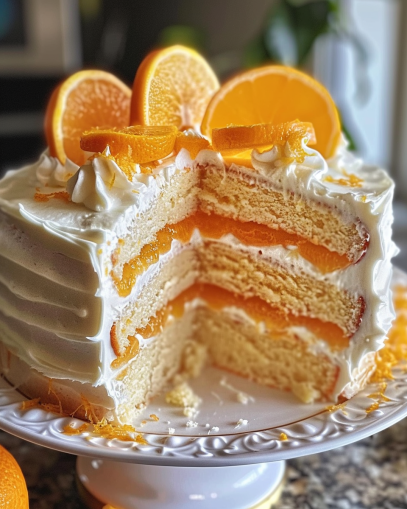
Visual Appeal:
Of course, presentation matters too! The vibrant orange color of the cake is absolutely gorgeous, and it’s topped with a luscious white vanilla frosting that creates a beautiful contrast. Whether you’re serving this cake at a party, a picnic, or just as an everyday treat, it’s a showstopper.
When you take a bite of Orange Creamsicle Cake, you’re not just indulging in a delicious dessert. You’re enjoying a slice of nostalgia wrapped in a fluffy cake with a creamy finish. Now that you know why this cake is so special, let’s move on to the next section: the key ingredients you’ll need to make this masterpiece at home.
2. Key Ingredients for Orange Creamsicle Cake
When it comes to making the perfect Orange Creamsicle Cake, the key is using fresh ingredients that bring out the flavors of orange and vanilla in the best way possible. While the ingredients are simple, it’s the combination of zesty orange and smooth vanilla that makes this cake such a standout dessert.
Cake Ingredients:
- Flour – All-purpose flour is your go-to base here, providing structure and lightness to the cake. Make sure to sift it to avoid any lumps.
- Sugar – Granulated white sugar gives the cake the sweetness it needs to balance out the tang of the orange. It also helps create a moist texture.
- Eggs – Eggs are essential for binding the ingredients together and contributing to the cake’s soft, airy texture.
- Butter – Unsalted butter adds richness and moisture. It’s important to bring it to room temperature to ensure it blends smoothly with the other ingredients.
- Vanilla Extract – A splash of pure vanilla extract enhances the creamy flavor of the frosting and adds depth to the cake.
- Orange Juice – Freshly squeezed orange juice is key for bringing out the tangy, citrusy flavor in the cake.
- Orange Zest – The zest of an orange is the secret weapon to intensifying that fresh, aromatic orange flavor. You can’t skip this!
Creamsicle Frosting:
- Heavy Cream – For a rich and fluffy frosting, heavy cream is a must. It creates the smooth texture that pairs perfectly with the cake.
- Powdered Sugar – This is the magic ingredient that helps thicken the frosting while giving it a smooth, melt-in-your-mouth finish.
- Vanilla Extract – Adding just a hint of vanilla makes the frosting more fragrant and complements the orange flavor.
- Orange Zest – A little more zest goes into the frosting to maintain that bright orange flavor.
- Orange Juice – A few tablespoons of orange juice will give the frosting the perfect consistency and bring a bit of extra tang.
Optional Add-ins and Variations:
- Orange Liqueur – For a grown-up twist, you could add a splash of orange liqueur, like Cointreau, to the cake batter or frosting.
- Candied Orange Peel – Want to take it to the next level? Adding some finely chopped candied orange peel as a garnish on top of the cake adds a lovely texture and a pop of extra flavor.
These ingredients create the base for your Orange Creamsicle Cake. Whether you stick to the basics or experiment with some of the optional add-ins, the result will always be a delicious and memorable cake that’s perfect for any occasion.
Now that we’ve covered the ingredients, it’s time to move on to the fun part—making the cake from scratch! In the next section, I’ll walk you through how to mix, bake, and frost your very own Orange Creamsicle Cake.
3. How to Make Orange Creamsicle Cake from Scratch
Now that you’ve gathered your ingredients, it’s time to roll up your sleeves and start baking! Making an Orange Creamsicle Cake from scratch is easier than it sounds, and the end result is totally worth it. I’ll guide you through the process step by step, from mixing the cake batter to frosting it to perfection. Let’s get started!
Step 1: Preparing the Cake Batter
- Preheat Your Oven: Set your oven to 350°F (175°C) and grease and flour two 9-inch round cake pans. You could also line them with parchment paper for an easy release once the cakes are baked.
- Cream the Butter and Sugar: In a large bowl, beat the unsalted butter and sugar together with an electric mixer on medium speed until the mixture is light and fluffy. This step is important because it incorporates air into the batter, giving your cake its light texture.
- Add the Eggs: Add the eggs one at a time, beating well after each addition. If you want a moist cake, it’s important to mix the eggs thoroughly but not too aggressively—just until combined.
- Add the Vanilla and Orange Zest: Stir in the vanilla extract and orange zest. The zest will infuse the batter with an incredible citrus aroma and flavor, making every bite burst with orange goodness.
- Alternate Dry and Wet Ingredients: In a separate bowl, whisk together the flour and a pinch of salt. Slowly add the dry ingredients to the wet mixture, alternating with the orange juice. Start and finish with the dry ingredients. Mix gently to avoid overworking the batter. The goal is to keep it light and airy.
- Mix Until Smooth: Once the ingredients are combined, beat the batter on low speed for about 30 seconds until it’s smooth. You should have a thick but pourable batter with a lovely orange hue.
Step 2: Baking the Cake
Pour the batter evenly into the prepared cake pans, smoothing the tops with a spatula. Bake for 25 to 30 minutes, or until a toothpick inserted into the center comes out clean. Every oven is different, so start checking around the 25-minute mark.
Step 3: Cooling the Cakes
Once baked, remove the cakes from the oven and let them cool in the pans for about 10 minutes. Then, transfer the cakes to a wire rack to cool completely. This step is essential, as frosting a warm cake can cause the frosting to melt and slide off, leaving a sticky mess.
Step 4: Preparing the Creamsicle Frosting
While the cakes are cooling, you can make the frosting.
- Whisk the Heavy Cream: In a large bowl, beat the heavy cream until it thickens and soft peaks form. This usually takes about 2-3 minutes with an electric mixer.
- Add Powdered Sugar: Gradually add the powdered sugar, about 1/2 cup at a time, beating until the frosting becomes thick and fluffy.
- Stir in Vanilla and Orange Juice: Add the vanilla extract and orange juice. Continue mixing until smooth and spreadable. If you find the frosting a bit too runny, add a little more powdered sugar until you reach your desired consistency.
- Add More Orange Zest: Fold in the extra orange zest for that perfect finishing touch of fresh citrus flavor.
Step 5: Frosting the Cake
Once the cakes have completely cooled, it’s time to frost!
- Place the first cake layer on your serving platter. Spread a generous amount of frosting over the top, smoothing it evenly with a spatula.
- Add the second cake layer on top and gently press it down to adhere.
- Frost the top and sides of the cake, making sure the frosting is smooth and even. You can use a bench scraper or spatula to create a sleek, professional look.
- For extra flair, you can decorate the top with additional orange zest, candied orange peel, or a sprinkle of edible glitter for a fun, festive look.
Optional Garnishes:
For an extra touch, you can decorate the sides of the cake with finely chopped candied orange peel or pipe additional frosting rosettes around the edges. This not only enhances the flavor but adds a beautiful visual appeal.
There you have it! You’ve just baked and frosted a delicious Orange Creamsicle Cake. It’s ready to be enjoyed. In the next section, we’ll share some tips and tricks to make sure your cake comes out perfectly every time. Plus, we’ll troubleshoot any potential issues, so nothing stands in your way of creating the best cake possible.
4. Tips for Perfecting Orange Creamsicle Cake
Now that you’ve baked and frosted your Orange Creamsicle Cake, there are a few tricks and tips you can use to ensure it turns out perfectly every time. Whether you’re aiming for a flawless texture, the right balance of flavors, or just want to avoid common baking mistakes, these tips will help you take your cake to the next level.
1. Using Fresh vs. Bottled Orange Juice
The juice you choose can really impact the flavor of your cake. While bottled orange juice might seem like an easy shortcut, using fresh, juicy oranges will give your cake a much brighter, more natural flavor. The freshness of the juice adds a vibrant, tangy quality that really shines through in the cake, making it taste like a burst of summer.
If you must use bottled juice, make sure it’s 100% pure orange juice without added sugars or artificial flavors. For the best results, always opt for fresh when you can.
2. Balancing Sweetness and Tartness
One of the key elements of an Orange Creamsicle Cake is the delicate balance between the tartness of the orange juice and the sweetness of the frosting. Here’s a trick: If you feel the cake is too tangy, you can always reduce the amount of orange zest or juice slightly to adjust the balance.
For the frosting, add just enough powdered sugar to achieve the perfect sweetness without overpowering the orange flavor. If you find it too sweet, a tiny bit more orange juice can help to cut the richness and bring back that citrus zing.
3. Ensuring a Moist, Light Cake
If you want your cake to be light and fluffy, there are a couple of key tips to follow:
- Don’t Overmix the Batter: After adding the flour, mix just until the ingredients are combined. Overmixing can cause the cake to be dense and tough.
- Room Temperature Ingredients: Make sure your butter and eggs are at room temperature before you begin. This ensures they mix smoothly and trap air, creating a fluffier batter.
- Check Your Oven Temperature: Baking times can vary, but an oven thermometer is an essential tool. Sometimes, ovens run hotter or cooler than their settings, so having a thermometer ensures you’re baking at the right temperature for the right amount of time. A cake that’s baked at the correct temperature will come out light and tender.
4. Troubleshooting Common Cake Issues
Let’s face it: sometimes things go wrong! Here are some common issues you might encounter and how to fix them:
- Cake Sinking in the Middle: This is often caused by overmixing the batter, underbaking, or opening the oven door too early. To avoid this, make sure your oven is fully preheated, and resist opening the door during the first 20 minutes of baking.
- Dry Cake: A dry cake can happen if the batter is overmixed or if it’s baked too long. Check your cake with a toothpick around the 25-minute mark to prevent overbaking. If it comes out clean, your cake is done!
- Frosting Sliding Off the Cake: This is a common issue when frosting a warm cake. Make sure your cakes are completely cool before frosting them. If you’re in a hurry, place the cake in the fridge for 30 minutes to firm up.
5. Experimenting with Flavor and Texture
While Orange Creamsicle Cake is already a crowd-pleaser, there are endless ways to make it your own! Here are a few ideas:
- Add a Splash of Orange Liqueur: For an adult twist, mix a splash of orange liqueur like Cointreau into the cake batter or frosting. This deepens the orange flavor and adds a touch of sophistication.
- Switch Up the Frosting: Try a whipped cream frosting instead of the traditional buttercream for a lighter texture. You can also swirl in a bit of orange marmalade for a twist.
- Add Texture with Candied Orange Peel: If you want a bit of crunch and extra flavor, sprinkle some candied orange peel on top. It adds a delightful contrast to the softness of the cake.
5. Variations of Orange Creamsicle Cake
The Orange Creamsicle Cake is already a winner, but what if you could take it a step further and experiment with different versions? Whether you’re catering to dietary preferences or just want to try something new, there are plenty of creative twists you can give this classic dessert. In this section, we’ll explore some fun and flavorful variations that will make your cake even more exciting!
1. Orange Creamsicle Cupcakes
If you’re looking to create individual servings of this delectable cake, turning it into cupcakes is the way to go! The process is very similar to baking a regular cake, but there are a few things to keep in mind:
- Baking Time: Cupcakes bake faster than a full-sized cake, usually in 18-22 minutes, so keep an eye on them.
- Frosting: Pipe the creamsicle frosting onto each cupcake for a picture-perfect look. For an added touch, you can sprinkle a little orange zest or top with a candied orange slice.
These mini cakes are perfect for parties, picnics, or even as a fun way to serve your family. Plus, the bite-sized portions make them perfect for anyone who wants just a little taste of something delicious.
2. Gluten-Free and Dairy-Free Versions
Everyone loves a good dessert, but it can be challenging to cater to guests with food sensitivities. Luckily, you can make a gluten-free and/or dairy-free Orange Creamsicle Cake without sacrificing flavor or texture!
- Gluten-Free Version: Simply swap the all-purpose flour with a gluten-free flour blend. Make sure the blend contains xanthan gum, which will help the cake maintain its structure. Be mindful of mixing times to ensure the cake doesn’t become dense.
- Dairy-Free Version: Replace the unsalted butter with a dairy-free alternative like coconut oil or vegan butter. Use almond milk or any plant-based milk instead of regular milk for the cake and frosting. Additionally, you can substitute heavy cream in the frosting with coconut cream or a dairy-free whipping cream.
These modifications will allow everyone to enjoy a piece of Orange Creamsicle Cake—whether they’re avoiding gluten, dairy, or both.
3. Orange Creamsicle Cake with a Twist
Looking to experiment with some bold flavors? There’s no need to limit yourself to just the classic orange and vanilla combination. Here are a few ideas to make your cake unique:
- Chocolate Chips: Stir in a handful of mini chocolate chips into the cake batter. The chocolate pairs wonderfully with the orange flavor, giving the cake a chocolate-orange vibe—think of a classic chocolate-orange combo, but in cake form.
- Coconut: If you love coconut, add some unsweetened shredded coconut to the cake batter or sprinkle it on top of the frosting. The coconut adds both flavor and texture, giving the cake a tropical feel that pairs beautifully with the orange.
- Lime Twist: For an extra kick, you can substitute some of the orange zest with lime zest for a citrus medley flavor. This combination creates a refreshing zing that’s just perfect for summer.
These creative variations give you endless options to tailor the Orange Creamsicle Cake to your preferences or make it stand out at any event.
4. Mini Orange Creamsicle Cakes
Sometimes smaller is better, especially when it comes to serving desserts at a gathering or event. Making mini cakes can be a fun way to serve individual portions that feel extra special.
- Baking in Mini Cake Pans: If you have a set of mini cake pans, this is the perfect opportunity to use them! Each tiny cake will have its own layer of frosting and orange goodness, perfect for sharing.
- Serving in Jars: You can even bake the cake in mason jars, layer it with frosting, and serve it as a grab-and-go dessert. This is an ideal option for weddings, birthday parties, or outdoor events.
The possibilities with Orange Creamsicle Cake are endless! From gluten-free and dairy-free options to creative twists like chocolate chips or lime zest, you can customize the cake to suit your needs or give it a fun new flair. Now that you have a few ideas on how to make this cake your own, let’s move on to the next part where we’ll show you how to decorate your cake to make it as beautiful as it is delicious.
6. Decorating Your Orange Creamsicle Cake
The best part of making an Orange Creamsicle Cake is the decorating! Not only does the decoration enhance the visual appeal of your cake, but it also adds that extra touch of creativity that takes your cake from delicious to extraordinary. Whether you’re keeping things simple or going all out with intricate designs, there are plenty of ways to decorate this cake and make it stand out.
1. Classic Smooth Frosting Look
If you’re going for an elegant, classic look, spreading the frosting smoothly over the cake is a great option. This style showcases the cake’s perfect orange hue, complemented by the smooth, velvety frosting. Here’s how to achieve it:
- Smooth Frosting Technique: After frosting the cake, use an offset spatula or a bench scraper to smooth the frosting evenly. If you prefer a glossy finish, you can slightly heat the frosting in the microwave (for just 10-15 seconds) before spreading it onto the cake. This makes the frosting more spreadable and gives it a sleek, polished finish.
- Crisp Edges: For a professional look, create crisp edges around the top and sides by gently pressing the bench scraper against the frosting, rotating the cake as you go.
This simple and clean design is timeless, highlighting the beauty of the cake’s colors and smooth frosting.
2. Piped Frosting and Rosettes
If you want a little more drama or flair, piping the frosting into decorative shapes is a fantastic way to add texture and visual interest. Here’s how you can do it:
- Frosting Piping Tips: Use a star-shaped piping tip to create rosettes or shells along the top and edges of the cake. Start at the center of each rosette and swirl outward to form a beautiful, tight pattern. This adds a touch of elegance and makes your cake look like it came from a professional bakery.
- Additional Decorations: For an extra pop of color, you can sprinkle some orange zest around the rosettes or add tiny edible flowers like orange blossoms to create a more natural, fresh look.
The piped frosting can give your cake an impressive, tiered appearance and provide a soft contrast to the bold, bright orange color of the cake.
3. Candied Orange Peel Garnish
One of the best ways to enhance both the flavor and appearance of your Orange Creamsicle Cake is with candied orange peel. This decoration not only reinforces the citrus flavor but also adds a unique texture and glossy finish. Here’s how to make candied orange peel:
- Prepare the Peel: Use a vegetable peeler to remove the zest from one or two oranges, making sure to remove the white pith underneath. Cut the peel into thin strips.
- Candy the Peel: Boil the peel in a simple syrup made of equal parts water and sugar. Simmer for about 20 minutes until the peel is tender. Drain and coat the peel in sugar to give it a sparkling, sugary coating.
- Garnish the Cake: Arrange the candied peel on top of the cake in a decorative pattern, or scatter it along the edges for a dramatic look.
The candied orange peel adds both visual interest and a burst of orange flavor that perfectly complements the cake.
4. Whipped Cream for Lightness
For a lighter, airier feel, you can top the cake with freshly whipped cream instead of a thick frosting. This works well if you want a less sugary option that still enhances the orange flavor.
- Whipped Cream Tips: Whip heavy cream until soft peaks form. Add a touch of vanilla extract and powdered sugar for sweetness. If you like, fold in a bit of orange zest to keep the citrus theme consistent.
- Decorating with Whipped Cream: Spoon the whipped cream on top of the cake, and then use a spatula or the back of a spoon to create gentle swirls or peaks. You can garnish with orange zest or fresh orange slices to enhance the decoration.
Whipped cream gives the cake a fresh, light finish while still adding richness to each bite.
5. Creative Orange-Themed Accents
Want to make your Orange Creamsicle Cake even more fun and eye-catching? Here are a few creative ways to amp up the theme:
- Orange Slices: Garnish the cake with thin, fresh orange slices or even crystallized orange slices for a sweet, decorative touch. They can be arranged around the base or scattered across the top.
- Edible Glitter or Sprinkles: Add a festive sparkle to your cake by sprinkling edible glitter or orange-colored sprinkles around the edges or over the frosting. This is a perfect option for birthday parties or any celebratory occasion.
- Orange Candies or Chocolate: For a playful touch, you can add small orange-flavored candies, chocolate orange segments, or even chocolate chips on top for texture and additional flavor layers.
These extra accents will make your cake look like a true showstopper and ensure it’s the center of attention at any event.
With these decorating ideas, you can take your Orange Creamsicle Cake from great to absolutely stunning. Whether you prefer a sleek, smooth finish or a more elaborate design with piping, garnishes, and accents, the options are endless. Decorating this cake is a chance to get creative, and the best part is that you can customize it to suit any occasion.
In the next section, we’ll cover some frequently asked questions about Orange Creamsicle Cake, so you can troubleshoot any issues you may encounter and get more ideas for customizing your cake!
7. FAQs About Orange Creamsicle Cake
you might have some burning questions about how to get the best results when making your Orange Creamsicle Cake. Don’t worry; we’ve got you covered! In this section, we’ll address some of the most frequently asked questions and provide you with solutions and tips to ensure your cake turns out just right.
1. Can I Make Orange Creamsicle Cake Ahead of Time?
Absolutely! In fact, making your cake ahead of time can save you some hassle, especially if you’re preparing for a party or event. Here’s how to do it:
- Baking Ahead: You can bake the cake up to 2 days in advance. Once it’s fully cooled, wrap the cake layers tightly in plastic wrap or store them in an airtight container to keep them fresh.
- Frosting Ahead: Make the frosting a day or two ahead as well. Store it in an airtight container in the fridge. When you’re ready to frost, let the frosting sit at room temperature for about 30 minutes to soften before spreading it on the cake.
When you’re ready to serve, simply frost and decorate the cake, and it’ll be good to go! This is a great time-saver, especially if you’re hosting a gathering.
2. Can I Use Store-Bought Frosting for My Orange Creamsicle Cake?
While making homemade frosting is ideal for the best flavor and texture, store-bought frosting is a viable shortcut if you’re short on time. You can use any vanilla or cream cheese frosting as a base, and then add your own orange zest or a few tablespoons of orange juice to infuse it with that classic Orange Creamsicle flavor.
However, keep in mind that homemade frosting usually has a richer, more authentic taste, so if you have the time, it’s definitely worth the extra effort.
3. How Do I Store Leftover Orange Creamsicle Cake?
If you have leftover cake, you’ll want to store it properly so it stays fresh and delicious. Here’s how to do it:
- At Room Temperature: If you plan to eat the leftovers within 1-2 days, you can keep the cake covered at room temperature. Place it under a cake dome or in an airtight container to prevent it from drying out.
- In the Refrigerator: For longer storage, refrigerate the cake to keep it fresh for up to 4-5 days. Make sure to wrap it in plastic wrap or store it in an airtight container to avoid it absorbing any odors from the fridge.
- Freezing the Cake: Yes, you can freeze your Orange Creamsicle Cake! To freeze, wrap the cake layers tightly in plastic wrap, then place them in a freezer-safe bag or container. You can also freeze slices individually. When ready to enjoy, let it thaw overnight in the fridge or at room temperature for a few hours.
4. Can I Make This Cake Gluten-Free?
Definitely! You can easily make a gluten-free Orange Creamsicle Cake by swapping out the all-purpose flour for a gluten-free flour blend. Choose a high-quality gluten-free flour that includes xanthan gum, as this helps provide structure to the cake. It’s important to note that gluten-free cakes can sometimes be a little denser, so don’t overmix your batter.
If you’re not sure which gluten-free flour to use, blends like King Arthur Gluten-Free Flour or Bob’s Red Mill are great options. They provide a more balanced texture and flavor compared to using a single flour, like rice flour or almond flour.
5. How Can I Make the Frosting Less Sweet?
If you find the frosting a little too sweet for your liking, there are a few ways to cut the sweetness while keeping the flavor balanced:
- Add More Citrus: Add extra orange juice or orange zest to the frosting. The citrus will cut through the sweetness and give the frosting a more vibrant, tangy flavor.
- Use Less Powdered Sugar: You can always reduce the amount of powdered sugar in the frosting. Start by cutting it down by 1/4 or 1/2 cup and taste it as you go. Just be careful not to go too low, or the frosting may not hold its shape properly.
- Try Cream Cheese Frosting: For a tangy, less sweet frosting, consider swapping out some or all of the butter for cream cheese. Cream cheese frosting offers a subtle tanginess that pairs wonderfully with the sweet, fruity cake.
6. Can I Make This Cake Dairy-Free?
Yes, you can easily make a dairy-free version of the Orange Creamsicle Cake. Here’s how:
- Substitute Dairy-Free Butter: Use a plant-based butter or coconut oil in place of regular butter.
- Use Dairy-Free Milk: Instead of regular milk, use almond milk, coconut milk, or another plant-based milk.
- Non-Dairy Whipped Cream: For the frosting, substitute coconut cream or a dairy-free whipping cream for the heavy cream. You can also use a plant-based cream cheese for the frosting if you prefer a cream cheese frosting.
These substitutions will keep the cake tasting delicious without any dairy.
7. Why Is My Cake Dry?
A dry Orange Creamsicle Cake can be a result of several factors. Here are a few things to check:
- Overmixing the Batter: Overmixing the cake batter after adding the flour can result in a dense, dry texture. Mix just until everything is combined, and no more.
- Overbaking: Keep an eye on the cake while it’s in the oven. If it’s baked too long, the cake will lose moisture. Check the cake with a toothpick about 5 minutes before the recommended time to ensure it’s done.
- Not Enough Moisture: If your cake is too dry, you might need to add a little more orange juice or milk to the batter. If you’re using gluten-free flour, the cake may need a bit more liquid than the recipe calls for.
Why You’ll Love Making Orange Creamsicle Cake
The Orange Creamsicle Cake is a delightful combination of zesty citrus and creamy sweetness, making it a perfect dessert for any occasion. Whether you’re baking it for a special celebration, a family gathering, or just because you’re craving something light and refreshing, this cake will surely impress.
From the tips on perfecting the texture to creative variations like gluten-free and dairy-free options, you now have all the tools to make this cake your own. You’ve learned how to decorate it beautifully with smooth frosting, piped rosettes, and even candied orange peel, ensuring your cake not only tastes great but looks spectacular too.
With the additional knowledge of troubleshooting common issues and adapting it to suit dietary needs, making your Orange Creamsicle Cake is easier than ever. So go ahead and bake this citrusy delight—it’s guaranteed to be a hit, no matter the occasion!
Try It Today!
Next time you’re looking for a dessert that’s both refreshing and indulgent, give the Orange Creamsicle Cake a try. With its perfect balance of sweet and tangy, it’ll soon become a favorite in your recipe collection. Don’t forget to experiment with the variations and decorations to make it uniquely yours!
Happy baking! 🍊🎂