
History of Lemon Cream Pie
Lemon cream pie is more than just a dessert; it’s a testament to the art of blending tart and sweet flavors. Its roots trace back to the 19th century, with the growing popularity of citrus fruits in Europe and North America. Lemons, prized for their refreshing zing, quickly found their way into pies, tarts, and custards.
By the mid-20th century, this dessert had evolved into the silky masterpiece we know today, with the addition of creamy fillings like sweetened condensed milk and whipped cream. It became a staple at gatherings, admired for its simplicity and elegance. Today, lemon cream pie continues to shine as a go-to dessert for special occasions and casual indulgence alike.
Not only does this pie offer a delightful flavor, but it also holds a nostalgic charm, reminding us of sunny afternoons and family celebrations. Whether you’re a fan of traditional recipes or modern twists, lemon cream pie is bound to win your heart—and your taste buds!
Essential Ingredients for Lemon Cream Pie
The magic of lemon cream pie lies in its harmonious blend of simple yet impactful ingredients. Each component contributes to its signature flavor and texture, making it a dessert that stands out.
1. Crust
The foundation of any pie is its crust, and lemon cream pie is no exception. Here are some popular options:
- Graham Cracker Crust: The most common choice, offering a sweet and slightly nutty base that complements the tart lemon filling.
- Shortbread Crust: Rich and buttery, this crust adds an extra layer of decadence.
- Pastry Crust: A classic option for those who love a flaky and tender texture.
Tip: To ensure your crust holds together, press it firmly into the pie dish and chill before adding the filling.
2. Lemon Filling
The filling is the heart of the pie, providing that iconic tangy sweetness. Here’s what you’ll need:
- Fresh Lemon Juice: Always opt for freshly squeezed lemon juice for the best flavor. Avoid bottled juices, which can taste artificial.
- Lemon Zest: Adds a fragrant citrus aroma and enhances the lemon flavor.
- Sweetened Condensed Milk: Creates a creamy texture and balances the tartness with its sweetness.
- Egg Yolks: Essential for thickening the filling and giving it a silky consistency.
3. Whipped Topping
A light and fluffy topping completes the pie, offering a perfect contrast to the dense filling.
- Heavy Whipping Cream: Whipped with sugar and vanilla for a cloud-like finish.
- Store-Bought Whipped Cream: A convenient alternative for quick assembly.
Optional Garnishes: Lemon slices, zest, or a sprinkle of graham cracker crumbs add visual appeal and extra flavor.
Step-by-Step Guide to Making Lemon Cream Pie
Now that we’ve covered the essentials, it’s time to dive into the process of creating the ultimate lemon cream pie. From preparing the crust to assembling the final masterpiece, these steps will ensure a flawless pie every time.
1. Preparing the Crust
Estimated Time: 15 minutes (plus chilling)
- Crush the Base Ingredients:
- For a graham cracker crust, crush graham crackers into fine crumbs using a food processor or rolling pin.
- Mix Ingredients:
- Combine crumbs with melted butter and sugar until the mixture resembles wet sand.
- Press into the Pan:
- Firmly press the mixture into the bottom and sides of a pie dish. Use the back of a spoon or measuring cup for evenness.
- Chill or Bake:
- For a no-bake crust, refrigerate for at least 30 minutes.
- For extra sturdiness, bake at 350°F (175°C) for 8–10 minutes, then cool completely.
2. Creating the Lemon Filling
Estimated Time: 10 minutes (plus chilling)
- Combine Ingredients:
- In a bowl, whisk together sweetened condensed milk, fresh lemon juice, lemon zest, and egg yolks until smooth.
- Thicken the Mixture:
- Let the mixture sit for 5–10 minutes to thicken slightly. This step ensures a firmer filling.
- Pour into the Crust:
- Carefully pour the filling into the prepared crust, spreading evenly with a spatula.
3. Chilling the Pie
Estimated Time: 4–6 hours (or overnight)
- Place the pie in the refrigerator to set. Avoid freezing, as this can alter the texture.
4. Adding the Whipped Topping
Estimated Time: 10 minutes
- Whip Cream to Perfection:
- Beat heavy cream, sugar, and vanilla extract until soft peaks form.
- Spread or Pipe:
- Gently spread the whipped cream over the set filling, or use a piping bag for decorative swirls.
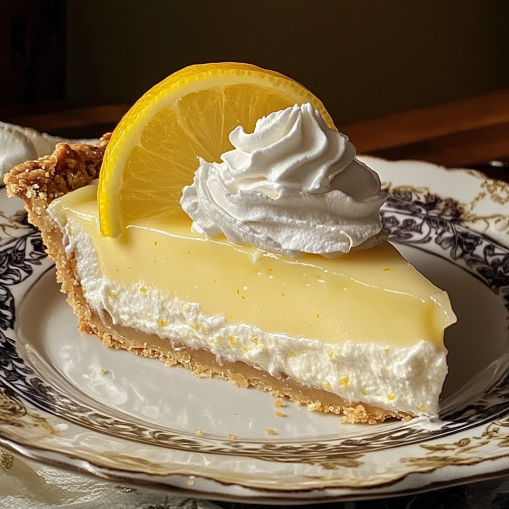
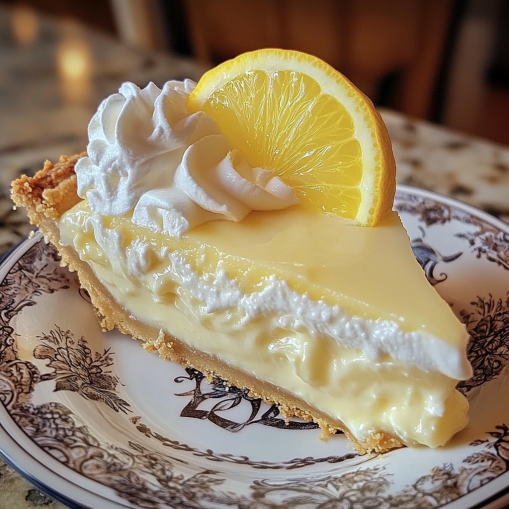
5. Garnishing the Pie
Estimated Time: 5 minutes
- Add a finishing touch with lemon slices, extra zest, or crushed graham crackers for a picture-perfect dessert.
Expert Tips and Tricks for the Perfect Lemon Cream Pie
Creating a lemon cream pie that’s both visually stunning and bursting with flavor is an art. Here are expert tips to ensure your pie becomes a crowd favorite.
1. Perfecting the Crust
- Achieve Even Texture: Use a food processor for consistent graham cracker crumbs. This ensures an even crust without larger chunks.
- Press Firmly: Use a flat-bottomed glass to firmly press the crust into the pie dish. A tightly packed crust prevents crumbling during slicing.
- Pre-Baking for Crispness: Even if the recipe doesn’t call for it, a quick bake before filling enhances the crust’s structure and adds a toasty flavor.
2. Getting the Filling Just Right
- Fresh Is Best: Always use freshly squeezed lemon juice for the filling. Bottled juice can lack the vibrant, tangy flavor needed for authenticity.
- Zest Before Juicing: Zesting the lemons before juicing prevents wastage and makes the process much easier.
- Balance Sweetness and Tartness: Adjust the ratio of lemon juice to sweetened condensed milk based on your taste preferences. A little extra zest can add an extra punch.
3. Perfecting the Whipped Topping
- Chill Your Tools: For the fluffiest whipped cream, chill your mixing bowl and whisk in the freezer for 10 minutes before starting.
- Don’t Overbeat: Stop whipping as soon as soft peaks form to avoid a grainy texture.
4. Adding Professional Touches
- Garnish Thoughtfully: Thin lemon slices, twists of zest, or a sprinkle of powdered sugar make for a visually appealing presentation.
- Experiment with Layers: Create a double-layered pie by adding a cream cheese layer under the lemon filling for added richness.
5. Storing and Serving
- Refrigeration Is Key: Always store your pie in the refrigerator to maintain its texture. Cover loosely with plastic wrap to avoid condensation.
- Slice Cleanly: Dip a sharp knife in warm water, then dry it before slicing for clean, picture-perfect cuts.
Nutritional Breakdown and Dietary Adjustments for Lemon Cream Pie
While lemon cream pie is undeniably indulgent, understanding its nutritional profile and exploring dietary tweaks ensures it fits a variety of lifestyles.
Nutritional Breakdown (Per Slice)
The average slice of lemon cream pie (1/8 of a 9-inch pie) typically includes:
- Calories: ~300-400 kcal
- Fat: ~15-20g (mainly from butter and cream)
- Carbohydrates: ~35-45g (from sugar and crust)
- Protein: ~4-6g
- Sugar: ~25-30g
These numbers vary based on the crust type, filling recipe, and toppings used.
Healthier Variations
1. Lighten the Crust
- Use low-fat graham crackers or almond flour for a lighter base.
- Swap butter with coconut oil or a reduced-fat alternative.
2. Modify the Filling
- Substitute sweetened condensed milk with low-sugar or fat-free versions.
- Use Greek yogurt for added creaminess and a protein boost.
3. Whipped Topping Adjustments
- Choose whipped coconut cream for a dairy-free option.
- Use reduced-fat or sugar-free whipped topping for fewer calories.
Dietary Accommodations
- Gluten-Free: Use a gluten-free graham cracker crust or make a nut-based crust.
- Dairy-Free: Replace condensed milk with coconut milk and use dairy-free whipped topping.
- Vegan-Friendly: Use vegan condensed milk alternatives and coconut cream.
Small changes can make a big impact, turning your lemon cream pie into a dessert that satisfies without the guilt.