
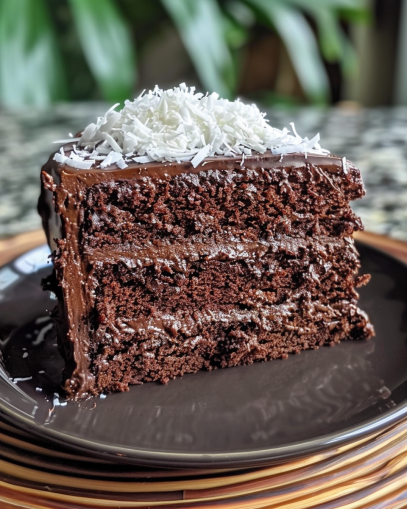
Coconut Chocolate Cake: A Decadent Delight
When it comes to desserts, few creations can rival the luscious harmony of chocolate and coconut. This cake is more than a treat; it’s an experience that blends the rich creaminess of chocolate with the tropical flair of coconut, making it a favorite for all occasions. In this guide, you’ll discover everything from the intriguing history of this dessert to expert tips and delectable variations. So, let’s dive right in!
History and Origin of Coconut Chocolate Cake
The coconut chocolate cake didn’t just appear overnight; it’s a dessert rooted in history and innovation. Chocolate cakes have been around since the 18th century, but they truly rose to fame in the mid-1800s with advancements in cocoa powder processing. This marked the beginning of an era where chocolate desserts became accessible to the masses. (For an in-depth look at this timeline, check out History of Chocolate Cake.)
But where does the coconut fit into this narrative? Coconut has long been a staple ingredient in tropical regions, celebrated for its versatility in both savory and sweet dishes. During the early 20th century, as trade routes expanded, coconut became a popular addition to Western desserts, adding a unique twist to traditional recipes.
The fusion of coconut and chocolate was a natural evolution. The tropical sweetness of coconut perfectly complemented the bold, rich flavor of chocolate. Together, they created a dessert that not only delighted the taste buds but also told a story of cultural exchange and culinary creativity. Today, this delightful combination is celebrated worldwide, symbolizing indulgence and innovation.
Ingredients Breakdown for Coconut Chocolate Cake
Crafting the perfect coconut chocolate cake starts with choosing the right ingredients. Each component plays a pivotal role in achieving the cake’s rich flavor and moist texture. Let’s break it down!
Core Ingredients
- All-Purpose Flour: The foundation of your cake, providing structure and stability. Ensure you sift it to avoid lumps.
- Unsweetened Cocoa Powder: Adds the signature chocolate flavor. Opt for high-quality, Dutch-processed cocoa for a deeper and richer taste.
- Granulated Sugar and Brown Sugar: A combination ensures balanced sweetness and contributes to the cake’s moistness. Brown sugar, with its molasses content, enhances the flavor complexity.
- Baking Powder and Baking Soda: The leavening agents that help your cake rise beautifully. Use fresh ones to avoid flat layers.
- Eggs: Essential for binding and adding richness. Room-temperature eggs are best for even mixing.
- Coconut Milk: The star ingredient for that tropical flair. It provides moisture and a subtle coconut flavor.
- Vegetable Oil or Butter: Ensures your cake is tender. Oil often gives a slightly lighter crumb, while butter enhances flavor.
- Vanilla Extract: Enhances the overall flavor and complements both the chocolate and coconut.
- Shredded Coconut: For texture and an extra coconut punch. You can choose sweetened or unsweetened based on your preference.
Optional Additions
- Chocolate Chips: Folded into the batter for bursts of melted chocolate.
- Espresso Powder: A small amount enhances the chocolate flavor without being overpowering.
- Chopped Nuts (e.g., almonds, pecans): For added crunch and flavor depth.
These thoughtfully chosen ingredients ensure that every bite of your coconut chocolate cake is moist, flavorful, and utterly irresistible.
Step-by-Step Baking Instructions
Now that you’ve gathered all the ingredients, it’s time to transform them into a luscious coconut chocolate cake. Follow these step-by-step instructions to achieve bakery-level perfection right at home.
1. Prepare Your Workspace
- Preheat your oven to 350°F (175°C). This ensures the cake bakes evenly.
- Grease and line your cake pans with parchment paper to prevent sticking. Two 9-inch round pans are ideal for layered cakes.
2. Mix the Dry Ingredients
- In a large bowl, whisk together the flour, cocoa powder, baking powder, baking soda, and a pinch of salt. This ensures even distribution and aerates the mixture for a lighter cake.
3. Combine the Wet Ingredients
- In another bowl, beat the eggs and sugars (granulated and brown) until creamy.
- Add the coconut milk, vegetable oil, and vanilla extract. Mix until smooth.
4. Blend the Dry and Wet Mixtures
- Gradually add the dry ingredients to the wet mixture. Mix gently with a spatula or use a hand mixer on low speed. Be careful not to overmix; this can make the cake dense.
- Fold in the shredded coconut and optional chocolate chips for added texture.
5. Pour and Bake
- Divide the batter evenly between the prepared pans. Smooth the tops with a spatula for uniform layers.
- Bake for 30–35 minutes, or until a toothpick inserted in the center comes out clean.
6. Cool the Cakes
- Allow the cakes to cool in the pans for 10 minutes. Then, transfer them to a wire rack to cool completely. This step prevents the frosting from melting when you decorate.
Pro Tip: Chill for Stability
- Once cooled, wrap the cake layers in plastic wrap and chill for 30 minutes. Chilled layers are easier to frost and less likely to crumble.
Crafting the Creamy Coconut Frosting
A coconut chocolate cake is only as good as its frosting, and this creamy coconut frosting is the perfect complement. It’s rich, luscious, and adds a burst of tropical flavor that will leave everyone asking for seconds.
Ingredients for Coconut Frosting
- Unsalted butter: 1 cup (softened)
- Cream cheese: 8 oz (softened)
- Powdered sugar: 4 cups (sifted)
- Coconut milk: 3 tablespoons
- Vanilla extract: 1 teaspoon
- Shredded coconut: 1 cup (for topping)
1. Beat Butter and Cream Cheese
- In a large mixing bowl, combine the softened butter and cream cheese. Beat them together using a hand or stand mixer on medium speed until smooth and fluffy, about 2–3 minutes.
2. Add Powdered Sugar Gradually
- Lower the mixer speed to avoid a sugar cloud, and slowly add the sifted powdered sugar, one cup at a time. Mix well after each addition to ensure a creamy consistency.
3. Incorporate Coconut Milk and Vanilla
- Add the coconut milk and vanilla extract. Increase the mixer speed to medium-high, blending until the frosting is light and airy.
4. Adjust Consistency
- If the frosting is too thick, add a teaspoon of coconut milk at a time until it reaches your desired consistency. For firmer frosting, add more powdered sugar.
5. Toast the Shredded Coconut
- Optional but highly recommended! Lightly toast the shredded coconut in a dry pan over medium heat for 2–3 minutes, stirring frequently. This adds a delightful crunch and amplifies the coconut flavor.
Assembling the Cake and Decoration Tips
Now that all the components of your coconut chocolate cake are ready, it’s time to assemble this showstopper. This step is where your baking masterpiece takes shape, blending the flavors and textures into a harmonious delight.
1. Level the Cake Layers
- Once your chocolate cake layers have cooled completely, use a serrated knife or a cake leveler to trim the tops of the layers if needed. This ensures a flat and stable surface for stacking and prevents the cake from wobbling.
2. Layer with Frosting
- Place the first cake layer on your serving plate or cake stand. Add a generous dollop of creamy coconut frosting and spread it evenly using an offset spatula.
- Repeat this process for the second layer, spreading the frosting all the way to the edges for uniform coverage.
3. Crumb Coat the Cake
- Apply a thin layer of frosting over the entire cake, known as a crumb coat. This seals in any loose crumbs and creates a smooth base for the final frosting layer.
- Refrigerate the crumb-coated cake for 20–30 minutes to set.
4. Final Frosting and Smooth Finish
- Once chilled, apply a thicker layer of frosting around the cake. Use a bench scraper or a spatula to smooth out the sides and top for a professional look. Don’t worry about perfection; a rustic finish works beautifully too.
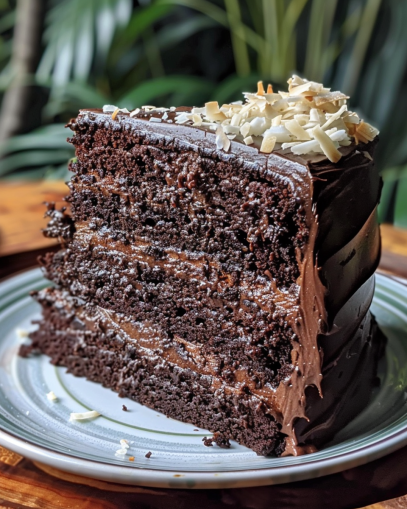
5. Decorate with Toasted Coconut and Chocolate
- Sprinkle the toasted shredded coconut evenly over the top of the cake and let some cascade down the sides for a natural, elegant effect.
- Add chocolate shavings, curls, or a drizzle of melted chocolate for extra flair. Alternatively, top with fresh berries or edible flowers for a pop of color.
6. Refrigerate Before Serving
- Let the cake chill for at least 30 minutes before slicing. This firms up the frosting, making it easier to cut clean slices.
Tips for Serving and Storing Coconut Chocolate Cake
Once your coconut chocolate cake is perfectly frosted and decorated, it’s time to share this decadent treat. But how you serve and store the cake can make a big difference in maintaining its flavor and freshness.
1. Serving the Cake
- Slice with Care: Use a sharp knife dipped in warm water for clean slices. Wipe the knife between cuts to prevent smudging the layers.
- Pair with Beverages: Coconut chocolate cake pairs beautifully with hot beverages like coffee or tea. For a more indulgent treat, serve with a side of vanilla ice cream or a drizzle of warm chocolate sauce.
- Ideal Temperature: While the cake is best stored chilled, let it sit at room temperature for about 15–20 minutes before serving to enjoy the full depth of flavors.
2. Storing Leftovers
- Refrigeration: Store leftover cake in an airtight container or wrap it tightly with plastic wrap. It can stay fresh in the refrigerator for up to 4–5 days.
- Freezing: For longer storage, slice the cake and wrap each piece individually in plastic wrap. Place the slices in a freezer-safe bag or container. The cake will remain delicious for up to 3 months.
- Thawing: When ready to enjoy, thaw slices in the refrigerator overnight. Let them come to room temperature before serving.
3. Keeping It Fresh
- Moisture Matters: Place a small piece of bread or a damp paper towel in the storage container with the cake. This helps prevent the cake from drying out.
- Avoid Strong Smells: Store away from foods with strong odors in the fridge, as cakes can absorb smells.
Coconut Chocolate Cake Variations to Try
One of the best things about a coconut chocolate cake is its versatility. Whether you’re catering to dietary restrictions or simply looking to switch things up, there are countless ways to adapt this classic recipe to suit your needs and preferences.
1. Vegan Coconut Chocolate Cake
- Egg Substitutes: Replace eggs with flaxseed meal or chia seeds mixed with water. Applesauce or mashed bananas also work well as natural binders.
- Dairy-Free Options: Use plant-based milk like almond, coconut, or oat milk and swap butter for vegan butter or coconut oil.
- Chocolate Adjustments: Opt for dairy-free chocolate chips or dark chocolate for the ganache.
2. Gluten-Free Coconut Chocolate Cake
- Flour Alternatives: Replace all-purpose flour with a gluten-free flour blend. Almond flour or coconut flour can also work, though adjustments to the liquid ingredients may be necessary.
- Baking Powder: Double-check that your leavening agents are gluten-free.
3. Low-Sugar or Keto-Friendly Option
- Sweetener Substitutes: Use natural low-carb sweeteners like stevia, erythritol, or monk fruit in place of sugar.
- Coconut Flour Base: Coconut flour is naturally low in carbs and pairs wonderfully with coconut flavors.
- Dark Chocolate: Choose sugar-free or unsweetened dark chocolate for the frosting.
4. Add Extra Flavors
- Tropical Twist: Add crushed pineapple or a layer of mango puree between the cake layers.
- Nutty Delight: Incorporate chopped toasted almonds, hazelnuts, or macadamia nuts into the batter for added crunch.
- Spiced Flair: Sprinkle in a touch of cinnamon or cardamom for a warm, aromatic flavor.
5. Decorative Variations
- Coconut Shavings: Cover the entire cake with toasted coconut flakes for a rustic finish.
- Layer Experiments: Add a creamy coconut mousse or chocolate fudge layer to enhance texture and richness.
Experimenting with these variations ensures that every slice of your coconut chocolate cake brings something new to the table. Whether you’re aiming for indulgence or looking to keep it light, there’s a version for everyone! 🥥🍫
Frequently Asked Questions About Coconut Chocolate Cake
When it comes to baking a coconut chocolate cake, questions are bound to arise. Here are some of the most frequently asked questions to ensure your baking journey is smooth and enjoyable.
1. Can I Make This Cake Ahead of Time?
Absolutely! Coconut chocolate cake stays moist and flavorful for days. You can bake the cake layers a day in advance and store them, tightly wrapped, at room temperature. Assemble and frost the cake closer to serving time for the best results.
2. How Do I Store Leftovers?
To keep your cake fresh, store it in an airtight container. If your frosting is perishable (like cream cheese or whipped ganache), refrigerate the cake for up to 4–5 days. Bring it to room temperature before serving to enjoy the best texture.
3. Can I Use Sweetened Coconut Instead of Unsweetened?
Yes, but be mindful of the sweetness. Sweetened coconut can make the cake overly sugary, so consider reducing the sugar in the batter or frosting slightly.
4. What Can I Use Instead of Coconut Milk?
If you don’t have coconut milk on hand, heavy cream or any plant-based milk will work as a substitute. For a stronger coconut flavor, you can add a few drops of coconut extract.
5. How Do I Prevent the Cake from Sticking to the Pan?
Grease your pans well with butter or non-stick spray, and line the bottoms with parchment paper. This ensures easy release and prevents the cake from breaking.
With these tips and answers, you’re well on your way to mastering the art of coconut chocolate cake! Ready to bake? 🎂
Final Thoughts
A coconut chocolate cake is more than just a dessert—it’s a celebration of rich flavors, indulgent textures, and endless creativity. Whether you stick to the classic recipe or experiment with variations, every slice promises joy. Now, it’s time to roll up your sleeves, preheat your oven, and get baking!