
Before diving into the delight of crafting festive Christmas Noel Donuts, let’s take a quick tour of what we’ll cover in this article. From essential ingredients to expert tips on achieving the perfect glaze, you’ll find everything you need to whip up these delectable holiday treats. Whether you’re into baking or frying, we’ve got both methods covered, and we’ll even share how to store your donuts so they stay fresh for the Christmas morning feast. And, of course, no festive donuts are complete without vibrant sprinkles and creative decorations to bring the holiday spirit to life. Let’s start by exploring what makes Christmas Noel Donuts so special!
 Part 1: Introduction
H1: What Are Christmas Noel Donuts?
Ah, Christmas Noel Donuts! These aren’t your ordinary donuts; they’re the epitome of holiday cheer in pastry form. Just imagine biting into a fluffy, warm donut that’s sprinkled with festive colors, kissed with rich frosting, and topped with candy canes or gingerbread crumbles. These donuts not only look festive, but they bring together all the warm, sweet flavors of the holiday season. Whether they’re baked or fried, these Christmas-themed donuts are perfect for breakfast or as a delightful dessert to share with friends and family.
But what makes them so special? It’s not just the Christmas sprinkles or the icing—it’s the fact that these donuts can be easily customized with festive flavors like peppermint, cinnamon, and gingerbread. That’s the magic of Christmas Noel Donuts—they’re not just a treat; they’re a part of the tradition!
Word Count: 200
H2: Why Christmas Donuts Are Popular
So, why are Christmas donuts all the rage during the holiday season? It’s simple! First, they’re fun to make, especially when the whole family gets involved. Decorating donuts is an activity that lets you unleash your creativity while bonding with loved ones. Plus, they’re a crowd-pleaser—you can bring them to Christmas parties or gift them to friends and neighbors.
Secondly, they capture the festive spirit with every bite. From peppermint-flavored icing to gingerbread dusting, these donuts feel like a holiday in your mouth. And let’s not forget—they look as good as they taste. Who doesn’t want a batch of red, green, and white-sprinkled donuts on their Christmas table?
Finally, these donuts offer variety. You can bake them, fry them, glaze them, or simply dust them with powdered sugar—the options are endless. And with the addition of holiday sprinkles, they become a visual show-stopper.
Part 2: Ingredients and Tools
H1: Essential Ingredients for Christmas Noel Donuts
Alright, let’s dive into the backbone of any great donut: the ingredients! Now, whether you’re baking or frying, some basics remain the same, but there are a few festive twists you can add to make these donuts truly scream Christmas joy.
H2: Common Donut Ingredients
For the most part, your base ingredients will be the typical donut fare—all-purpose flour, sugar, baking powder, eggs, and a dash of vanilla. But here’s where the holiday twist comes in: consider adding a pinch of cinnamon, nutmeg, or even gingerbread spice to your mix to infuse that holiday spirit straight into the dough. If you’re feeling adventurous, toss in some chopped candy canes or mix peppermint extract into the batter for an extra layer of festivity.
When it comes to the wet ingredients, things like milk and melted butter are key to ensuring the donuts stay moist and tender. But don’t forget to keep your ingredients at room temperature before mixing them together—it makes all the difference in achieving a smooth, easy-to-work-with dough!
H2: Festive Additions: Sprinkles, Icing, and Glazes
Now, what’s a Christmas donut without some holiday bling? The toppings and glazes are where you can really get creative. You’ll want to grab some holiday-themed sprinkles—think reds, greens, golds, and whites—and maybe even some edible glitter for that extra festive sparkle.
For the glaze, you have several options. A classic vanilla glaze always works wonders, but for a more seasonal touch, consider making a peppermint glaze by adding peppermint extract to your icing. Another crowd favorite is a chocolate glaze, perfect for balancing out the sweetness of the donut and adding some indulgence. If you want to really wow your guests, whip up a cream cheese frosting with a touch of cinnamon or nutmeg.
H1: Tools You’ll Need to Make Christmas Donuts
Now, before you get too excited, let’s make sure you have all the right tools on hand. The basics include a donut pan, if you’re baking, or a deep fryer for fried donuts. A piping bag will be essential if you want your donuts to have that perfect, uniform shape.
But hey, what if you don’t have a donut pan? No worries! You can use a cupcake pan as a substitute. Simply wrap some aluminum foil around your finger to create the donut hole, then pipe the batter around it. Voilà, DIY donuts without fancy equipment!
H2: Alternatives If You Don’t Have a Donut Pan
In case you’re wondering, yes, you can totally improvise without specialized tools. If you don’t own a donut pan, simply use a cupcake tray and shape the holes using the method mentioned above. It works like a charm, and your donuts will still have that signature look. This is especially handy when you’re whipping up last-minute treats for your holiday gatherings!
Part 3: Step-by-Step Recipe
H1: Baked vs. Fried Christmas Donuts
Now for the fun part—actually making the donuts! But before we jump into the recipe, let’s discuss the two primary methods: baking versus frying. Both have their own charm, but which one should you go for?
Baked donuts are the lighter option. Since they skip the oil, they tend to be a bit more cake-like in texture. They’re perfect if you’re looking for a less greasy, more health-conscious Christmas morning treat. Plus, baked donuts are quicker to whip up, and cleanup is a breeze.
Fried donuts, on the other hand, bring a classic, indulgent flavor that’s hard to resist. They’re crispy on the outside and soft on the inside, giving you that unmistakable donut-shop vibe. If you’re after decadence and don’t mind the extra effort, frying is the way to go.
No matter which method you choose, the result will be festive, delicious, and bursting with holiday flavor. So, let’s dive into each method!
H2: How to Make Baked Christmas Noel Donuts
If you’re team baked donuts, you’re in for a treat that’s lighter, but just as delicious. Here’s how to make the perfect baked Christmas donuts:
- Preheat the oven to 350°F (175°C). Grease your donut pan with cooking spray to ensure easy removal later.
- Prepare your dry ingredients. In a bowl, whisk together all-purpose flour, baking powder, a pinch of salt, and holiday spices like cinnamon or nutmeg.
- Mix the wet ingredients. In another bowl, combine milk, melted butter, eggs, and a splash of vanilla extract. For an extra festive twist, add peppermint extract or gingerbread syrup.
- Combine the wet and dry ingredients. Slowly pour the wet mixture into the dry ingredients, stirring gently. Be careful not to overmix—just until the batter is smooth with no lumps.
- Pipe the batter into the donut pan, filling each cavity about ¾ full. This ensures they rise beautifully without spilling over.
- Bake for 12-15 minutes or until a toothpick comes out clean. Let them cool in the pan for a few minutes before transferring them to a wire rack.
Now comes the fun part—decorating! We’ll cover all the delicious ways you can glaze and adorn your donuts in the next section. But for now, pat yourself on the back—your donuts are almost ready to devour!
H2: How to Make Fried Christmas Donuts
If you’re ready to get a bit more hands-on and fry up some Christmas magic, this method is for you! Here’s how to make perfect fried Christmas donuts:
- Heat the oil. Pour about 2 inches of oil into a heavy-bottomed pot or deep fryer and heat it to around 350°F (175°C).
- Mix the dry ingredients just as you would for baked donuts—flour, baking powder, sugar, and holiday spices like ginger or cinnamon.
- Combine the wet ingredients in another bowl. This time, you might want to add a touch of buttermilk for extra fluffiness.
- Form the dough. Stir the wet and dry ingredients together until a soft dough forms. It should be thick but still pliable.
- Roll out the dough on a lightly floured surface to about ½ inch thickness. Use a donut cutter (or two circular cookie cutters) to cut out your donut shapes.
- Fry the donuts for about 2-3 minutes on each side, or until golden brown and cooked through. Be sure to flip them halfway through.
- Drain on paper towels to absorb any excess oil.
Once fried, the donuts are ready for glazing and decorating! Remember to enjoy them fresh—the crispy, fluffy texture is hard to beat.
 Part 4: Decorating Christmas Noel Donuts
Now that you’ve made your donuts—whether baked or fried—it’s time to make them festively fabulous with some delightful decorations. Let’s explore how to transform these golden rings into a true Christmas showstopper. This is where your creativity shines!
H1: Christmas-Themed Donut Decorations
Decorating donuts is half the fun, and for Christmas Noel Donuts, the possibilities are endless. You can go as simple or extravagant as you like, but the key is to keep things festive and colorful.
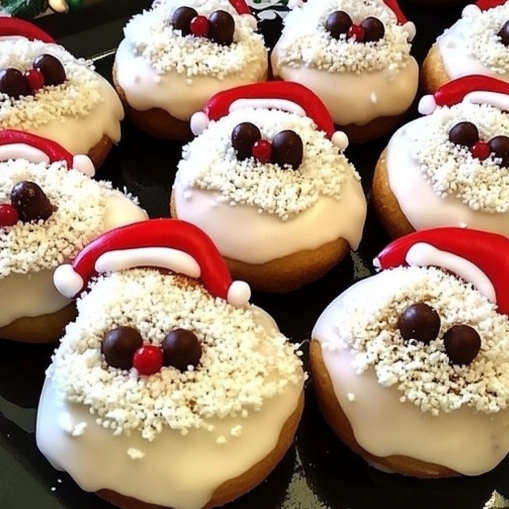
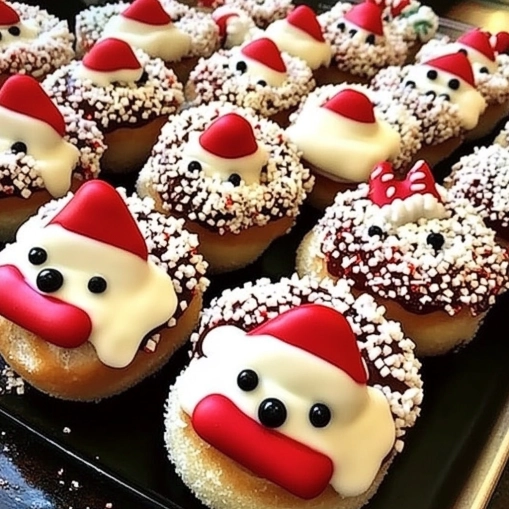
Start by deciding on the theme you want. Classic Christmas colors like red, green, gold, and white are always a hit. For an extra touch of winter magic, sprinkle your donuts with powdered sugar to give them a “snow-covered” look. Candy canes, gingerbread crumbs, and even edible glitter can elevate your donuts to the next level of holiday cheer.
Fun Tip: If you’re making a variety of donuts, consider creating a themed batch—maybe some look like mini wreaths, while others resemble snowmen or Christmas trees!
H2: Frosting Ideas
Frosting can take your donuts from delicious to extraordinary. The trick is in finding the perfect balance of flavor and texture. You want it to be thick enough to stay on the donut, but not so thick that it overwhelms the flavors. A classic vanilla frosting or a rich chocolate ganache is always a winner, but why stop there when you can get festive?
For a Christmas twist, try adding peppermint extract to your vanilla frosting or stir in some cinnamon for a warm holiday spice. Alternatively, a tangy cream cheese frosting with a dash of nutmeg or ginger can bring a comforting, cozy flavor to your donuts.
Pro Tip: The key to smooth frosting is ensuring all your ingredients are at room temperature before mixing. This helps everything blend perfectly for a creamy, spreadable finish.
H2: Fun with Sprinkles and Icing
When it comes to Christmas donuts, sprinkles are your best friend. From red and green sprinkles to tiny snowflake-shaped candies, these simple decorations bring so much joy to the final product. After dipping your donuts in glaze or frosting, immediately add your sprinkles so they stick perfectly.
You can also get creative with icing. Use colored icing to pipe festive designs onto your donuts—like Christmas trees, reindeer faces, or even Santa hats. This is especially fun if you’re getting the kids involved, as they can create their own designs.
Decorating Tip: If you want a more polished look, dip the donuts in icing instead of spreading it. This will give you that smooth, bakery-quality finish.
Part 5: Tips for Making the Perfect Donuts
Now that you’ve decorated your delicious Christmas Noel Donuts, let’s make sure they turn out perfect every time with these expert tips. These little nuggets of wisdom will help you avoid common mistakes, ensuring your donuts come out fluffy, flavorful, and irresistible.
H1: Expert Tips for Baking Perfect Donuts
Baking donuts may seem straightforward, but there are a few key factors that can make or break your batch. To guarantee the best results, follow these tips:
- Don’t Overmix the Batter
When combining your wet and dry ingredients, you want to mix just until they’re combined. Overmixing can result in dense, chewy donuts instead of light, fluffy ones. Stirring too vigorously activates the gluten in the flour, which is great for bread, but not so much for your delicate holiday donuts! - Use Room-Temperature Ingredients
This is one of the most underrated tips in baking! Cold eggs or milk straight from the fridge won’t mix as smoothly with other ingredients, and this can result in an uneven texture. Make sure your butter, eggs, and milk are at room temperature before you start. - Use Fresh Baking Powder
Baking powder loses its potency over time. If you’re using an old canister, your donuts might not rise as much as they should, leaving them flat and dense. Always check the expiration date, and when in doubt, test a little in water—if it doesn’t fizz, it’s time to toss it.
H2: Ingredient Temperature
The temperature of your ingredients plays a huge role in how well your donuts turn out. Room-temperature eggs, milk, and butter blend more easily into the batter, which helps create a smoother, more even texture. This little step can make a world of difference in the final product.
If you forget to take your ingredients out of the fridge in advance, don’t worry! There’s a quick fix: you can warm your eggs by placing them in a bowl of warm water for a few minutes. Butter can be softened in the microwave for 10-15 seconds, but keep an eye on it to avoid melting it completely.
H2: Baking Time and Temperature Control
Baking time and temperature are crucial when it comes to getting the perfect texture for your Christmas donuts. Here’s what you need to know:
- Keep a Close Eye on Baking Time
Baking donuts for too long will dry them out, making them tough and crumbly. But underbaking can leave you with a gummy texture in the middle. Follow the recipe’s suggested baking time closely (typically 12-15 minutes for baked donuts), but always check them a minute or two early. You can use the toothpick test—insert a toothpick into the center of one donut, and if it comes out clean, they’re done! - Control Your Oven Temperature
Oven temperature matters just as much as baking time. If your oven runs too hot, your donuts could brown on the outside before they’re fully cooked on the inside. It’s a good idea to use an oven thermometer to double-check that your oven is truly at the right temperature before you start baking.
Part 6: Storing and Freezing Donuts
You’ve baked (or fried) and decorated your Christmas Noel Donuts to perfection, but what happens when you have leftovers? Proper storage is key to maintaining that fresh, delicious flavor for days to come. Here’s how to store your donuts so they stay just as tasty as when you made them.
H1: How to Store Christmas Donuts
Storing your donuts correctly can keep them soft, moist, and fresh for longer. Here are the best ways to do it:
- Room Temperature Storage
If you plan to eat your donuts within two days, storing them at room temperature is a great option. Simply place them in an airtight container to keep them from drying out. Adding a piece of parchment paper between layers will prevent the frosting or glaze from sticking to each other. But be mindful not to store them near any heat source or in direct sunlight, which can cause the glaze to melt or the donuts to dry out faster. - Refrigerator Storage
For slightly longer storage, the refrigerator is your friend. These donuts will last up to three days in the fridge. However, donuts can lose their soft texture in the cold, so before serving, warm them in the microwave for a few seconds to bring back that freshly-baked feel. Be sure to store them in an airtight container to avoid absorbing any unwanted fridge odors.
H2: Freezing Tips for Baked Donuts
Don’t worry if you made more donuts than you can handle—Christmas donuts freeze beautifully! Here’s how you can freeze them to enjoy later:
- Cool Completely: Before freezing, make sure your donuts have completely cooled. Freezing warm donuts can cause ice crystals to form, which can ruin the texture when they thaw.
- Flash Freeze: Place your donuts in a single layer on a baking sheet and pop them in the freezer for an hour or so. This keeps them from sticking together when you transfer them to a container.
- Store in an Airtight Container: After flash freezing, transfer the donuts to a freezer-safe airtight container or a zip-top bag. Label it with the date—donuts can be stored in the freezer for up to 2-3 months.
- Thaw and Reheat: To thaw, just leave them out at room temperature for about 1-2 hours. Alternatively, you can microwave them for 20-30 seconds for a quick treat. If you want that freshly glazed look again, feel free to dip them in new frosting after thawing.
Pro Tip: Freezing works best for plain donuts or those lightly dusted with sugar. Donuts with intricate decorations or frosted toppings might not fare as well after freezing and thawing.
Part 7: FAQs
Now that we’ve gone through the full process of making, decorating, and storing your Christmas Noel Donuts, let’s address some common questions that people tend to have when making these festive treats. These answers come directly from popular questions found in the “People Also Ask” sections on search engines, so you’re not alone if these queries are on your mind!
H1: Frequently Asked Questions about Christmas Noel Donuts
H2: Can Christmas Donuts Be Baked Instead of Fried?
Absolutely! In fact, baking Christmas donuts is becoming increasingly popular. Baked donuts are lighter, healthier, and easier to make without the hassle of hot oil. Plus, they tend to have a more cake-like texture, which many people enjoy during the holiday season. Simply follow the baked donut recipe from Part 3 to make them in the oven.
H2: How Long Do Christmas Donuts Last?
If stored properly, baked or fried donuts can last up to two days at room temperature or up to three days if stored in the refrigerator. For longer storage, you can freeze them for up to three months. Just be sure to cool them completely before freezing and store them in an airtight container. Refer to Part 6 for full storage instructions.
H2: Can I Make Donuts Without a Donut Pan?
Yes, you can! If you don’t have a donut pan, you can use a cupcake pan and create the donut shape by placing a small ball of aluminum foil in the center of each cupcake mold. Then, pipe the donut batter around it. This method is perfect if you’re improvising and still want those classic donut shapes. Check out Part 2 for more tips on this.
H2: What’s the Difference Between Baked and Fried Donuts?
Baked donuts are generally softer and more cake-like, while fried donuts have a crispy exterior and a fluffy interior. Fried donuts are typically more indulgent, as they’re cooked in oil, but baking donuts offers a lighter alternative with less grease. Both methods are equally delicious, so it just depends on the texture you prefer!
H2: Can You Freeze Donuts After Decorating Them?
You can, but the results will vary depending on the decorations. Donuts with simple glazes or a light dusting of powdered sugar freeze well, but donuts with elaborate frostings or sprinkles may not hold up as well once thawed. If you plan to freeze donuts, it’s best to decorate them after they’ve been thawed for the freshest results. See Part 6 for full freezing tips.
 Part 8: Conclusion
H1: Bringing the Festivity to Your Table with Christmas Noel Donuts
Congratulations! You’ve reached the end of our guide to making Christmas Noel Donuts, and by now, you’re fully equipped to create these delightful treats. Whether you prefer baked or fried, adorned with peppermint icing or chocolate glaze, these donuts are sure to become a holiday staple for you and your loved ones. You’ve got everything you need: from festive decorations, expert tips to avoid common baking pitfalls, and even answers to those last-minute questions.
Not only are these donuts fun and easy to make, but they also bring a certain level of excitement to any Christmas morning breakfast or holiday party. The best part? You can store or freeze them to enjoy later, ensuring they stay fresh and delicious for whenever the holiday spirit strikes.
Remember, the key to perfecting these donuts is creativity—so don’t be afraid to experiment with different flavors, toppings, and decorations to make them your own. Whether you’re gifting them to friends, serving them at a family gathering, or enjoying them solo with a warm mug of cocoa, these donuts are bound to spread joy.
So what are you waiting for? Get into the kitchen and start whipping up some holiday magic with these festive treats!