Heavenly Black Forest Cheesecake Delight Bars: An Irresistible Chocolate and Cherry Treat
Black Forest flavors bring together deep, dark chocolate, tangy cherries, and rich, creamy cheesecake, blending them in delightful bars that are easy to make and even easier to enjoy. This recipe combines a classic dessert with a fresh twist, introducing readers to Heavenly Black Forest Cheesecake Delight Bars, which offer the same rich flavors but in a versatile, shareable format. So, let’s dive right into crafting this dessert from its flavorful base to its creamy layers and vibrant toppings!
 Part 1: Introduction and Background
1.1 What Are Heavenly Black Forest Cheesecake Delight Bars?
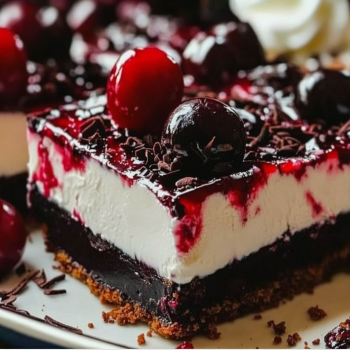
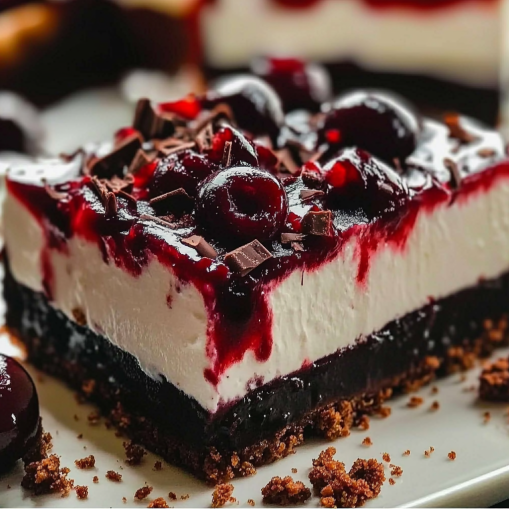
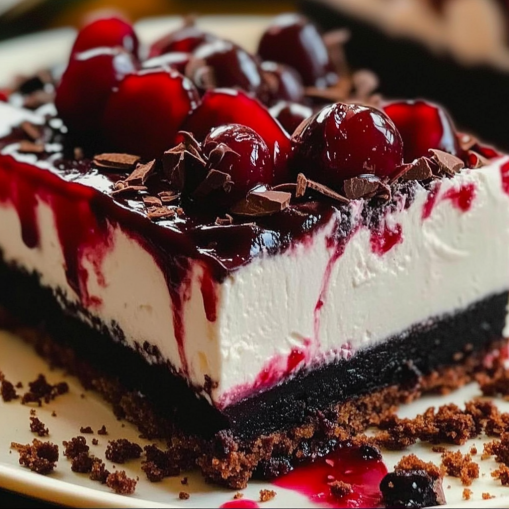
When you take a bite of these Heavenly Black Forest Cheesecake Delight Bars, you’ll find an irresistible fusion of flavors and textures. They feature a chocolatey Oreo crust, a smooth cheesecake filling, and a cherry topping that captures the essence of a classic Black Forest cake in a bite-sized bar form. The recipe is a crowd-pleaser, perfect for gatherings, celebrations, or when you simply crave a delicious dessert at home.
1.2 Origins of Black Forest Cheesecake and Its Traditional Ingredients
Black Forest cake, traditionally known as “Schwarzwälder Kirschtorte” in Germany, originated from the Black Forest region, famous for its cherries and cherry liqueur. This indulgent dessert combines chocolate layers, whipped cream, and cherry topping, which come together to make a rich, fruity treat. Cheesecake variations have introduced new textures, with a creamy layer adding a more intense flavor profile. Transforming this cake into bar form gives it a modern twist that’s both practical and delightful.
Part 2: Key Ingredients and Equipment
2.1 Ingredients Overview for Heavenly Black Forest Cheesecake Delight Bars
To capture that signature Black Forest taste, we’re combining classic ingredients like chocolate, cherries, and cream cheese to create a layered dessert that’s both decadent and well-balanced. These ingredients not only provide flavor but also offer varying textures that make each bite a delight. Starting with a crisp, chocolatey crust, a creamy cheesecake layer, and finishing with a vibrant cherry topping, these cheesecake bars have all the elements needed for a memorable dessert.
2.2 Detailed Ingredient Breakdown
Below, we’ll break down each part of the recipe, from the crust to the topping, with tips for choosing high-quality ingredients.
- Crust: Oreo cookies or graham crackers work well as a base. An Oreo crust gives a darker chocolate flavor, while graham crackers offer a slightly lighter taste, so feel free to choose based on your preference.
- Cheesecake Layer: This part of the bars needs a smooth and rich mixture of cream cheese, eggs, sugar, and sour cream. Vanilla extract enhances the flavors, and you might add a touch of chocolate for extra depth.
- Cherry Topping: Fresh or frozen cherries work beautifully, but if you want to stay close to traditional Black Forest, add a dash of cherry liqueur. This topping brings a bright, fruity contrast to the creamy layers below.
- Whipped Topping: Heavy cream, a touch of sugar, and vanilla whipped to soft peaks will create a delicate, airy topping that complements the denser cheesecake layer.
2.3 Equipment You’ll Need
To make these bars, gather a few essential tools:
- Springform Pan or Square Baking Dish: This will give structure to the bars and make it easier to layer.
- Electric Mixer: For achieving the smoothest, creamiest cheesecake filling.
- Spatula and Mixing Bowls: These help with even mixing and scraping.
The right tools not only make preparation easier but also contribute to that perfect layered cheesecake texture.
Part 3: Step-by-Step Preparation
3.1 Preparing the Crust
The crust is the foundation of your Heavenly Black Forest Cheesecake Delight Bars, giving them that satisfying crunch and rich chocolate flavor. Here’s how to create the perfect base:
- Crush the Cookies or Crackers: Begin by finely crushing Oreo cookies (or graham crackers, if you prefer a milder flavor) in a food processor. You want the crumbs to be consistent, without any large chunks.
- Mix with Melted Butter: Add melted butter to the crumbs, stirring until it has the consistency of wet sand. This mixture should be just sticky enough to hold together when pressed.
- Press into the Pan: Firmly press the crust mixture into the base of a greased baking dish or springform pan, ensuring an even layer. This step ensures that your bars have a sturdy foundation that won’t crumble when cut.
3.2 Making the Cheesecake Filling
The cheesecake layer is the heart of this dessert, offering a rich and creamy contrast to the crust and topping. Follow these tips for a smooth, lump-free filling:
- Cream the Cheese and Sugar: Start by beating softened cream cheese with granulated sugar until smooth and fluffy. This can take about 2–3 minutes using an electric mixer on medium speed.
- Incorporate Sour Cream and Vanilla: Add sour cream and vanilla extract, which help balance the cheesecake’s sweetness and provide a creamy texture. Beat until fully incorporated.
- Add the Eggs One at a Time: Crack in the eggs one by one, beating well after each addition. This helps the filling set properly during baking and prevents any lumps.
- Optional Chocolate Addition: For those who prefer an extra touch of chocolate, consider mixing in a few tablespoons of melted dark chocolate to give the filling more depth.
3.3 Creating the Cherry Layer
The cherry topping is what gives this dessert its true Black Forest flavor, adding color and a tart contrast to the creamy filling.
- Prepare the Cherry Mixture: In a saucepan, add pitted cherries (fresh or frozen) along with a bit of sugar and a splash of water. For an authentic touch, add a dash of cherry liqueur, which enhances the cherry flavor.
- Thicken with Cornstarch: Mix a spoonful of cornstarch with water to form a slurry, then add this to the cherry mixture. Cook on low heat until the mixture thickens slightly, allowing the flavors to meld.
- Cool Before Layering: Allow the cherry topping to cool for a few minutes. This helps prevent the cherries from sinking into the cheesecake layer.
3.4 Assembling the Layers
Assembling the cheesecake bars is all about creating a distinct layered look that’s both delicious and visually appealing.
- Spread the Cheesecake Filling: Pour the prepared cheesecake filling over the crust, using a spatula to ensure an even layer. Smooth the top to make it level.
- Add the Cherry Layer: Gently spoon the cherry mixture on top of the cheesecake layer, spreading it out to create a colorful, even topping.
3.5 Baking Instructions
To bake these bars to perfection, follow these tips for even cooking:
- Preheat and Prepare: Preheat the oven to 325°F (163°C). If using a springform pan, wrap the bottom in foil to prevent leaks.
- Bake Slowly: Place the cheesecake bars in the oven and bake for about 40–45 minutes, or until the edges are set and the center has a slight wobble.
- Optional Water Bath: To prevent cracks, place a pan of hot water on the rack below the cheesecake. This creates steam, helping the bars bake more evenly.
3.6 Cooling and Setting the Cheesecake Bars
Once baked, let the cheesecake bars cool in the pan. After cooling, refrigerate them for at least 4 hours or overnight. This helps the bars set fully, ensuring they’ll be easy to slice and hold their shape.
 Part 4: Decoration and Serving Tips
4.1 Adding the Finishing Touches
Once your Black Forest Cheesecake Bars have chilled and set, it’s time to add some beautiful finishing touches to elevate both their look and taste. Here’s how to do it:
- Whipped Topping: Top each bar with a swirl of fresh whipped cream. You can use a piping bag with a star tip for a more decorative look or simply spoon it on.
- Chocolate Shavings: Sprinkle dark chocolate shavings or curls on top of each bar. This gives a rich, chocolatey finish that complements the cherry and cheesecake flavors.
- Fresh Cherries: Garnish with a single cherry on top of each bar. Fresh or maraschino cherries work well, adding a burst of color and that iconic Black Forest appeal.
4.2 How to Slice and Serve for Best Results
To get clean, even slices, use a sharp knife and wipe it between cuts. Cut the bars into squares or rectangles, depending on your preference. Serve chilled, as the cool temperature enhances the creamy texture and the flavors of the chocolate, cherry, and cheesecake layers.
Part 5: Storage Tips and Recipe Variations
5.1 How to Store Black Forest Cheesecake Bars
To maintain the freshness and flavors of your Black Forest Cheesecake Bars, it’s essential to store them properly. Here are some tips:
- Refrigeration: Place the bars in an airtight container and store them in the refrigerator for up to 4–5 days. The cool temperature helps preserve the creamy texture of the cheesecake layer and keeps the cherry topping from softening too quickly.
- Freezing: These bars can also be frozen if you want to enjoy them later. To freeze, wrap each bar individually in plastic wrap, then place them in a freezer-safe container. This method prevents freezer burn and keeps them fresh for up to 2 months. Before serving, allow the bars to thaw in the refrigerator overnight.
5.2 Creative Variations on Black Forest Cheesecake Bars
If you’re looking to put a twist on this classic dessert, here are some fun variations to try:
- Chocolate Crust Alternatives: Swap Oreo cookies with chocolate graham crackers or a mix of almond flour and cocoa powder for a gluten-free option.
- Flavor-Infused Cheesecake Layer: Add a teaspoon of almond extract or a splash of dark chocolate liqueur to the cheesecake filling for extra depth.
- Fruit Variations: Substitute cherries with raspberries or strawberries to create a new berry flavor profile, keeping the same layering technique.
- No-Bake Option: For a quicker version, skip the baking and use a gelatin-based cheesecake layer. This is ideal for warm weather or when you’re short on time.
Part 6: Frequently Asked Questions (FAQs)
6.1 FAQ Section for Black Forest Cheesecake Delight Bars
To help address common questions about making these bars, here’s a FAQ section to guide readers through some popular topics:
Q1: Can I use canned cherry pie filling instead of fresh cherries?
Yes, you can! Canned cherry pie filling is a convenient substitute and gives a similar tart, fruity layer. However, using fresh or frozen cherries with a dash of cherry liqueur adds a more authentic Black Forest flavor.
Q2: Why did my cheesecake layer crack during baking?
Cheesecake often cracks due to overbaking or rapid cooling. To prevent this, bake at a lower temperature and avoid opening the oven door too frequently. A water bath placed in the oven below the bars can also help maintain moisture.
Q3: How do I make sure the crust doesn’t crumble?
To create a sturdy crust, ensure the cookie crumbs are finely crushed and mixed well with melted butter. Press the mixture firmly and evenly in the pan before adding the cheesecake layer.
Q4: Can I make these bars gluten-free?
Absolutely. Use gluten-free cookies or graham crackers for the crust, and ensure all other ingredients, such as cream cheese and chocolate, are labeled gluten-free.
Q5: What’s the best way to store these bars if I want to keep them fresh longer?
For the longest freshness, store them in an airtight container in the refrigerator for up to 4–5 days, or wrap and freeze individual bars for up to 2 months.
Part 7: Summary and Presentation Tips
7.1 Recipe Summary
To create your Heavenly Black Forest Cheesecake Delight Bars, follow these steps:
- Prepare the Crust: Crush Oreo cookies, mix with melted butter, and press into a baking pan.
- Make the Cheesecake Filling: Blend cream cheese, sugar, sour cream, and eggs until smooth, then pour over the crust.
- Add Cherry Layer: Prepare a cherry topping using fresh cherries, sugar, and cornstarch, then spoon it over the cheesecake filling.
- Bake and Cool: Bake at 325°F (163°C) for 40–45 minutes. Allow to cool completely before refrigerating for a few hours or overnight.
- Decorate and Serve: Top with whipped cream, chocolate shavings, and cherries before slicing and serving.
By following these steps, you’ll have a decadent dessert that’s sure to impress!
7.2 Presentation Tips
When serving your Black Forest Cheesecake Bars, presentation can make all the difference. Here are some tips:
- Chill and Serve: Always serve the bars chilled to enhance their creamy texture.
- Use Decorative Plates: Present the bars on beautiful plates or platters, perhaps garnished with additional cherries or mint leaves for a pop of color.
- Create a Dessert Table: If serving at a gathering, arrange the bars on a dessert table alongside other themed treats for an appealing spread.
The article on Heavenly Black Forest Cheesecake Delight Bars is complete! If you need any further modifications or have specific sections you’d like to focus on, just let me know. Whether you want more details, additional variations, or help with formatting, I’m here to assist!
 Conclusion
Creating Heavenly Black Forest Cheesecake Delight Bars brings together the classic flavors of chocolate, cherries, and cheesecake in a stunning dessert that’s sure to impress. From a rich, buttery Oreo crust to a creamy cheesecake layer topped with a cherry compote, these bars offer the perfect combination of sweetness, tang, and texture. With simple decorating tips and storage methods, they’re as practical to make as they are delightful to share.
Whether for a special occasion or a treat-yourself dessert, these cheesecake bars are bound to be a hit. Enjoy the process, experiment with the variations, and savor each layer of this decadent dessert!
