
Ready to experience the perfect balance between tart and rich, crispy and gooey? Dark Chocolate Raspberry Pie Bars are the sweet treat you didn’t know you needed. This article dives deep into what makes these dessert bars a must-bake—covering everything from ingredients and steps to tips, storage, and flavor variations.
Introduction & Overview
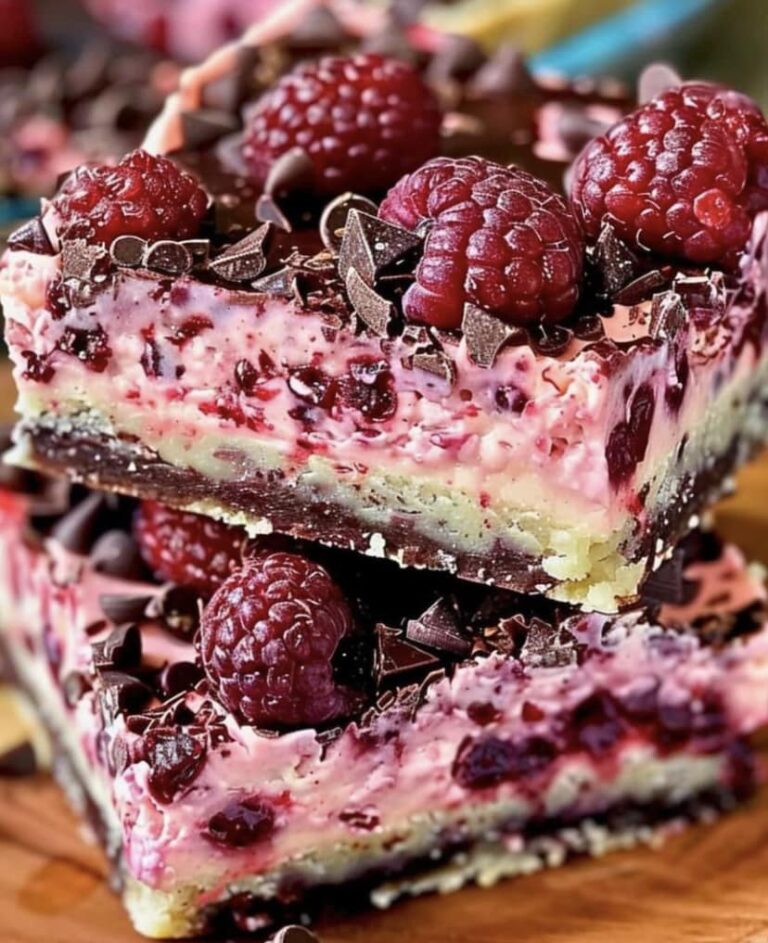
Dark Chocolate Raspberry Pie Bars – A Decadent Twist on Berry Desserts
If you’re a fan of rich dark chocolate and fresh, juicy raspberries, then you’re in for a real treat. These bars aren’t your typical dessert squares—they’re an upgrade, a fusion of gooey fudge and fruity brightness layered over a buttery crust. Each bite melts in your mouth with a contrast that’s just divine. And hey, they’re easier to make than you might think!
Unlike traditional raspberry crumble bars, these beauties add a bold chocolate base that elevates the flavor. The sweetened condensed milk creates a luscious, velvety layer that blends seamlessly with melted dark chocolate. Then comes the raspberry layer—bright, tangy, and slightly jammy. It’s all topped off with a buttery, golden crumble that brings everything together like a cozy blanket on a rainy day.
Whether you’re baking for a holiday, sharing at a potluck, or just craving something spectacular, dark chocolate raspberry pie bars check all the boxes. They’re perfect for chocolate lovers, berry fans, and anyone who appreciates a no-fuss, crowd-pleasing dessert. So, let’s dig into why these bars are stealing hearts (and plates) everywhere!
Up next: we’ll break down why these bars deserve a top spot in your recipe collection and what makes them stand out from the usual dessert lineup.
Dark Chocolate Raspberry Pie Bars – Easy & Decadent Dessert Recipe
Ingredients
Instructions
- Author: laura
Ingredients Deep Dive
Key Components
Behind every irresistible dark chocolate raspberry pie bar is a lineup of simple ingredients working in delicious harmony. Let’s unpack each layer—because once you know what makes them tick, you’re halfway to baking bliss.
The Buttery Base
Every great dessert starts with a strong foundation. Here, that’s a tender shortbread-like crust made from all-purpose flour, unsalted butter, granulated sugar, and a pinch of salt. This combo creates a slightly crisp, melt-in-your-mouth texture that perfectly supports the gooey fillings. Some bakers toss in a touch of vanilla extract or almond flour for extra depth, but the classic mix keeps things clean and satisfying.
The Chocolate Magic
Next comes the star: the dark chocolate filling. Melted dark chocolate chips blended with sweetened condensed milk forms a rich, silky layer that sits on the crust like a velvet curtain. It’s indulgent without being overbearing, offering just enough bitterness to balance the sweetness from the raspberry layer. You can explore semi-sweet chocolate for a milder profile, but dark chocolate adds that bold, satisfying punch.
The Raspberry Dream Layer
Here’s where the tangy brightness cuts through the richness. You’ll need fresh raspberries (or thawed frozen ones if fresh aren’t in season), combined with raspberry jam, sugar, and a spoonful of cornstarch to thicken things up. Some versions use only jam, but adding whole berries creates bursts of flavor that jam alone just can’t match.
BS in the Kitchen recommends layering the fruit right over the chocolate before baking to help the flavors merge naturally while in the oven. It’s a move that takes these bars from tasty to totally unforgettable.
Step-by-Step Recipe Structure
Prepping & Mixing the Crust
Alright, apron on! We’re kicking things off with the buttery base. In a large mixing bowl, cream together 1 cup of softened unsalted butter and ½ cup of granulated sugar until light and fluffy—this step is key to getting that melt-in-your-mouth bite. Add 2 cups of all-purpose flour and ¼ teaspoon of salt, then mix until a crumbly dough forms.
Scoop about ¾ of the dough into a greased or parchment-lined 9×13” baking pan, pressing it down gently but firmly to form an even layer. You’ll want to reserve the remaining dough for the topping later on.
Pop that pan into a preheated oven at 350°F (175°C) and bake the crust for about 12–15 minutes. It should look lightly golden around the edges. This pre-bake helps the base stay crisp under the chocolate layer—no soggy bottoms here!
Crafting the Chocolate Filling
While the crust cools slightly, make your fudgy dark chocolate layer. In a saucepan over low heat, combine 1 can (14 oz) of sweetened condensed milk with 2 cups of dark chocolate chips. Stir until smooth, glossy, and totally irresistible.
Once your crust has cooled for a few minutes, spread the chocolate mixture evenly over the top. Don’t be shy—go edge to edge. A warm offset spatula works wonders here. The creamy richness from the condensed milk gives the bars that velvety brownie-like layer that just melts into the crust.
Building the Raspberry Layer
Time to brighten things up! In a small bowl, toss 2 cups of fresh raspberries with 2 tablespoons of sugar and 1 tablespoon of cornstarch. This mixture helps thicken the juices as it bakes, so your bars aren’t swimming in liquid.
Some bakers prefer to add a layer of raspberry jam beneath or on top of the fresh berries for extra punch—about ½ cup does the trick. It adds concentrated sweetness while the berries add juicy bursts with every bite.
Spread this fruit mixture over the chocolate layer. It doesn’t need to be perfect—rustic looks delicious.
For a pro tip, Reddit’s r/TastyKitchenCreations recommends scattering whole berries unevenly for that artisan bakery vibe.
Adding the Crumb or Topping Layer
Remember the reserved dough from earlier? Time to crumble it! Sprinkle it evenly across the raspberry layer, pinching some into larger bits for texture. This creates a delightful contrast between gooey and crispy—like a crumble and a brownie had a baby.
If you’re feeling adventurous, fold in a handful of chopped nuts or mini chocolate chips for bonus flavor and crunch.
Baking & Cooling
Slide the pan back into the oven and bake at 350°F for another 30–35 minutes, or until the top looks golden brown and the raspberry juices are bubbling slightly.
Now the hardest part—letting them cool. Let the bars sit in the pan for at least an hour. If you try to slice them too soon, you’ll end up with a gooey mess (though still delicious). Once cooled, you can transfer the pan to the fridge for cleaner cuts.
According to Tablespoon, chilling the bars for 2–3 hours makes slicing a breeze and helps flavors settle beautifully.
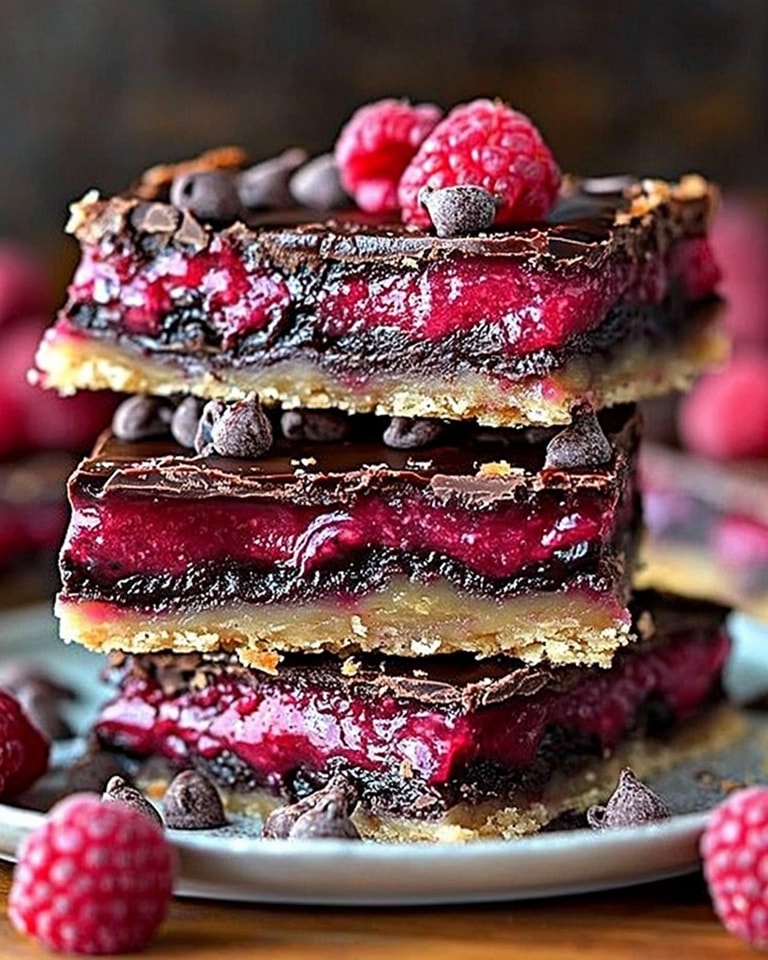
Once cut into squares or rectangles, you’ll see gorgeous layers of buttery crust, silky chocolate, juicy raspberry, and golden crumble—each bite a little celebration.
Tips, Troubleshooting & Variations
Baking Tips
Let’s face it, even simple recipes can throw curveballs. But don’t worry—these tips will help you nail your dark chocolate raspberry pie bars every time.
-
Don’t overbake the crust. It should be just golden before layering the chocolate; otherwise, you’ll lose that soft, buttery bite.
-
Use parchment paper. Lining your pan makes cleanup (and lifting the bars out) way easier.
-
Level your chocolate. A warm spatula helps smooth the chocolate filling, preventing lumps that mess with the raspberry layer.
-
Go easy on the berries. Too many fresh raspberries? You’ll end up with soggy bars. Stick to the amounts and scatter evenly.
Creative Variations
Want to mix things up? These easy tweaks keep things exciting without complicating the recipe:
-
Add a nutty crunch. Chopped toasted pecans or slivered almonds in the crumble bring texture and nutty depth.
-
Swap the fruit. Out of raspberries? Try cherries or blackberries for a seasonal twist. Just adjust the sugar slightly depending on the fruit’s tartness.
-
Make it gluten-free. Sub in 1:1 gluten-free baking flour for the crust and topping.
-
Try a white chocolate drizzle. Once baked and cooled, drizzle with melted white chocolate for a pretty contrast and sweet finish.
If you’re on the lookout for inspiration, Everyday Jenny has a similar crumb bar that plays with textures and flavors beautifully.
Storage & Serving Suggestions
These bars don’t just taste amazing—they’re also super practical. Store them in an airtight container at room temperature for up to 2 days, or refrigerate for 5–6 days.
Want cleaner cuts? Chill them before slicing. Serve with a scoop of vanilla ice cream or a hot cup of tea for an afternoon treat that’ll have everyone asking for seconds.
 Nutritional Info & Dietary Notes
Nutrition Overview
Let’s talk numbers—but don’t worry, we’re not here to guilt you out of dessert. These dark chocolate raspberry pie bars are rich, satisfying, and meant to be enjoyed in moderation.
On average, one bar (assuming you cut the pan into 24 squares) contains approximately:
-
Calories: 280–320
-
Fat: 14–18g
-
Sugar: 20–24g
-
Protein: 3–5g
Keep in mind, the numbers can vary based on ingredient swaps or portion sizes. Using extra chocolate chips or sweetened jam can increase sugar and fat, while adding nuts might boost protein and fiber slightly.
The upside? Thanks to the raspberries, you’re getting a small dose of antioxidants, fiber, and Vitamin C in every bite. It’s dessert—but not a total nutritional zero.
Dietary Modifications
Want to tailor the recipe to meet your dietary goals? Easy peasy.
-
Lower the sugar: Use unsweetened raspberry preserves or cut back on jam.
-
Make it dairy-free: Swap in coconut condensed milk and use plant-based butter.
-
Gluten-free? No problem—just replace the all-purpose flour with a gluten-free blend. The texture stays just as dreamy.
If you’re into high-fiber baking, adding a spoonful of oat flour or using whole wheat pastry flour in the crust works well—just don’t overdo it, or you’ll lose that buttery tenderness.
These tweaks let you enjoy your bars without compromising on that irresistible flavor combo of dark chocolate and raspberries. Because dessert should always feel good—inside and out.
Background & Popularity
Origins of Chocolate Raspberry Bars
Every dessert has a story, and dark chocolate raspberry pie bars are no exception. These sweet squares are part of a bigger dessert family known as dessert bars—a beloved staple in North American baking.
Inspired by traditional fruit pies, dessert bars simplify the process. Instead of rolling out dough or crafting lattice tops, everything’s layered in a single pan. Easy to slice, easy to share. Over time, home bakers started experimenting, blending bold flavors like raspberry and chocolate into new bar recipes that felt both nostalgic and exciting.
The pairing of dark chocolate and raspberries isn’t new—it’s a classic in its own right. But turning it into a compact, handheld bar with layers of crust, fudge, and fruit? That’s where the magic happens.
Popularity in Recipe Sites & Social Media
One scroll through Pinterest or a quick hashtag search, and you’ll find these bars popping up everywhere. From baking blogs to Reddit threads, their fanbase is only growing.
Take BS in the Kitchen for instance—they’ve nailed a version that’s gone viral thanks to its simple steps and stunning results.
Not to mention, Wikipedia even lists dessert bars as a staple in potlucks and bake sales. So it’s no surprise these chocolate-raspberry wonders are gaining traction as a modern-day classic.
FAQs
Can I use frozen raspberries instead of fresh?
Absolutely! Frozen raspberries work just fine, especially when fresh ones aren’t in season. Just make sure to thaw and drain them well before using. Excess moisture can make your bars soggy—and nobody wants that.
How do I make the crumb topping?
Simple! When mixing your crust, reserve about one-quarter of the dough. After spreading your raspberry layer, crumble the reserved dough over the top with your fingers. You can keep it rustic or press some into bigger chunks for texture. For extra crunch, feel free to toss in a few chopped pecans or mini chocolate chips.
Can I prepare these bars ahead of time?
You bet. You can either fully bake the bars, cool, and refrigerate them for up to 5 days, or assemble all the layers, cover tightly, and refrigerate the unbaked pan overnight. Just be sure to bring it back to room temperature before baking to ensure even cooking.
What’s the best pan size to use?
A 9×13-inch baking pan is ideal. It gives you enough surface area to build those signature layers without overcrowding. Cutting the finished bars into 24 squares gives just the right bite-sized portion—rich, but not overwhelming.
Can I make these bars gluten-free?
Yes! Simply swap the all-purpose flour for a gluten-free baking blend—preferably one that contains xanthan gum for structure. The taste stays just as satisfying, and the crust holds up beautifully.
 Conclusion & Call to Action
There you have it—dark chocolate raspberry pie bars that check all the boxes: sweet, tart, gooey, and crumbly in all the right ways. Whether you’re a first-time baker or a seasoned pro, this recipe is the kind of showstopper that never disappoints.
They’re easy to make, fun to customize, and practically guaranteed to vanish within minutes of hitting the table.
So go ahead—grab your mixing bowl, preheat that oven, and treat yourself to something truly special. Don’t forget to share your results, leave a comment, and tag your photos—because good desserts deserve to be celebrated! 🍫🍓