
Introduction to Red Velvet Cinnamon Rolls
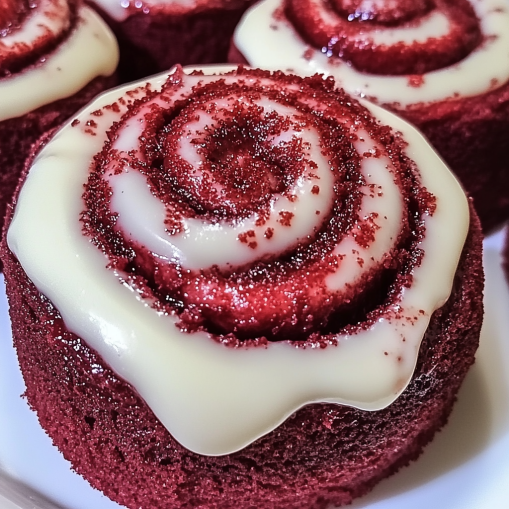
Craving a treat that combines the moist, velvety goodness of red velvet with the warm, comforting swirl of a cinnamon roll? Red Velvet Cinnamon Rolls are the perfect answer, offering a festive twist on classic cinnamon rolls. Whether it’s for a cozy breakfast or a holiday brunch, these vibrant rolls are sure to impress with their striking color and rich, cream cheese frosting.
Let’s dive into every detail of how to create this decadent dessert from scratch, along with tips, variations, and even ways to make them ahead. Ready? Let’s roll up our sleeves and get baking!
Part 1: Key Ingredients
Creating perfect Red Velvet Cinnamon Rolls begins with choosing the right ingredients. This recipe features a combination of classic cinnamon roll essentials, plus a few special additions for that iconic red velvet flavor and texture. Here’s everything you’ll need:
Essential Ingredients for the Dough
- Flour: For the base, use all-purpose flour to keep the dough light and fluffy.
- Yeast: Active dry yeast is ideal for this recipe, ensuring the rolls rise properly and get that airy texture.
- Milk: Warm milk helps activate the yeast and enriches the dough.
- Butter: Adding melted butter gives the dough a soft, rich texture.
Red Velvet Ingredients
To achieve that beautiful red velvet color and taste, you’ll need:
- Cocoa Powder: Just a small amount adds depth without overpowering the cinnamon flavor.
- Red Food Coloring: The classic red hue is key to making these rolls stand out.
Cinnamon Filling Ingredients
For a truly indulgent experience, the filling is crucial:
- Butter: Spread softened butter generously over the dough.
- Brown Sugar & Cinnamon: This classic duo brings the signature cinnamon roll sweetness and warmth.
Cream Cheese Frosting Ingredients
A rich cream cheese frosting tops these rolls perfectly:
- Cream Cheese: Use full-fat cream cheese for a smooth, decadent texture.
- Powdered Sugar: Adds sweetness and blends well with cream cheese.
- Vanilla Extract: Enhances the flavor and balances the richness.
With these ingredients, you’re all set to make delicious, homemade Red Velvet Cinnamon Rolls. Each component plays a role in creating the unforgettable taste and texture that’ll make these rolls a family favorite.
Part 2: Preparing the Dough for Red Velvet Cinnamon Rolls
The first major step in creating your Red Velvet Cinnamon Rolls is preparing the dough. This soft, pillowy dough will serve as the base for your deliciously sweet and spiced rolls, so it’s essential to get it just right. Here’s how to make it:
Step-by-Step Instructions
- Activate the Yeast: Begin by warming the milk to around 110°F (43°C). Pour the warm milk into a mixing bowl, add a tablespoon of sugar, and sprinkle the active dry yeast over the top. Stir gently, then let the mixture sit for 5–10 minutes until it’s foamy. This step is essential to activate the yeast, giving the rolls their light, airy texture.
- Mix the Wet Ingredients: In a separate bowl, combine the melted butter, egg, and red food coloring. Stir until the mixture is well-blended. The food coloring will give your rolls their vibrant color, and the egg adds richness to the dough.
- Combine Dry Ingredients: In a large mixing bowl, whisk together the all-purpose flour, a tablespoon of cocoa powder, and a pinch of salt. Cocoa powder is a subtle but essential addition here, bringing in that classic red velvet taste.
- Form the Dough: Gradually add the wet mixture and the activated yeast to the dry ingredients. Use a dough hook attachment if you have a stand mixer, or knead by hand until the dough is smooth and elastic, about 5–7 minutes. The dough should be soft but not sticky—add a touch more flour if it’s too sticky or a bit of milk if it’s too dry.
- Let the Dough Rise: Place the kneaded dough into a greased bowl, cover it with a clean towel, and set it in a warm spot. Allow the dough to rise for about 1–1.5 hours or until it has doubled in size. This step ensures the rolls turn out light and fluffy.
Part 3: Creating the Cinnamon Filling
Now that the dough is ready, it’s time to prepare the cinnamon filling—the heart and soul of these delicious Red Velvet Cinnamon Rolls. This filling brings the perfect balance of sweet and spicy, infusing each roll with irresistible warmth and aroma.
Ingredients for the Filling
- Brown Sugar: Brown sugar is key to achieving a rich, caramel-like sweetness. It also adds a soft texture to the filling, making each bite perfectly tender.
- Ground Cinnamon: This is the star ingredient! Cinnamon brings warmth and spice, balancing the sweetness of the dough and sugar.
- Butter: Softened butter makes the filling creamy and helps it spread easily across the dough, ensuring every bite has that classic cinnamon-sugar flavor.
Step-by-Step Instructions
- Combine the Ingredients: In a mixing bowl, blend the brown sugar and cinnamon until they’re well-mixed. This will evenly distribute the spice, making every bit of the filling flavorful.
- Add the Butter: Soften the butter until it’s spreadable, but not melted. Spread it across the rolled-out dough, ensuring it covers all edges. Then, sprinkle the cinnamon-sugar mixture over the butter layer. Use a gentle patting motion to help the sugar stick to the butter.
- Spread Evenly: Spread the cinnamon filling in an even layer across the dough, pressing gently to help it adhere. This ensures the filling stays in place when you roll up the dough.
With the filling spread and ready, the dough is now primed to be rolled up and sliced into delicious spirals, each filled with sweet, spiced goodness.
Part 4: Rolling and Slicing the Dough
With the filling spread evenly across the dough, it’s time to roll up the dough into a log and slice it into individual Red Velvet Cinnamon Rolls. This step creates those beautiful spirals of dough and cinnamon filling in each roll.
Step-by-Step Instructions for Rolling the Dough
- Start Rolling: Beginning at one of the long edges, carefully roll the dough tightly into a log. Keep the roll tight as you go to prevent the filling from spilling out and to achieve a defined spiral in each roll.
- Seal the Edge: Once rolled, pinch the edge of the dough log to seal it. This keeps the rolls intact during baking and helps the filling stay inside.
- Mark and Slice: Use a serrated knife or unflavored dental floss to make clean, even slices without flattening the dough. Slice the log into 1 ½-inch sections, yielding approximately 12 rolls. For the best texture and shape, try to keep each slice uniform.
- Arrange in the Baking Pan: Place the rolls in a greased baking pan with a little space between each. This allows them to expand and rise, resulting in fluffy, soft rolls.
- Second Rise: Cover the pan loosely with plastic wrap or a clean kitchen towel, and allow the rolls to rise again for about 30 minutes. This second rise gives the rolls their final fluffy texture and ensures they bake evenly.
After the second rise, your Red Velvet Cinnamon Rolls are ready to bake, filling your kitchen with the enticing aroma of cinnamon and fresh dough!
Part 5: Baking the Red Velvet Cinnamon Rolls
With the rolls neatly arranged in the pan, it’s time to bring them to life in the oven. Baking these rolls is straightforward, but a few tips will ensure they come out perfectly soft and evenly baked.
Baking Instructions
- Preheat the Oven: Preheat your oven to 350°F (175°C). While the oven is heating, the rolls can continue to rest for a few more minutes, allowing them to become even fluffier.
- Bake Time: Place the pan in the center of the oven and bake for 20-25 minutes. Keep a close eye on them to ensure they don’t overbake. The tops should be a beautiful golden-brown, and the centers should feel soft when touched.
- Check for Doneness: To check for doneness, gently press the center of a roll; it should feel firm yet springy. Alternatively, insert a toothpick into the center. If it comes out mostly clean with just a few crumbs, the rolls are done.
- Cool Slightly: Remove the rolls from the oven and let them cool in the pan for about 10 minutes. Cooling briefly helps the rolls retain their shape and makes them easier to frost.
Once baked, these Red Velvet Cinnamon Rolls are soft, fluffy, and full of rich flavors, making them ideal for a decadent treat!
Part 6: Making the Cream Cheese Frosting
The final touch to elevate these Red Velvet Cinnamon Rolls is a rich, smooth cream cheese frosting. This frosting balances sweetness with a slight tang, enhancing the red velvet flavor and adding a creamy layer that melts beautifully over the warm rolls.
Ingredients for Cream Cheese Frosting
- 4 oz (113g) cream cheese, softened
- 1/4 cup (56g) butter, softened
- 1 cup (120g) powdered sugar, sifted
- 1/2 tsp vanilla extract
- Pinch of salt (optional, for taste balance)
Instructions
- Cream the Butter and Cream Cheese: In a mixing bowl, beat the softened cream cheese and butter together until smooth and creamy. This should take about 2 minutes on medium speed.
- Add Vanilla and Sugar: Gradually add the powdered sugar, about 1/3 at a time, mixing until each addition is fully incorporated. Once the frosting is smooth, add the vanilla extract, and mix on low speed until well blended. If the frosting feels too thick, add a teaspoon of milk to adjust the consistency.
- Frost the Rolls: Spread the frosting generously over the slightly cooled rolls, allowing it to melt just a little into the rolls’ warm tops.
With each swirl covered in a creamy layer, the rolls become irresistibly indulgent!
Part 7: Baking and Serving
After all the preparation, it’s time to bake these delightful Red Velvet Cinnamon Rolls!
Baking Instructions
- Preheat the Oven: Heat the oven to 350°F (175°C).
- Bake: Place the prepared rolls in the oven and bake for 20-25 minutes, or until the tops are slightly golden and the centers are baked through. They should feel firm but soft when pressed gently.
- Cool Slightly: Allow the rolls to cool for about 5-10 minutes before adding the cream cheese frosting. This slight cooling lets the frosting melt just a little without completely liquefying, giving the rolls a gooey, luxurious finish.
Serving Tips
These rolls are best served warm, so the frosting remains melty, and the rolls stay soft. Pair them with a cup of coffee or tea for an indulgent breakfast or dessert treat that’s sure to impress!
Part 8: Cream Cheese Frosting Recipe and Application
No Red Velvet Cinnamon Roll is complete without a generous layer of velvety cream cheese frosting. This frosting adds a luscious tanginess that perfectly complements the cinnamon spice and subtle cocoa flavors of the rolls.
Cream Cheese Frosting Ingredients
- Cream Cheese: 4 oz, softened
- Butter: 2 tbsp, softened
- Powdered Sugar: 1 cup
- Vanilla Extract: ½ tsp
- Milk: 1-2 tbsp, for desired consistency
Instructions for Making the Frosting
- Combine Ingredients: In a mixing bowl, beat together the softened cream cheese and butter until smooth and creamy.
- Add Sugar and Vanilla: Gradually add powdered sugar and vanilla extract, mixing until smooth. If the frosting is too thick, add a little milk until you reach a spreadable consistency.
Applying the Frosting
Spread the frosting generously over the warm rolls, allowing it to melt slightly for an extra indulgent experience. Serve immediately and enjoy the delicious combination of flavors and textures!
Part 9: Storing and Freezing Red Velvet Cinnamon Rolls
Once you’ve baked up a batch of these incredible Red Velvet Cinnamon Rolls, storing them properly will ensure they stay fresh and delicious.
How to Store
If you plan to enjoy the rolls within a couple of days, store them at room temperature. Place them in an airtight container to keep them soft and moist. They’ll stay fresh for about 2 days on the counter.
Freezing Instructions
To make your rolls last longer, freeze them! Allow the baked rolls to cool completely, then wrap each roll tightly in plastic wrap and store them in a freezer-safe container or bag. When you’re ready to enjoy, simply reheat them in the oven or microwave until warmed through.
Reheating Tips
To keep the rolls from drying out, add a touch of water on top before reheating in the microwave, or cover with foil in the oven for best results.
Part 10: Frequently Asked Questions
1. Can I make Red Velvet Cinnamon Rolls ahead of time?
Yes, you can! Prepare the dough and rolls as instructed, but instead of baking them right away, cover them tightly with plastic wrap or foil and refrigerate overnight. When you’re ready to bake, just let the rolls sit at room temperature for about 30 minutes before popping them into the oven.
2. Can I use store-bought red velvet cake mix for these rolls?
Absolutely! If you’re short on time or prefer an easier route, using a red velvet cake mix can be a good shortcut. However, homemade dough provides a fresher, richer flavor. If you do use a mix, make sure to follow the instructions for the dough consistency, and don’t forget the cinnamon and filling!
3. How can I make the cream cheese frosting less sweet?
To tone down the sweetness of the frosting, simply reduce the amount of powdered sugar in the recipe. Alternatively, you can add a pinch of salt or a splash of vanilla extract to balance out the sweetness and enhance the flavors.
4. Can I freeze unbaked Red Velvet Cinnamon Rolls?
Yes, you can freeze the rolls before baking! Once shaped and placed in the baking pan, cover them tightly and freeze. When you’re ready to bake, let them thaw and rise for a few hours, then bake as usual.
5. Are these rolls only for special occasions?
While Red Velvet Cinnamon Rolls are a showstopper for holidays and celebrations, they can be enjoyed as a special treat for breakfast or dessert any time! Their rich flavor and festive color make them a delightful indulgence for any occasion.