
Luxurious Pink Velvet Raspberry Cheesecake
Before we dive into the layers of flavor and velvety goodness, here’s a quick taste of what this article offers. Whether you’re a beginner or a confident baker, this guide will help you create a stunning dessert that looks fancy, tastes amazing, and leaves everyone wanting seconds. From the ingredients to baking tips and creative variations, we’ve got you covered—so let’s get started!
🍰 Part 1: Introduction
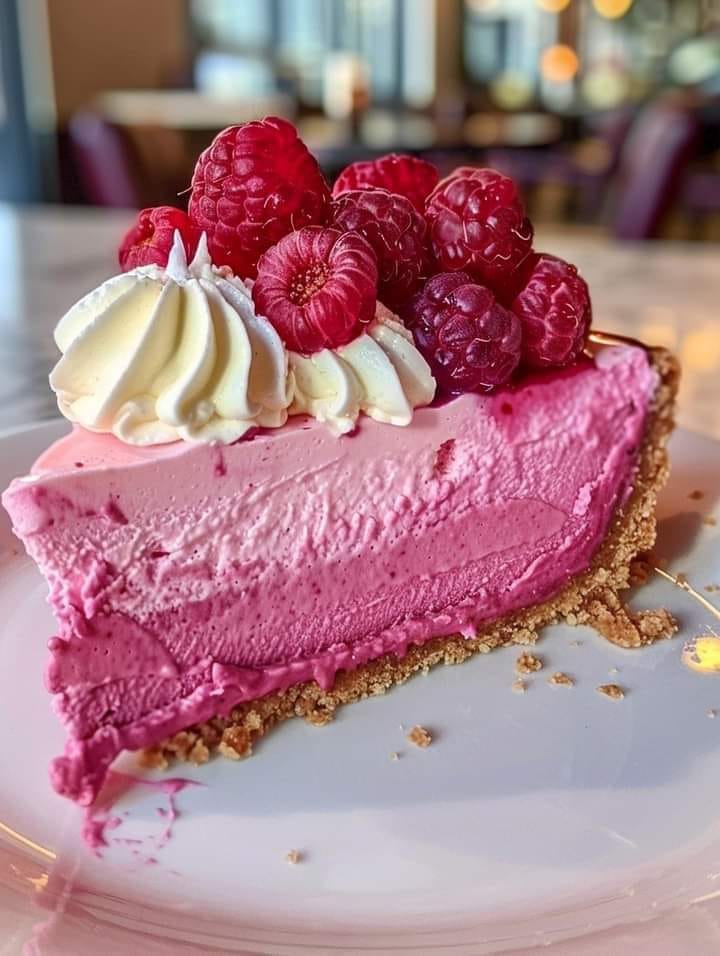
A Luxurious Pink Velvet Raspberry Cheesecake isn’t just dessert—it’s a masterpiece. It’s the kind of show-stopping treat that turns heads and gets people talking. With a smooth, tangy raspberry swirl and that dreamy pink velvet texture, this cheesecake is a sweet celebration in every bite.
It’s perfect for holidays, romantic dinners, birthdays, or anytime you want to bake something extra special. And while it looks like it came from a fancy bakery, it’s surprisingly simple to make at home. Stick with us, and you’ll learn exactly how to bring it to life.
Luxurious Pink Velvet Raspberry Cheesecake – A Dreamy Dessert for Any Celebration
 𝑷𝒊𝒏𝒌 𝑽𝒆𝒍𝒗𝒆𝒕 𝑹𝒂𝒔𝒑𝒃𝒆𝒓𝒓𝒚 𝑪𝒉𝒆𝒆𝒔𝒆𝒄𝒂𝒌𝒆
Ingredients
Instructions
Notes
Prep Time: 30 minutes | Baking Time: 60-70 minutes | Total Time: Approximately 5 hours | Servings: 12 slices
🍓 Part 2: What Is Pink Velvet Raspberry Cheesecake?
This cheesecake is a fusion of beauty and flavor. It combines the vibrant color and softness of pink velvet cake with the creamy richness of classic cheesecake, finished off with a swirl of tart raspberry.
The pink hue often comes from natural coloring like beet juice or food-safe gel dyes. The raspberry swirl adds brightness, balancing the sweet creaminess of the filling.
It’s not just delicious—it’s elegant. Ideal for celebrations like Valentine’s Day or a baby shower, this dessert brings together flavor, texture, and presentation in one beautiful bite.
🧁 Part 3: Ingredient Breakdown
Crust
-
Chocolate cookie crumbs
-
Unsalted melted butter
-
Brown sugar (optional, for extra depth)
Filling
-
Cream cheese (block-style, not whipped)
-
Granulated sugar
-
Large eggs
-
Sour cream or heavy cream
-
Vanilla extract
-
Lemon juice
-
Natural pink food coloring (optional)
-
Raspberry purée or preserves
Toppings (Optional)
-
Fresh raspberries
-
White chocolate curls
-
Whipped cream
-
Mint leaves
Want to understand which cream cheese works best? This guide from The Kitchn explains it perfectly.
 👩🍳 Part 4: Step-by-Step Preparation Guide
Make the Crust
-
Mix crushed chocolate cookies with melted butter.
-
Press into a springform pan and chill while making the filling.
Make the Filling
-
Beat room temperature cream cheese until smooth.
-
Add sugar, then eggs one at a time.
-
Mix in sour cream, vanilla, lemon juice, and food coloring.
-
Pour half the batter into the crust.
Swirl in Raspberry
-
Drop spoonfuls of raspberry purée over the batter.
-
Swirl gently with a toothpick.
-
Add the rest of the batter and swirl again.
Bake It Right
-
Bake in a water bath at 325°F (160°C) for about 60 minutes.
-
Turn off the oven, crack the door, and let it cool inside for 1 hour.
-
Chill in the fridge for at least 4 hours or overnight.
Want foolproof results? These cheesecake baking tips from King Arthur Baking are gold.
✅ Part 5: Tips for a Perfect Cheesecake
Avoid Cracks
-
Don’t overmix the eggs.
-
Always use a water bath.
-
Let it cool slowly in the oven.
If a crack happens—no worries! A topping of fresh raspberries or whipped cream will cover it beautifully.
Get That Creamy Texture
-
Use room temp ingredients.
-
Don’t overbake! The center should jiggle slightly.
-
Chill thoroughly before serving.
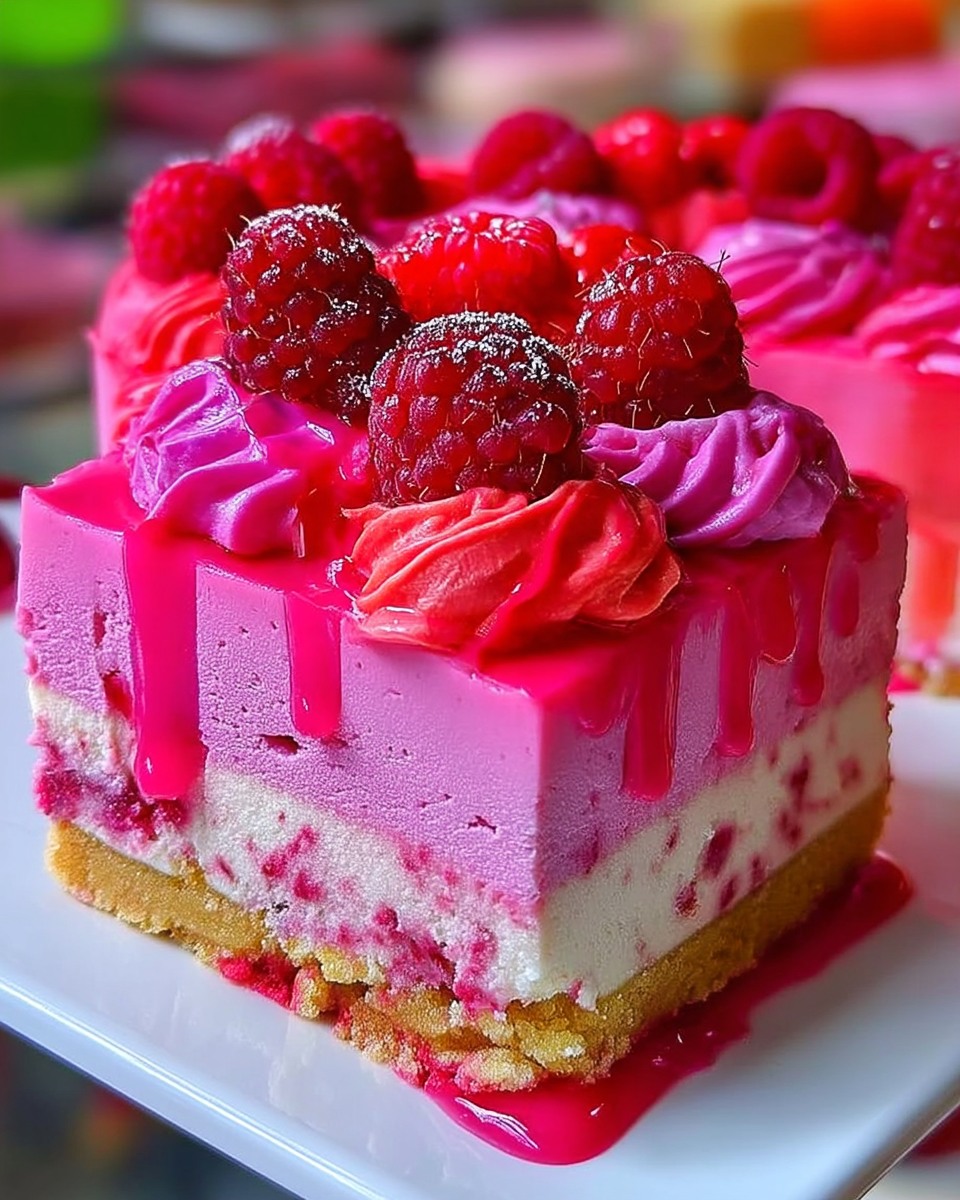
Presentation Tips
-
Add fresh berries and mint.
-
Use a white plate for contrast.
-
Drizzle raspberry sauce for flair.
Check out this freezing and decorating guide from Better Homes & Gardens for extra styling ideas.
🎨 Part 6: Fun Variations and Customizations
Crust Options
-
Graham crackers
-
Vanilla wafers
-
Gluten-free cookies
-
Nut-based crusts
Flavor Twists
-
Chocolate swirls
-
Strawberry or blackberry purée
-
Almond or rose water for a floral touch
Dietary Adjustments
-
Use vegan cream cheese and coconut cream for a dairy-free version
-
Gluten-free cookies for the crust
-
Gelatin for a no-bake version
Get creative—it’s half the fun!
🍽️ Part 7: Serving Suggestions
Best Occasions
-
Valentine’s Day
-
Bridal or baby showers
-
Holiday dinners
-
Birthday celebrations
Serving Ideas
-
Slice cleanly using a warm knife
-
Add raspberry coulis on the plate
-
Serve with fresh fruit and whipped cream
-
Present mini versions for parties
Your cheesecake deserves to shine—make each plate feel special.
🧊 Part 8: Storage and Shelf Life
Refrigerating
-
Store covered in the fridge for up to 5 days.
-
Keep it in an airtight container to avoid odors.
Freezing
-
Wrap slices in plastic wrap and foil.
-
Freeze for up to 1 month.
-
Thaw overnight in the fridge before serving.
Want to freeze it like a pro? Here’s a great guide from BHG.
❓ Part 9: Frequently Asked Questions
Can I use frozen raspberries?
Yes! Thaw and strain before swirling them in.
How do I prevent cracks?
Use a water bath and avoid overbaking. Let it cool slowly.
Do I need food coloring?
Nope. It’s just for that pink “wow” factor. The flavor is all there even without it.
Can I make it ahead?
Absolutely! It actually tastes better the next day.
What if I don’t have a springform pan?
Use a regular cake pan lined with parchment, but unmolding will be trickier.
🎯 Part 10: Final Thoughts
Making a Luxurious Pink Velvet Raspberry Cheesecake isn’t just baking—it’s creating a moment. It’s rich, creamy, tangy, and stunning on every plate. And while it may sound fancy, it’s totally doable from your own kitchen.
With the tips, variations, and ideas in this guide, you’ll not only bake a cheesecake—you’ll wow your guests (and yourself). So grab those berries and that cream cheese… your masterpiece awaits!